Technology & Software
How to Use Microsoft Excel: A Guide
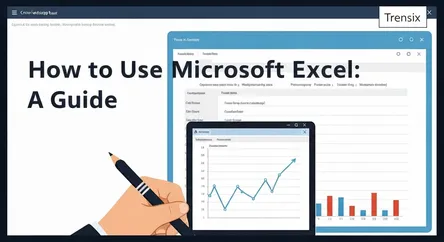
# How to Use Microsoft Excel: A Comprehensive Guide to Mastering the Essentials Microsoft Excel stands as one of the most pivotal and ubiquitous soft...
How to Use Microsoft Excel: A Comprehensive Guide to Mastering the Essentials
Microsoft Excel stands as one of the most pivotal and ubiquitous software applications in the modern professional landscape. From small business owners tracking inventory to financial analysts modeling market trends, the ability to effectively learn Excel is a skill that translates across nearly every industry and role. This powerful spreadsheet program, at its core, allows users to store, organize, calculate, and analyze data with remarkable efficiency. However, for the uninitiated, the grid of cells, ribbons of commands, and the sheer breadth of its capabilities can seem intimidating. This guide is designed to demystify the process and provide a clear, structured path for anyone looking to master this essential tool.
In this comprehensive tutorial, we will embark on a journey from the very basics of the Excel interface to the application of its most powerful features. You will learn not just what the buttons do, but how to think in a way that leverages Excel's logical framework to solve real-world problems. We will start by building a strong foundation, familiarizing ourselves with the layout of a workbook and the fundamental concepts of data entry and formatting. From there, we will progress to the heart of Excel's power: formulas and functions. This guide will walk you through creating simple calculations and then introduce you to indispensable functions like VLOOKUP, which allows you to search for and retrieve data from other parts of your spreadsheet. Furthermore, we will unlock the secrets of data analysis with an in-depth look at PivotTables, a dynamic tool that enables you to summarize and explore large datasets with just a few clicks. By the end of this article, you will have the knowledge and confidence to not only navigate Excel with ease but also to utilize its key functions to make your data work for you.
Getting Started: Understanding the Excel Interface
Before diving into complex formulas and data analysis, the first crucial step to learn Excel is to become comfortable with its user interface. When you first open Excel, you are presented with the Start Screen, which allows you to create a new blank workbook, choose from a variety of templates, or access recently edited files. Opting for a "Blank workbook" will open the main Excel window, a grid of columns and rows that forms the foundation of your spreadsheet work. Understanding the key components of this interface is fundamental to navigating and utilizing the software effectively.
The Core Components of the Excel Window
The Excel environment is thoughtfully organized to provide access to a vast array of tools without overwhelming the user. Familiarizing yourself with these core components will streamline your workflow and make learning more advanced features much more intuitive.
The Ribbon and Quick Access Toolbar
At the top of the screen is the Ribbon, a dynamic command bar that contains nearly all the functions you'll need. The Ribbon is organized into a series of tabs, such as "Home," "Insert," "Page Layout," and "Formulas." Each tab, when clicked, reveals a new set of command groups. For instance, the "Home" tab contains common formatting tools like font adjustments, alignment, and number formatting, while the "Insert" tab is where you'll go to add charts, tables, and PivotTables.
Above the Ribbon, you'll find the Quick Access Toolbar. This customizable toolbar provides one-click access to your most frequently used commands, such as Save, Undo, and Redo, regardless of which tab on the Ribbon is currently active. You can easily add or remove commands to tailor it to your specific needs, enhancing your efficiency.
The Formula Bar, Name Box, and the Grid
Below the Ribbon are two critical elements: the Name Box and the Formula Bar. The Name Box, located on the left, displays the address of the currently selected cell (e.g., A1, B2). This becomes particularly useful when navigating large datasets. To its right is the Formula Bar, which shows the actual content of the selected cell. This is where you will enter and edit data, formulas, and functions.
The main body of the window is the worksheet itself, a grid comprised of columns (lettered A, B, C...) and rows (numbered 1, 2, 3...). The intersection of a column and a row is called a cell, and each cell has a unique address. A collection of one or more cells is known as a range. An Excel file is called a workbook, and it can contain multiple worksheets, which you can navigate using the tabs at the bottom of the screen. This structure allows you to organize different but related sets of data within a single file.
The Foundation of Excel: Working with Formulas and Basic Functions
The true power of Excel lies in its ability to perform calculations, from simple arithmetic to complex financial modeling. This capability is unlocked through the use of formulas and functions. A formula is an expression that calculates the value of a cell, always beginning with an equal sign (=). Functions, on the other hand, are predefined formulas that simplify the process of performing common calculations.
Writing Your First Formulas
Getting started with formulas is straightforward. You can perform basic arithmetic operations like addition (+), subtraction (-), multiplication (*), and division (/) directly within a cell.
Basic Arithmetic Operations
To create a formula, you simply select a cell, type an equal sign, and then enter your calculation. For example, to add two numbers, you could type =5+10 and press Enter. Excel will display the result, 25, in the cell. While you can use explicit numbers, the real efficiency comes from using cell references. If you have the number 5 in cell A1 and the number 10 in cell A2, you could type =A1+A2 in cell A3. The advantage here is that if you change the value in either A1 or A2, the result in A3 will automatically update, making your spreadsheet dynamic and responsive.
Relative vs. Absolute Cell References
A critical concept to grasp is the difference between relative and absolute cell references. By default, cell references are relative. This means that if you create a formula in cell C1 that references A1+B1, and then you copy that formula down to cell C2, the formula will automatically adjust to reference A2+B2. This is incredibly useful for applying the same calculation across multiple rows or columns.
However, sometimes you need a reference to remain fixed. This is where absolute references come in. By adding a dollar sign ($) before the column letter and/or row number, you can lock that part of the reference. For instance, $A$1 is a fully absolute reference; no matter where you copy the formula, it will always point to cell A1. A mixed reference like A$1 would allow the column to change but would lock the row. Mastering this concept is key to building complex and scalable spreadsheets.
Essential Functions Every Beginner Should Know
While you can perform many calculations with basic formulas, functions streamline the process significantly. Here are some of the most fundamental functions that form the building blocks for more advanced analysis.
SUM, AVERAGE, COUNT, MAX, and MIN
- SUM: This is one of the most frequently used functions. Instead of adding cells one by one (e.g.,
=A1+A2+A3), you can use=SUM(A1:A3)to add all the values within that range. - AVERAGE: As the name suggests, this function calculates the average (arithmetic mean) of a range of numbers. For example,
=AVERAGE(B1:B10)will find the average of the values in cells B1 through B10. - COUNT: This function counts the number of cells in a range that contain numeric values. If you want to count all cells that are not empty (including those with text), you should use the COUNTA function.
- MAX & MIN: These functions are used to find the highest and lowest values in a range, respectively.
=MAX(C1:C100)will return the largest number in that range, while=MIN(C1:C100)will return the smallest.
To use any of these functions, you start by typing the equal sign, followed by the function name and an opening parenthesis. Then, you select the range of cells you want the function to operate on and close the parenthesis before pressing Enter.
Leveling Up: An Introduction to VLOOKUP
As you begin to work with larger and more complex datasets, you'll often need to find and retrieve specific information from one table and bring it into another. Manually searching for this data would be incredibly time-consuming and prone to error. This is precisely the problem that the VLOOKUP function solves. VLOOKUP, which stands for "Vertical Lookup," is one of the most powerful and widely recognized functions in Excel, and mastering it is a significant step when you learn Excel.
Understanding the VLOOKUP Syntax
The VLOOKUP function searches for a value in the first column of a specified table and returns a corresponding value from a different column in the same row. The syntax for the function is as follows: =VLOOKUP(lookup_value, table_array, col_index_num, [range_lookup]). Let's break down each of these four arguments.
The Four Arguments of VLOOKUP
-
lookup_value: This is the value you are trying to find. It can be a specific value (like "Product123") or a cell reference (like A2) that contains the value. This value must be in the first column of the
table_arrayyou specify. -
table_array: This is the range of cells that contains the data you are searching through. This range must include both the column with the
lookup_valueand the column with the value you want to retrieve. A critical rule for VLOOKUP is that the lookup column must be the leftmost column in this array. -
col_index_num: This is the column number within the
table_arrayfrom which you want to retrieve a value. The first column of thetable_arrayis 1, the second is 2, and so on. For instance, if you want to retrieve a value from the third column of your selected table, you would enter 3. -
[range_lookup]: This is an optional logical value (TRUE or FALSE) that specifies whether you want an approximate or an exact match.
- FALSE (or 0): This finds an exact match for the
lookup_value. If an exact match is not found, Excel will return an error (#N/A). In most business scenarios, you will use FALSE to ensure data accuracy. - TRUE (or 1): This finds an approximate match. It will find the closest value that is less than or equal to your
lookup_value. For this to work correctly, the first column of yourtable_arraymust be sorted in ascending order. This is less common but useful for scenarios like finding a tax rate based on an income bracket.
- FALSE (or 0): This finds an exact match for the
A Practical VLOOKUP Example
Imagine you have two worksheets. The first sheet is a sales report that includes a "Product ID" but not the "Product Name." The second sheet is a product list that contains the "Product ID," "Product Name," and "Price." Your goal is to pull the "Product Name" into your sales report.
You would select a cell in your sales report where you want the product name to appear and start your formula: =VLOOKUP(.
- For the lookup_value, you would select the cell containing the first Product ID in your sales report (e.g., A2).
- For the table_array, you would switch to your product list worksheet and select the entire range of data, from the Product ID column to the Price column (e.g., 'Product List'!$A$2:$C$100). It's a best practice to make this an absolute reference by pressing F4 so that it doesn't shift when you copy the formula down.
- For the col_index_num, since the "Product Name" is the second column in your selected table array, you would enter 2.
- For the range_lookup, you want an exact match, so you would enter FALSE.
Your final formula would look something like this: =VLOOKUP(A2, 'Product List'!$A$2:$C$100, 2, FALSE). After pressing Enter, Excel will find the corresponding product name and display it. You can then drag the fill handle (the small square at the bottom-right of the cell) down to apply this formula to all the rows in your sales report.
Unlocking Data Insights: A Beginner's Guide to PivotTables
While formulas and functions are essential for calculations, PivotTables are the cornerstone of data analysis and summarization in Excel. A PivotTable is an incredibly powerful interactive tool that allows you to quickly summarize large amounts of data without writing a single formula. It enables you to "pivot" or reorganize your data, allowing you to view it from different perspectives, identify trends, and extract meaningful insights with just a few drag-and-drop actions. For anyone looking to learn Excel for data analysis, mastering PivotTables is non-negotiable.
Preparing Your Data for a PivotTable
Before you can create a PivotTable, it's crucial to ensure your source data is properly formatted. A PivotTable works best with data arranged in a tabular format, where each row represents a single record and each column represents a specific attribute or field.
Best Practices for Data Organization
- Column Headers: Each column must have a unique header in the first row. These headers will become the field names you use to build your PivotTable.
- No Blank Rows or Columns: Your data set should be a single, contiguous block. Avoid having completely empty rows or columns within your data range.
- Consistent Data Types: Ensure that each column contains a consistent type of data. For instance, a "Sales" column should only contain numbers, and a "Date" column should only contain dates.
- Format as a Table: While not strictly necessary, it is highly recommended to format your data range as an Excel Table (using the "Format as Table" command on the Home tab or by pressing Ctrl+T). When your data is in a Table, the PivotTable will automatically update to include new rows or columns you add later, making your report dynamic.
Creating Your First PivotTable
Once your data is properly structured, creating a PivotTable is a remarkably simple process that involves just a few clicks.
Step-by-Step Creation
- Select Your Data: Click any single cell within your data range.
- Insert PivotTable: Navigate to the "Insert" tab on the Ribbon and click the "PivotTable" button.
- Confirm the Details: An options window will appear. Excel will typically auto-select your data range correctly (especially if it's formatted as a Table). You can choose to place the PivotTable in a new worksheet (recommended for clarity) or an existing one. Click "OK."
Excel will now create a blank PivotTable placeholder on a new sheet and open the "PivotTable Fields" pane on the right side of your screen. This pane is the control center for your PivotTable. It contains a list of all your column headers (fields) at the top and four areas at the bottom: Filters, Columns, Rows, and Values.
Building Your PivotTable Report
This is where the magic happens. By dragging and dropping fields from the list into the four areas, you can instantly structure your report.
Understanding the Four Areas
- Rows: Fields placed here will appear as row labels down the left side of the PivotTable. For example, dragging a "Region" field here would create a unique row for each region in your data.
- Columns: Fields placed here will appear as column labels across the top of the PivotTable. For instance, dragging a "Product Category" field here would create a column for each category.
- Values: This area is for the fields you want to calculate or summarize. Typically, this will be a numeric field like "Sales" or "Quantity." By default, Excel will sum the values, but you can easily change the calculation to Count, Average, Max, Min, and more by clicking on the field in the Values area and selecting "Value Field Settings."
- Filters: Fields placed here allow you to filter the entire PivotTable report. For example, placing a "Year" field here would let you view the summary for a specific year at a time.
For example, to see the total sales for each region, you would drag the "Region" field to the Rows area and the "Sales" field to the Values area. Instantly, your PivotTable would display a summarized report showing each region and its corresponding total sales—a task that would have required multiple complex formulas otherwise. By experimenting with dragging different fields into these areas, you can explore your data from countless angles.
Conclusion
Mastering Microsoft Excel is a journey that transforms the way you interact with data, elevating your skills from basic data entry to sophisticated analysis. We've navigated the essential landscape of this powerful tool, starting with the fundamental layout of the Excel interface, ensuring you are comfortable with the Ribbon, Formula Bar, and the basic grid structure. By grounding yourself in the creation of formulas and the use of core functions like SUM, AVERAGE, and COUNT, you have built the foundational logic required for any quantitative task.
The true leap in capability, however, comes from understanding and applying its more advanced features. We've delved into the mechanics of VLOOKUP, an indispensable function for connecting and retrieving data across different tables, saving you invaluable time and preventing manual errors. Furthermore, we have unlocked the immense analytical power of PivotTables, demonstrating how to transform vast, raw datasets into dynamic, insightful summary reports with simple drag-and-drop actions. The ability to quickly summarize, filter, and analyze your data from multiple perspectives is a game-changer in any professional setting.
By following this guide, you have not only learned the "how" but also the "why" behind these essential Excel features. The skills you've acquired in navigating the interface, writing formulas, executing VLOOKUPs, and building PivotTables are the cornerstones of data literacy. Continue to practice and explore, as proficiency in Excel is a versatile and highly valued asset that will undoubtedly enhance your efficiency and decision-making capabilities in any field.