Home & DIY
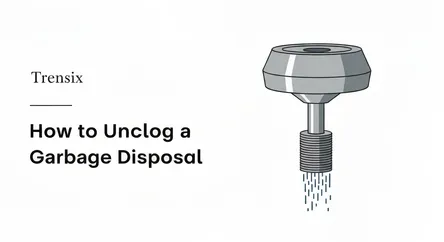
How to Unclog a Garbage Disposal
## How to Unclog a Garbage Disposal: A Safe and Simple DIY Guide A garbage disposal is a modern kitchen convenience that makes quick work of food scr...
How to Unclog a Garbage Disposal: A Safe and Simple DIY Guide
A garbage disposal is a modern kitchen convenience that makes quick work of food scraps, but when it stops working, it can bring your kitchen sink to a halt. A humming or completely silent garbage disposal often points to a clog or a jam, a common household issue that can seem daunting at first. Many homeowners' immediate instinct might be to reach for harsh chemical drain cleaners or, even worse, to put their hand down the drain—both of which are dangerous and often ineffective. This comprehensive guide is designed to empower you with the knowledge to safely and effectively unclog your garbage disposal using simple tools and household items. We will walk you through the process step-by-step, focusing on safe methods that protect both you and your appliance. You will learn how to diagnose the problem, use an Allen wrench to manually dislodge jams, and employ natural cleaning solutions to clear stubborn clogs, all while keeping your hands safely out of the disposal unit. By following these instructions, you can solve this common home problem yourself, saving time and the potential cost of a plumber.
Understanding Your Garbage Disposal and Safety First
Before attempting to unclog your garbage disposal, it's crucial to understand the basic mechanics of the appliance and, most importantly, the safety precautions you must take. A garbage disposal doesn't use blades like a blender. Instead, it has a spinning plate with small, blunt impellers (lugs) that force food scraps against a stationary grind ring. This ring shreds the waste into tiny particles that can be washed down the drain. A jam occurs when something hard, like a bone, fruit pit, or fibrous material like corn husks, gets lodged between the impellers and the grind ring, preventing the plate from spinning. A clog, on the other hand, typically happens further down the drainpipe when food particles, grease, and other debris build up over time. Recognizing the difference is key; a humming sound usually indicates a jam, while a silent unit that still has power might point to an internal breaker trip caused by overheating from a jam. Complete silence, even after pressing the reset button, could indicate a problem with the electrical connection.
The Golden Rule: Disconnect the Power
The absolute most critical step before you begin any work is to ensure the garbage disposal is completely deprived of electrical power. Accidentally activating the unit while you are working on it can cause severe injury. Do not rely solely on the wall switch, as it could be bumped or faulty. You must take definitive steps to cut the power to the unit itself.
How to Safely Cut Power
First, locate the main electrical panel for your home. This is often in the garage, basement, or a utility closet. Find the circuit breaker that controls the garbage disposal. It should be labeled; if not, you may need to flip breakers one by one until the disposal's power is cut (you can test this by having someone check the switch). Turn the corresponding breaker to the "OFF" position. For an added layer of safety, it is wise to place a piece of tape over the breaker switch to prevent anyone from accidentally turning it back on while you are working. If your garbage disposal is a plug-in model (less common), you can simply unplug it from the wall outlet, which is typically located under the sink. Once you are certain the power is off, you can proceed with the unclogging process, confident that the unit cannot turn on unexpectedly.
Method 1: Using an Allen Wrench to Manually Clear a Jam
The most common reason a garbage disposal stops working is a simple jam. When an object is lodged inside, the motor will try to spin, creating a distinct humming noise. The unit is designed with a manual override feature specifically for this situation, accessible from the very bottom of the disposal. This method is the safest and most effective way to unclog a garbage disposal that is jammed. You will need a specific tool, but it's one that often comes with the disposal unit itself.
Step 1: Locate the Reset Button and Manual Crank Socket
Look underneath the main body of the garbage disposal unit under your sink. You will see two important features. First is a small, typically red or black, reset button. This button is a built-in circuit breaker that pops out when the motor overheats, which often happens during a jam. Second, you will find a hexagonal socket right in the center of the bottom of the unit. This is the manual crank socket, designed to be turned from the outside to move the internal flywheel.
Step 2: Find Your Allen Wrench
The hexagonal socket requires a 1/4-inch Allen wrench, also known as a hex key. Many manufacturers include a custom, T-shaped wrench (often called a jam-buster wrench) for this exact purpose, and it might be taped to the side of the disposal or stored under the sink. If you cannot find this specific tool, a standard 1/4-inch Allen wrench from any hardware store will work perfectly well.
Step 3: Manually Crank the Flywheel
Insert the Allen wrench into the socket at the bottom of the disposal. Now, begin working the wrench back and forth. You are not trying to make a full rotation at first; the goal is to use leverage to move the internal plate in both directions. You will likely feel resistance where the jam is located. Apply firm, steady pressure, alternating between clockwise and counter-clockwise motions. This back-and-forth action will work to dislodge whatever object is stuck between the impellers and the grind ring. Continue this motion until the wrench can move freely in a complete 360-degree circle. This indicates that the obstruction has been cleared.
Removing the Obstruction
Once the flywheel moves freely, the object that caused the jam is now loose inside the disposal chamber. Do not use your hands to retrieve it. Instead, use a pair of pliers or tongs to reach into the disposal from the sink drain opening and carefully pull out the dislodged item. You may need a flashlight to see clearly inside the chamber.
Method 2: Clearing a Drain Clog with Natural Solutions
If the garbage disposal's motor runs freely but water is still backing up into the sink, the problem is likely not a jam in the unit itself but a clog in the drainpipe connected to it. This is often caused by a buildup of grease, starches, and other fine food particles that have made it through the disposal but have accumulated in the P-trap or the pipes beyond. Before reaching for harsh chemical drain cleaners, which can damage your pipes and the disposal's seals, a simple and safe combination of baking soda and vinegar can often do the trick.
Step 1: Prepare the Baking Soda and Vinegar Solution
This classic household cleaning duo creates a fizzing chemical reaction that is excellent for breaking down grease and loosening blockages without harming your plumbing. The process is straightforward and uses common kitchen staples.
The Recipe for a Clear Drain
- Boil Water: Start by boiling a large kettle or pot of water. Hot water is essential for helping to dissolve the clog after the baking soda and vinegar have done their work.
- Pour Baking Soda: Pour about half a cup of baking soda directly into the garbage disposal drain. Try to get as much of it down the drain as possible.
- Add Vinegar: Carefully pour one cup of white vinegar down the drain on top of the baking soda. The mixture will immediately begin to foam and fizz. This is the chemical reaction that will help to break apart the clog.
- Let It Work: Place a drain stopper over the opening to contain the fizzing action within the pipes. Let the mixture sit and work its magic for at least 15 to 20 minutes. For tougher clogs, you can even let it sit for up to an hour.
Step 2: Flush the System Thoroughly
After you've allowed the baking soda and vinegar solution to work, the final step is to flush the loosened debris out of your plumbing system. Take the pot of boiling water and carefully pour it directly down the drain. The heat and force of the water will help wash away any remaining grease and particles that were broken down by the fizzing reaction. Following the hot water flush, turn on the hot water tap and let it run for another minute or two to ensure the pipe is completely clear. This method is a great first-line-of-defense to unclog a garbage disposal drain pipe safely.
Final Steps: Resetting and Testing Your Garbage Disposal
After you have successfully cleared the jam or clog, the final phase is to restore power and test the unit to ensure it's working correctly. This is a critical step to confirm that your DIY repair was successful and your kitchen sink is back to full functionality. Rushing this part could mean you have to start the process over again, so it's important to be methodical.
Step 1: Press the Reset Button
Before you restore power at the circuit breaker, you need to address the unit's own safety mechanism. The jam likely caused the motor to overheat, tripping the internal circuit breaker. This is the small red or black button you located on the bottom of the disposal unit earlier. If the button is popped out, press it firmly back in until it clicks and stays in place. If it does not stay in, it may mean the motor is still too hot. In this case, wait another 10-15 minutes for it to cool down completely and then try again. The button must be reset for the disposal to receive power.
Step 2: Restore Power and Test
Once the reset button is engaged, it's time to restore power. Go back to your home's electrical panel and flip the circuit breaker for the garbage disposal back to the "ON" position. If you unplugged the unit, plug it back into the outlet under the sink.
The Testing Procedure
- Clear the Area: Make sure no tools (like the Allen wrench or pliers) are left in the sink or near the drain.
- Run Cold Water: Turn on the cold water tap at a strong, steady flow. You should always run cold water when operating your garbage disposal, as it helps solidify any grease or fats, allowing them to be chopped up and washed away rather than sticking to the pipes.
- Turn On the Disposal: With the water running, flip the wall switch for the garbage disposal. The unit should now turn on without the humming sound. Let it run for about 30 seconds to a minute with the cold water to ensure everything is clear and functioning smoothly.
- Listen Carefully: Pay attention to the sounds it makes. A properly functioning disposal will have a consistent whirring sound. If you hear any loud, metallic, or unusual grinding noises, turn it off immediately and re-check for any foreign objects you may have missed. If the unit operates smoothly, your effort to unclog your garbage disposal has been a success.
Conclusion
Successfully troubleshooting and fixing a clogged or jammed garbage disposal is a highly rewarding DIY task that can save you from a costly plumbing bill. By prioritizing safety and methodically following the steps outlined in this guide, you can confidently handle this common kitchen problem. The key takeaways are to always disconnect the power before beginning any work, to use the Allen wrench method for mechanical jams, and to rely on safe, natural solutions like baking soda and vinegar for drain clogs. Remember that your hands should never go down the drain. By using the proper tools like pliers and tongs, you can keep yourself safe while effectively resolving the issue. Maintaining your garbage disposal by running cold water during use and avoiding fibrous or hard materials will go a long way in preventing future clogs. With this knowledge, you are now well-equipped to unclog your garbage disposal and keep your kitchen running smoothly.