Creative Skills
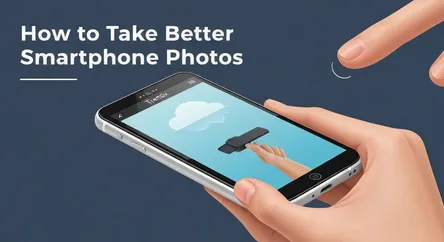
How to Take Better Smartphone Photos
# How to Take Better Smartphone Photos In an age where your smartphone is always within arm's reach, the power to capture stunning, high-quality phot...
How to Take Better Smartphone Photos
In an age where your smartphone is always within arm's reach, the power to capture stunning, high-quality photographs is more accessible than ever before. Gone are the days when professional-grade photography was the exclusive domain of those with expensive DSLR cameras and a bag full of lenses. Today, the device in your pocket is a sophisticated tool capable of producing breathtaking images that can rival those taken with traditional equipment. However, simply pointing and shooting rarely unlocks the full potential of your smartphone's camera. To truly elevate your pictures from simple snapshots to compelling visual stories, you need to look beyond the default settings and embrace the fundamental principles of photography. This comprehensive guide is designed to do just that.
This article will serve as your detailed roadmap to mastering the art of smartphone photography. We will delve into the critical elements that separate an average photo from a great one: composition, lighting, and the effective use of your camera's built-in features. You will learn timeless compositional rules that artists have used for centuries, such as the Rule of Thirds and the use of leading lines, and how to apply them effortlessly in your daily shooting. We will explore the nuances of light, teaching you how to find and manipulate the best natural light sources to add mood, depth, and drama to your images. Furthermore, we will demystify the various modes and settings hiding within your native camera app, from HDR and Portrait Mode to the more advanced Pro or Manual controls that give you granular command over your final shot. By the end of this guide, you will have the knowledge and confidence to transform your everyday mobile phone into a powerful instrument for creative expression, enabling you to capture the world around you with newfound skill and artistry.
Section 1: Mastering Composition for Dynamic Photos
Composition is the backbone of a great photograph. It’s how the elements within your frame are arranged to guide the viewer's eye and tell a story. While smartphone cameras automate many technical aspects, composition remains a purely creative decision that can dramatically improve your images. Understanding a few key principles will help you create more balanced, engaging, and visually appealing photos. The first and most crucial step is to move beyond simply centering your subject. While symmetrical compositions can be powerful, they can also feel static. By intentionally placing your subject off-center, you create a more dynamic and interesting image that pulls the viewer in. A simple trick to start improving your composition is to activate the gridlines in your camera app's settings. This overlay will be your constant guide for applying foundational techniques. It's a small change that yields significant results, encouraging a more thoughtful approach before you even press the shutter button. Remember, these rules are guidelines, not rigid laws. Once you understand them, feel free to experiment and break them to develop your unique style.
### The Rule of Thirds: Your Foundation for Balance
The Rule of Thirds is one of the most fundamental guidelines in photography and visual arts. Imagine your screen is divided into nine equal segments by two horizontal and two vertical lines. The principle suggests that you should place the most important elements of your scene along these lines or at the points where they intersect, often called "power points." For example, when shooting a landscape, instead of placing the horizon line directly in the middle of the frame, align it with either the top or bottom horizontal line. This creates a more compelling image by giving dominance to either the sky or the foreground. Similarly, when photographing a person, positioning their eyes on one of the upper intersection points can create a more natural and engaging portrait. By placing your subject off-center, you create negative space that balances the composition and allows the subject room to "breathe," making the photo feel more dynamic and less staged. Most smartphone camera apps have a built-in grid feature that you can enable in the settings to help you visualize and apply the Rule of Thirds effortlessly.
### Guiding the Eye with Leading Lines and Symmetry
Beyond the Rule of Thirds, other compositional tools can add depth and direction to your smartphone photography. Leading lines are a powerful technique where natural or man-made lines within the scene—such as roads, fences, rivers, or architectural elements—are used to guide the viewer's eye toward the main subject. This creates a sense of depth and pulls the viewer into the image, making it more immersive. When you spot a potential leading line, think about how you can position yourself and your phone to make that line start from a corner of the frame and lead towards your point of interest.
Conversely, while off-center compositions are often preferred, symmetry and patterns can create incredibly striking and harmonious images. Look for scenes with natural symmetry, such as reflections in water or perfectly aligned architectural features. When capturing a symmetrical scene, it's crucial to position yourself along the central axis to ensure the balance is perfect. Patterns, whether in nature or man-made structures, are also inherently pleasing to the human eye. Filling your frame with a repeating pattern or breaking that pattern with a single, unique element can result in a powerful and memorable photograph.
### Changing Your Perspective and Framing the Shot
One of the easiest ways to instantly make your photos more interesting is to change your point of view. Most people take photos from eye level, which is how we typically see the world. To create a more unique perspective, experiment with different angles. Try getting low to the ground for a dramatic, larger-than-life feel, or shoot from a higher vantage point to offer a bird's-eye view of the scene. This simple act of moving your body can transform an ordinary subject into an extraordinary one.
Another effective technique is framing, which involves using elements within the scene to create a natural frame around your subject. This could be anything from shooting through a doorway or window to using overhanging tree branches. This technique adds context and depth to the image, drawing the viewer's attention directly to the intended focal point. It’s a creative way to add layers to your composition and make the final image feel more deliberate and thoughtfully constructed.
Section 2: Understanding and Utilizing Light
Light is arguably the most critical element in all of photography; it shapes the mood, tone, and overall atmosphere of an image. The quality of your smartphone photos is directly tied to the quality of the light you're shooting in. While you can't always control the light, you can learn to understand it, find the best sources, and position yourself to take advantage of it. The single most important tip is to prioritize natural light whenever possible. Smartphone camera sensors are relatively small and perform best in well-lit conditions. Artificial light, and especially your phone's built-in flash, can often create harsh, unflattering shadows and wash out colors. If you find yourself indoors, try moving your subject closer to a window. This soft, diffused light is perfect for portraits and still life, creating gentle shadows and a more natural look. Learning to "see" the light—noticing its direction, intensity, and color—is a skill that will fundamentally change the way you take pictures with your phone, allowing you to move from simply documenting a scene to creatively interpreting it.
### The Magic of Golden Hour and Soft Light
Not all natural light is created equal. The time of day dramatically affects the quality and color of sunlight. The most coveted time for photographers is the Golden Hour, which occurs shortly after sunrise and shortly before sunset. During these periods, the sun is low in the sky, casting a soft, warm, golden glow that is incredibly flattering for almost any subject. This light creates long, gentle shadows that add depth and dimension to your photos without the harshness of midday sun. In contrast, shooting in the middle of a sunny day often results in strong, dark shadows and blown-out highlights (areas of the image that are too bright, losing all detail). If you must shoot midday, try to find a shaded area where the light is more even and less intense. Don't dismiss overcast days either; the clouds act as a giant diffuser, creating a soft, even light that is ideal for portraits and minimizing harsh shadows.
### Working with Light Direction: Front, Back, and Side Lighting
The direction from which light hits your subject has a profound impact on the final image. Understanding the three main types of directional lighting will give you creative control over the look and feel of your shots.
### Front Lighting
Front lighting is when the light source is directly in front of your subject (and behind you, the photographer). This creates a well-lit, evenly illuminated scene with few shadows. It's great for capturing clear detail and vibrant colors, making it a good choice for landscape photography on a day with soft light. However, be aware that harsh front lighting can make a scene look flat and one-dimensional.
### Side Lighting
With side lighting, the light source illuminates the subject from the side. This is a fantastic technique for adding depth, drama, and texture to your photos. It creates a mix of highlights and shadows that sculpts your subject, emphasizing its shape and form. Side lighting is particularly effective for portraits where you want to create a sense of mystery or for still life shots where you want to highlight the texture of objects.
### Backlighting
Backlighting occurs when the light source is behind your subject. This can be a challenging but highly rewarding technique. It can create a beautiful glowing halo or rim light around your subject, separating them from the background. Backlighting during the golden hour is especially effective for creating dreamy, ethereal portraits. It's also the key to creating dramatic silhouettes. To capture a silhouette, position your subject in front of a bright light source (like the setting sun), tap on the brightest part of the background to set the exposure, and then take your shot.
### Exposure Control and Avoiding the Flash
Your smartphone camera gives you more control over light than you might think. The most basic and powerful tool is the manual exposure adjustment. When you tap on your screen to set your focus point, you will usually see a sun icon or a slider appear. By sliding your finger up or down, you can manually brighten or darken the image before you take it. This is invaluable for correcting scenes that are too dark or too bright, ensuring you capture the right mood. For instance, in a low-light situation, you can slide it up to let in more light, or when shooting a silhouette, you can slide it down to ensure the background is bright and the subject is dark.
One final, crucial tip regarding light is to avoid using your phone's built-in flash whenever possible. The flash produces a small, harsh burst of light that often results in red-eye, washed-out skin tones, and unnatural, stark shadows, while leaving the background in darkness. If you're in a low-light situation, it's far better to seek out an ambient light source, increase the exposure manually, or use your phone's Night Mode if it has one.
Section 3: Maximizing Your Smartphone's Camera App
Your smartphone’s native camera app is a surprisingly powerful and versatile tool, packed with features designed to help you capture better photos. Taking some time to explore these settings and modes can unlock a new level of creative control that goes far beyond the default point-and-shoot experience. Many users are unaware of the capabilities hidden just a few taps away. Features like High Dynamic Range (HDR) can rescue photos with difficult lighting, Portrait Mode can create professional-looking background blur, and Pro or Manual modes offer DSLR-like control over the camera's core settings. Before you even consider downloading a third-party app, it’s essential to master the tools you already have. Start by familiarizing yourself with every icon and menu option in your camera interface. Understanding what each function does—from setting a timer to changing the aspect ratio—will make you a more confident and capable smartphone photographer.
### Essential Features: HDR, Gridlines, and Focus/Exposure Lock
There are a few key features available in almost every modern smartphone camera app that can instantly improve your photography.
### High Dynamic Range (HDR)
HDR mode is designed for scenes with a high contrast between the brightest and darkest areas, like a landscape with a bright sky and a dark foreground. When you take a photo in HDR, the camera actually captures multiple shots at different exposure levels and then merges them to create a single, more balanced image where detail is preserved in both the shadows and the highlights. Many phones have an "Auto HDR" setting, which is generally reliable, but you can also turn it on manually when you know you're facing a tricky lighting situation.
### Gridlines
As mentioned in the composition section, enabling gridlines is a simple but transformative setting. The grid helps you align your shots, keep horizons straight, and apply compositional rules like the Rule of Thirds. It's a visual aid that encourages more deliberate framing.
### Focus and Exposure Lock
Your phone automatically sets focus and exposure based on where you tap the screen. However, in scenes with a lot of movement or changing light, the camera might constantly readjust, leading to a missed shot. You can prevent this by using the focus/exposure lock. On most phones, you can activate this by tapping and holding on your desired focal point for a few seconds. A confirmation like "AE/AF Lock" will appear, indicating that both the focus and exposure are now locked in place, allowing you to reframe your shot slightly without losing your settings.
### Exploring Creative Modes: Portrait, Panorama, and More
Beyond the basic settings, smartphones offer a variety of creative shooting modes that can add flair and professionalism to your photos.
### Portrait Mode
Portrait mode uses software to simulate the shallow depth of field (blurred background) effect, known as bokeh, that is typically achieved with professional cameras and wide-aperture lenses. This mode is excellent for making your subject pop by separating them from a distracting background. It works best when there is some distance between your subject and the background. Many phones also allow you to adjust the intensity of the blur both before and after you take the shot.
### Panorama Mode
Panorama mode allows you to capture an ultra-wide view of a scene by stitching multiple photos together. It's perfect for expansive landscapes, cityscapes, or any scene that is too wide to fit into a single frame. The key to a good panorama is to move your phone slowly and steadily in a straight line, keeping the guide arrow on the center line to avoid jagged or misaligned results.
### Pro/Manual Mode
For those who want ultimate control, Pro or Manual mode is the holy grail of smartphone photography. This mode allows you to manually adjust key settings just like on a DSLR:
- ISO: Controls the camera's sensitivity to light. A lower ISO is better for bright conditions and produces a cleaner image, while a higher ISO is needed for low light but can introduce digital noise or "grain."
- Shutter Speed: Determines how long the camera's sensor is exposed to light. A fast shutter speed freezes motion, while a slow shutter speed can create motion blur or be used for long-exposure shots in low light (a tripod is necessary for this).
- White Balance: Adjusts the color temperature of the image to make whites appear neutral under different lighting conditions (e.g., sunny, cloudy, indoors).
- Manual Focus: Gives you precise control over what part of the image is sharp.
### The "Don'ts": Avoiding Digital Zoom and Over-Editing
Just as important as knowing what features to use is knowing what to avoid. The primary culprit in smartphone photography is digital zoom. Unlike the optical zoom on a dedicated camera lens, digital zoom doesn't actually zoom in; it simply crops the image and enlarges the pixels, which severely degrades the photo's quality and results in a blurry, grainy mess. If you need to get closer to your subject, the best practice is to physically move closer. If your phone has multiple lenses (e.g., wide, ultra-wide, telephoto), use those to change your focal length without losing quality.
Finally, while post-processing is a key part of photography, it's easy to go overboard. Your phone's built-in editor and apps like Snapseed or Adobe Lightroom Mobile offer powerful tools to enhance your images. Start with basic adjustments to brightness, contrast, and saturation. Be subtle with filters and edits. The goal of editing should be to enhance the photo you took, not to salvage a bad one or make it look unnatural. A light touch often yields the most professional results.
Conclusion
Elevating your smartphone photography from simple snapshots to thoughtfully crafted images does not require expensive equipment, but rather a shift in perspective and an understanding of core photographic principles. By focusing on the three pillars of composition, lighting, and camera app utilization, you can unlock the immense creative potential held within the device you carry every day. Mastering compositional guidelines like the Rule of Thirds and leading lines will provide your photos with balance and direction, while experimenting with different angles will inject novelty and dynamism into your shots. Learning to observe and harness the power of light—especially the soft, warm glow of the golden hour—will allow you to shape the mood and atmosphere of your images far more effectively than any filter. Finally, taking the time to explore the features built into your phone's camera app, from the practical utility of HDR to the creative control of Pro mode, will give you the technical command needed to bring your artistic vision to life. Remember to move your feet instead of using digital zoom and to edit with a gentle hand. With these tips in mind, the key to taking better smartphone photos is simple: practice, experiment, and always be looking for the beauty in the world around you.