Home & DIY
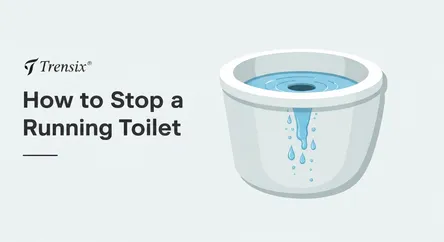
How to Stop a Running Toilet
# How to Stop a Running Toilet That incessant, phantom trickling sound. The hiss that whispers through your home, day and night. A running toilet is...
How to Stop a Running Toilet
That incessant, phantom trickling sound. The hiss that whispers through your home, day and night. A running toilet is more than just a minor annoyance; it's a constant drain on your water bill and a significant source of water waste. Every minute it runs, it can waste gallons of water, leading to shocking utility bills and a heavy environmental footprint. Many homeowners resign themselves to the noise or delay the repair, fearing a complex and costly plumbing job. But what if you could silence that sound for good with a simple, inexpensive DIY fix? The truth is, most running toilets are caused by one of two small, easily replaceable components inside the tank: a faulty flapper or a failing fill valve. You don't need to be a master plumber to tackle this common household problem.
This comprehensive guide is designed to empower you to confidently fix your running toilet yourself. We will walk you through every step of the process, from initial diagnosis to final testing. You will learn a simple, foolproof trick using food coloring to determine the exact cause of the leak. We will provide detailed, step-by-step instructions on how to replace both a toilet flapper and a fill valve, the two most frequent culprits. Forget the frustration and the expense of calling a professional for a job you can complete in under an hour. By following these instructions, you will not only stop the leak and save a significant amount of money on your water bills but also gain the satisfaction and confidence that comes from mastering a basic home repair. Let's open that tank lid and get started on bringing peace, quiet, and efficiency back to your bathroom.
Section 1: Understanding Your Toilet and Why It Runs
Before you can effectively fix a running toilet, it helps to understand the basic mechanics at play inside the tank. The system is surprisingly simple, relying on gravity and a few key parts to work in harmony. When you press the flush handle, it lifts a component called the flapper, which uncovers the flush valve opening and allows water to rush from the tank into the bowl. As the tank empties, the flapper falls back into place, sealing the opening. Simultaneously, a float mechanism connected to the fill valve drops with the water level. This drop signals the fill valve to open and release fresh water back into the tank. As the tank refills, the float rises, and once it reaches a preset level, it shuts off the fill valve. The cycle is then complete, ready for the next flush. A running toilet occurs when this cycle is interrupted by a component failure.
The Anatomy of a Toilet Tank
To diagnose the problem accurately, you need to be familiar with the main players inside the tank. When you lift the lid, you'll see a few distinct parts working together.
The Fill Valve (or Ballcock)
This is the tall assembly, typically on the left side of the tank, responsible for refilling the tank with water after a flush. Older models have a large floating ball attached to a long arm, while modern, water-efficient toilets use a more compact float cup that slides up and down the fill valve's main shaft. The fill valve is connected directly to the water supply line coming from the wall. When it fails, it may not shut off properly, allowing water to continuously pour into the tank. This excess water is then directed down the overflow tube to prevent a flood, causing the constant running sound.
The Flapper and Flush Valve Seat
Located at the center bottom of the tank is the flush valve, which is the large opening that lets water into the bowl. Sealing this opening is the flapper, a rubber or silicone plug connected by a chain to the flush handle's lever. When you push the handle, the chain lifts the flapper. Over time, this rubber flapper can degrade, warp, or accumulate mineral deposits, preventing it from creating a perfect seal on the flush valve seat. This is the most common cause of a running toilet, as it allows water to slowly and silently leak from the tank into the bowl.
The Overflow Tube
This is a tall, open pipe, usually part of the flush valve assembly. Its purpose is crucial: it acts as a safety drain. If the fill valve fails to shut off and the water level rises too high, the excess water spills into the overflow tube and drains harmlessly into the bowl, preventing the tank from overflowing onto your bathroom floor. If you hear your toilet constantly running and see water trickling down the inside of the bowl, but the water level is at the top of the overflow tube, your fill valve is the likely problem.
Section 2: Diagnosing the Problem: The Flapper vs. The Fill Valve
Pinpointing the exact cause of the leak is the most critical step to fix your running toilet efficiently. Wasting time and money replacing the wrong part is a common frustration for DIYers. Luckily, there's a simple, definitive test you can perform in minutes to determine whether the culprit is your flapper or your fill valve. This diagnostic process requires no special tools and will set you on the right path for a quick and successful repair.
The Foolproof Food Coloring Test
This is the gold standard for identifying a silent leak from a faulty flapper. A flapper that isn't sealing properly allows water to seep from the tank into the bowl, triggering the fill valve to periodically turn on to refill the tank. This is often called a "ghost" or "phantom" flush.
How to Perform the Test
- Remove the Tank Lid: Carefully lift the ceramic lid off the top of your toilet tank and place it somewhere safe where it won't be knocked over.
- Add the Dye: Take a few drops of food coloring (dark colors like blue or green work best) or a dye tablet specifically made for this purpose and add it to the water inside the tank. Do not flush the toilet.
- Wait Patiently: Now, simply wait for about 15-20 minutes. This gives the dyed water in the tank enough time to seep past a faulty flapper seal and into the bowl.
- Check the Bowl: After the waiting period, look inside the toilet bowl. If you see any of the colored dye in the bowl water, you have a confirmed flapper leak. The flapper is not creating a tight seal, and it needs to be replaced.
Identifying a Faulty Fill Valve
If the food coloring test shows no color in the bowl after 20 minutes, your flapper is likely doing its job correctly. The problem, therefore, probably lies with the fill valve. A failing fill valve causes a different kind of running issue. Instead of water leaking into the bowl, the valve itself fails to shut off completely once the tank is full.
Signs of a Bad Fill Valve
- Constant Hissing: The most obvious sign is a constant hissing or refilling sound that never stops.
- Water Level at the Overflow Tube: Look inside the open tank. If the water level is at the very top of the overflow tube and is trickling down into it, the fill valve is the problem. The float mechanism is not signaling the valve to shut off, and the overflow tube is doing its job by draining the excess water to prevent a flood.
- Spasmodic Refills: Sometimes, a fill valve won't run constantly but will turn on and off sporadically for no apparent reason. This can be a sign that the valve is getting stuck or failing internally.
- Check the Float: Make sure the float (either the ball or the cup) isn't getting caught on any other part of the tank mechanism, preventing it from rising fully and shutting off the water.
Once you have completed these diagnostic steps, you will know with certainty which component needs your attention.
Section 3: How to Fix a Running Toilet by Replacing the Flapper
If the food coloring test revealed a leak, you're in luck. Replacing a toilet flapper is one of the easiest and cheapest plumbing repairs you can perform. The part itself is inexpensive, and the entire process typically takes less than 15 minutes. This simple fix can have an immediate impact on your water bill and will silence that annoying trickle for good.
Step 1: Preparation and Buying the Right Flapper
Before you begin, you need to purchase the correct replacement flapper. While they may look similar, flappers come in different sizes and types, and using the wrong one will not solve the problem.
Choosing Your Replacement
- Size Matters: The most common flapper sizes are 2-inch and 3-inch, corresponding to the size of the flush valve opening. Newer, water-saving toilets often use the larger 3-inch flapper to allow water to enter the bowl more quickly. The easiest way to determine your size is to look up your toilet model online or simply measure the diameter of the flush valve opening after you've removed the old flapper.
- Frame vs. Frameless: Some flappers have a rigid plastic frame, while others are all-rubber. It's best to replace your flapper with one of a similar style to the original for a guaranteed fit. Taking a picture of your old flapper with your phone before heading to the hardware store is a great idea.
- Adjustable Flappers: Many modern replacement flappers are adjustable, allowing you to fine-tune the amount of water used per flush. These can be a good option for optimizing your toilet's flushing performance and water efficiency.
Step 2: Shut Off the Water and Drain the Tank
You must remove the water from the tank before you can work on it.
- Turn Off the Water Supply: Look for the water shut-off valve on the wall behind or beside the toilet base. Turn the handle clockwise until it stops. This will prevent any new water from entering the tank.
- Flush the Toilet: Push the flush handle and hold it down to drain as much water as possible from the tank. There will still be a small amount of water left at the bottom, which is perfectly fine. You can use a sponge or towel to soak up this residual water if you prefer a completely dry workspace.
Step 3: Remove the Old Flapper
With the tank empty, you can now remove the old, faulty flapper.
- Unhook the Chain: First, disconnect the chain from the flush lever arm. It usually connects with a simple clip.
- Detach the Flapper: The flapper itself is mounted onto the flush valve via two small "ears" or pegs on the sides of the overflow tube. Gently flex the rubber ears of the flapper to pop them off the pegs. Lift the old flapper out of the tank.
Step 4: Install the New Flapper
- Clean the Valve Seat: Before installing the new flapper, run your finger around the rim of the flush valve seat where the flapper sits. Feel for any mineral buildup (scale) or debris that could prevent a perfect seal. Wipe it clean with a rag or a non-abrasive sponge. Do not use harsh chemical cleaners, as they can damage the new flapper.
- Mount the New Flapper: Align the new flapper over the flush valve opening and attach its ears to the mounting pegs on the overflow tube, just as the old one was.
- Connect the Chain: Attach the chain from the new flapper to the flush lever arm.
Step 5: Adjust and Test
This is a crucial final step. A chain that is too long will not lift the flapper high enough for a full flush, while a chain that is too short will prevent the flapper from sealing completely, causing the very leak you're trying to fix.
- Adjust the Chain Length: There should only be about a half-inch of slack in the chain when the flapper is closed. Most replacement chains have multiple clip points to allow for easy adjustment. Trim any excess chain so it doesn't get caught under the flapper.
- Turn the Water On: Slowly turn the water supply valve counter-clockwise to refill the tank.
- Test the Flush: Once the tank is full, flush the toilet and watch the action. Ensure the flapper lifts fully and then drops squarely back onto the valve seat, creating a tight seal. Listen carefully after the tank has refilled to make sure there is no sound of running water. You can perform the food coloring test one more time for absolute certainty.
Section 4: How to Fix a Running Toilet by Replacing the Fill Valve
If your diagnosis pointed to a faulty fill valve, the repair is slightly more involved than replacing a flapper, but it is still well within the capabilities of a novice DIYer. A new fill valve assembly is an affordable part that can restore your toilet to perfect working order. This process requires a few basic tools and will take about 30-45 minutes to complete.
Step 1: Preparation and Buying the Right Fill Valve
Universal fill valve kits are widely available and designed to fit most standard toilets. They are a significant improvement over old ballcock-style valves, offering quieter operation and easier water level adjustment.
Choosing Your Replacement
- Universal Kits: Look for a universal toilet fill valve replacement kit. These kits are highly adaptable and come with all the necessary washers, nuts, and instructions needed for installation.
- Consider Height: Note the height of your toilet tank. Most kits are adjustable, but it's good to have a general idea to ensure it will fit without interfering with the tank lid.
- Tools and Materials: You will need a few basic tools for this job: an adjustable wrench or channel-lock pliers, a bucket, and some old towels or a sponge to manage any water spillage.
Step 2: Shut Off Water and Empty the Tank Completely
This step is even more critical when replacing the fill valve, as you will be disconnecting the main water supply line.
- Turn Off the Water Supply: Turn the shut-off valve on the wall clockwise until it is fully closed.
- Flush and Sponge: Flush the toilet and hold down the handle to drain as much water as possible. Because you need to work on the bottom of the tank, you must remove all the remaining water. Use a sponge or towel to soak up every last bit of water from inside the tank.
Step 3: Remove the Old Fill Valve
- Disconnect the Water Supply Line: Place a bucket or towels under the toilet tank to catch any dripping water. Use your wrench to unscrew the coupling nut that connects the water supply line to the bottom of the fill valve shank, located on the underside of the tank.
- Remove the Locknut: Still on the underside of the tank, use your wrench to unscrew the large plastic locknut that holds the fill valve in place. Once this nut is off, the fill valve inside the tank will be loose.
- Lift Out the Old Valve: Disconnect the small refill tube from the overflow pipe. You can now lift the entire old fill valve assembly straight up and out of the tank.
Step 4: Install the New Fill Valve
- Adjust the Height: Before placing the new valve in the tank, adjust its height. The instructions with your new valve will show you how. A general rule is that the top of the fill valve should be about 3 inches above the top of the overflow pipe when installed.
- Insert the New Valve: Place the new fill valve into the hole in the bottom of the tank, ensuring the rubber washer is properly seated on the inside to create a watertight seal.
- Secure the Locknut: From the underside of the tank, thread the new locknut onto the shank of the fill valve and hand-tighten it. Use your wrench to give it an additional half-turn to ensure it's snug. Be careful not to over-tighten, as this can crack the porcelain tank.
- Reconnect the Water Supply Line: Re-attach the water supply line to the new fill valve shank and tighten the coupling nut. Again, hand-tighten first, then give it a gentle snug with the wrench.
Step 5: Connect and Adjust
- Attach the Refill Tube: Clip the new refill tube to the top of the overflow pipe as directed by the kit's instructions. This tube's job is to send a small amount of water down the overflow pipe during refill to replenish the water in the toilet bowl.
- Turn the Water On: Slowly turn the water supply valve back on and check for any leaks at the base of the tank where you made the connections. If you see any drips, gently tighten the nuts a little more.
- Adjust the Water Level: Let the tank fill completely. The water level should stop about one inch below the top of the overflow pipe. Most new fill valves have a simple adjustment screw or clip that allows you to raise or lower the float, which in turn sets the final water level. Adjust it as needed to achieve the correct level.
- Test: Flush the toilet several times to ensure everything is working smoothly. The fill valve should shut off cleanly at the proper water level, and the bowl should refill correctly.
Conclusion
The persistent, wasteful sound of a running toilet is a problem you no longer have to live with. By investing a small amount of time and effort, you have successfully tackled one of the most common—and costly—household plumbing issues. You have learned how to look inside your toilet tank not with confusion, but with the confidence of understanding how its simple yet effective mechanism works. You now possess the diagnostic skills to quickly determine the root of the problem, using a simple food coloring test to differentiate between a faulty flapper and a failing fill valve.
More importantly, you are equipped with the step-by-step knowledge to fix your running toilet yourself, whether it required a quick 15-minute flapper swap or a slightly more involved fill valve replacement. In doing so, you have not only restored peace and quiet to your home but also taken a meaningful step toward conserving water and reducing your utility bills. This successful DIY project proves that with clear guidance, you can handle many home repairs without the need for an expensive professional call, saving money and building valuable self-sufficiency. Enjoy the silence and the savings you've earned.