Creative Skills
How to Start Drawing: 5 Basic Exercises
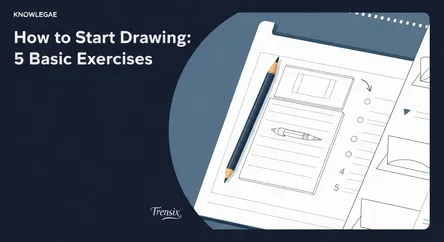
# How to Start Drawing: 5 Basic Exercises The desire to create, to translate the world around us or the images in our minds onto a blank page, is a d...
How to Start Drawing: 5 Basic Exercises
The desire to create, to translate the world around us or the images in our minds onto a blank page, is a deeply human one. For many, the ambition to learn to draw feels like an innate calling, yet it's often met with a formidable barrier: the fear of not being good enough. The pristine white sheet of paper can be intimidating, and the gap between what we envision and what our hands produce can feel discouragingly wide. But here’s the secret every artist knows: drawing is not an elusive, magical talent bestowed upon a chosen few. It is a skill. And like any skill, it can be learned, developed, and mastered through consistent, focused practice. This guide is built on that fundamental principle. It’s designed specifically for the absolute beginner, the person who says "I can't even draw a straight line," and shows them that, yes, they can.
This comprehensive guide will strip away the complexity and pressure, taking you back to the very atoms of art: lines, shapes, and forms. We will not be tackling complex portraits or sprawling landscapes just yet. Instead, we will build your confidence and competence from the ground up with five foundational exercises. You will learn how to control your pencil, how to see the world in its basic geometric components, and how to give those components the illusion of three-dimensional life. We will cover the essentials of making clean, confident lines, constructing fundamental shapes, transforming those shapes into solid forms, understanding the basics of light and shadow, and finally, training your eye to work in perfect harmony with your hand. By focusing on these core drills, you will be developing the muscle memory and observational acuity that underpin all great artwork. Prepare to embark on a structured journey to learn to draw, one simple, rewarding exercise at a time.
Section 1: Mastering the Foundation: The Power of the Line
Before a single recognizable object can be rendered, there must be a line. The line is the first and most fundamental element of all drawing. It is the DNA of visual art, a simple point moving through space to define edges, create texture, and imply motion. For a beginner eager to learn to draw, mastering the line is not just the first step; it is the most crucial one. Many aspiring artists make the mistake of trying to draw complex subjects immediately, only to become frustrated when their lines are shaky, uncertain, and fail to capture the essence of the subject. This frustration stems from underdeveloped hand-eye coordination and a lack of muscle memory. The exercises in this section are designed to remedy that directly. They are the physical conditioning for your artistic practice, training your arm, wrist, and fingers to work together to create the marks you intend to make. By dedicating time to simply drawing lines, you are building a powerful and reliable foundation that will support every future drawing you create.
Exercise 1: Building Control with Straight and Curved Lines
This exercise is about developing a confident, steady hand. It’s about teaching your body that drawing is a physical act that involves more than just your fingers. True line control comes from utilizing your entire arm, from the shoulder to the wrist.
The Proper Setup: Posture and Grip
Before you make a single mark, assess your physical setup. Sit up straight in your chair, with your feet flat on the floor. If you're drawing on a desk, try not to hunch over your paper. If possible, an angled drawing board or easel is ideal, as it allows you to see your work without perspective distortion and encourages better posture. Now, consider your grip. Most people hold a pencil as if they are writing, a tight tripod grip that relies on small finger and wrist movements. While this is great for detail, it’s restrictive for drawing long, fluid lines. Try an "overhand" grip, holding the pencil barrel between your thumb and fingers, almost parallel to the paper. This grip encourages you to draw using the muscles in your shoulder and elbow, which are capable of creating much smoother, more consistent, and longer lines.
The Practice: Filling the Page
Take a blank sheet of paper and your pencil. Using your new overhand grip and drawing from your shoulder, attempt to draw a perfectly straight line across the page from one edge to the other. Do not use a ruler. The line will almost certainly not be perfect, and that is the point. Now, draw another line directly below it, trying to keep it parallel to the first. Continue this process, filling the entire page with horizontal lines. On a new sheet, repeat the exercise with vertical lines. On a third, fill the page with diagonal lines.
Focus on a few key things: consistency in the spacing between lines, maintaining an even pressure with your pencil, and the smoothness of the motion. Experiment with speed; sometimes a faster, more confident stroke will produce a straighter line than a slow, hesitant one. Once you’ve practiced straight lines, move on to curves. Draw a series of "S" curves down the page. Practice drawing large, sweeping arcs. The goal of this entire exercise is not to create a masterpiece but to build a direct and reliable connection between your brain's intention and your hand's action.
Section 2: From Lines to Shapes: Building Your Visual Vocabulary
Once you begin to develop confidence in your ability to draw a single, intentional line, the next logical step is to combine those lines into shapes. Shapes are the two-dimensional building blocks that form the basis of all objects we see. An apple is fundamentally a circle, a book is a rectangle, and a mountain is a triangle. The ability to break down the complex world into these simple, manageable components is one of the most powerful skills a beginner can develop. Many people who want to learn to draw get overwhelmed by detail. They try to draw an entire car at once, focusing on the headlights, tires, and windows simultaneously. A trained artist, however, sees the car first as a series of simple boxes (rectangles and squares) and ovals. This process, known as "construction," allows you to establish the correct proportions and placement of an object before you commit to any fine details. This section focuses on practicing the freehand drawing of these essential shapes, thereby building your visual library and training your brain to see the world like an artist.
Exercise 2: Freehanding the Four Foundational Shapes
This exercise is dedicated to repeatedly drawing the four most important basic shapes—the circle, the square, the triangle, and the ellipse—without the aid of stencils, compasses, or rulers. The objective is to train your hand and eye to create these fundamental forms accurately and consistently.
The Core Shapes: Practice and Repetition
Dedicate at least one full page of your sketchbook to each shape.
- The Circle: Circles can be tricky. Avoid drawing them with a series of short, sketchy lines. Instead, try to use a smooth, continuous motion from your shoulder. Lightly ghost the circular motion in the air above the paper a few times to get a feel for it before committing the pencil to the page. Draw circles of various sizes, filling the page. Don't worry about perfection; focus on the fluidity of the movement.
- The Square: A square requires control over straight lines and right angles. Practice drawing your horizontal and vertical lines as you did in the first exercise. Try to make all four sides equal in length and all corners a perfect 90 degrees. This is harder than it sounds and is an excellent test of your observational skills.
- The Triangle: Practice drawing different types of triangles: equilateral (all sides equal), isosceles (two sides equal), and scalene (no sides equal). This helps you further refine your control over angles and straight lines.
- The Ellipse: The ellipse is essentially a circle viewed in perspective and is one of the most common shapes in drawing (the top of a cup, a wheel on a car). Practice drawing long, thin ellipses and wide, round ellipses. A key goal is to make the curved ends symmetrical and to avoid sharp, pointy ends.
The Application: Seeing Shapes in Everyday Objects
Once you feel more comfortable drawing the shapes in isolation, begin to apply this knowledge. This is the first step in learning to truly see as an artist. Find simple objects around your home and mentally deconstruct them into their basic shapes. A coffee mug is a cylinder (which is made of circles/ellipses) and a rectangle (the handle). A television is a rectangle. A lamp might be a combination of a cone (the shade) and a cylinder (the base). Lightly sketch these objects using only the basic shapes you’ve been practicing. This isn't about creating a finished drawing; it's about training your brain to ignore distracting details and identify the underlying geometric structure of the world.
Section 3: Giving Shapes Dimension: An Introduction to Form
You have practiced lines and learned to combine them into flat, two-dimensional shapes. The next great leap in your journey to learn to draw is to give those shapes the illusion of three-dimensional reality. This is the transition from shape to form. A shape is flat (a square), but a form has volume, depth, and mass (a cube). A circle becomes a sphere; a triangle becomes a cone. Understanding this distinction is absolutely critical to making your drawings look believable and solid, as if they occupy real space. While a drawing on a flat piece of paper will always be a 2D illusion, creating convincing forms is how you trick the viewer's eye into perceiving depth. This section will guide you through the process of taking your basic shapes and extruding them into the foundational forms that are the true building blocks of realistic drawing. Mastering these will allow you to construct virtually any object you can imagine, from a simple piece of fruit to the complex anatomy of the human figure.
Exercise 3: Constructing the Primary Forms
This exercise is a direct evolution of the previous one. We will take the shapes you've been practicing and add the dimension of depth to transform them into their corresponding 3D forms: the cube, the sphere, the cylinder, and the cone.
From Square to Cube: Understanding Perspective
The most effective way to turn a square into a cube is by applying the basic principles of perspective. Start by drawing a square. Now, pick a point somewhere behind it and slightly to one side (this is a simple "vanishing point"). From the three corners of the square closest to this point, draw light, straight lines back towards the point. Finally, draw a second square further back along these perspective lines, with its edges parallel to the first square. Connect the corners, and you have a transparent cube. Practice this from different angles. This single exercise will teach you more about creating depth than almost any other. The key is to remember that lines moving away from the viewer appear to converge.
From Circle to Sphere, Cylinder, and Cone
- The Sphere: A circle is the outline of a sphere. Unlike a cube, a sphere's three-dimensionality is revealed not by its edges (it has none) but by its shading and contour lines. For now, simply practice drawing clean circles and then add a single curved line (a contour line, like the equator on a globe) around its middle to suggest its roundness. This simple addition immediately begins to transform it from a flat disc into a solid ball.
- The Cylinder: A cylinder is constructed from two ellipses and two parallel straight lines. Draw an ellipse. Then, draw two straight, parallel lines downwards from the widest points of the ellipse. Finally, close the bottom with another identical ellipse. The roundness of the ellipses is what sells the illusion that the form is cylindrical.
- The Cone: A cone is similar. Start with an ellipse for the base. Find the center point of the ellipse and draw a straight line directly upwards to the desired height. This point will be the apex of the cone. Now, draw two straight lines from the apex down to the widest points of the base ellipse.
Your task is to fill pages with these forms. Draw them from different viewpoints. Imagine what a cube looks like from below, or what a cylinder looks like when it's lying on its side. This practice trains your brain to think and visualize in three dimensions.
Section 4: Understanding Light and Shadow: The Basics of Shading
So far, you have built a solid foundation. You can control your lines, construct shapes, and turn those shapes into three-dimensional forms. However, your forms are still just outlines, transparent wireframes floating in space. The element that will finally breathe life, weight, and realism into your drawings is shading. Shading, also known as rendering or tonal value, is the technique of applying light and dark tones to a drawing to simulate the way light interacts with an object. It is shading that describes the texture of a surface, reveals the volume of a form, and grounds an object in its environment. To learn to draw convincingly, you must learn to see and replicate the patterns of light and shadow. This section introduces the fundamental concepts of light logic—how a single light source creates highlights, mid-tones, and shadows—and provides a simple exercise to begin practicing this crucial skill.
Exercise 4: Shading the Basic Forms with a Value Scale
Before you can apply shading to an object, you must first learn to control the lightness and darkness of your pencil marks. This range of tone from pure white to solid black is called "value." A value scale is the artist's primary tool for understanding and controlling this range.
Creating Your First Value Scale
On your paper, draw a long, narrow rectangle and divide it into five equal sections.
- Box 1 (Highlight): Leave this box completely white, the pure color of the paper.
- Box 5 (Core Shadow): Fill this box with the darkest black your pencil can produce. Apply heavy pressure and build up layers of graphite.
- Box 3 (Mid-tone): Now, try to create a shade in the middle box that is exactly halfway between white and black—a perfect middle gray.
- Box 2 (Light Tone): Fill this box with a value that is halfway between the white of Box 1 and the gray of Box 3.
- Box 4 (Dark Tone): Fill this box with a value that is halfway between the gray of Box 3 and the black of Box 5. Practicing this will dramatically improve your pencil control, teaching you how to create different tones simply by varying your pressure.
Applying Shading to Your Forms
Now, let's apply this knowledge to the forms you drew in the previous exercise.
- Set the Scene: Draw a simple sphere, cube, or cylinder. Imagine it is sitting on a flat surface.
- Establish a Light Source: Decide where your light is coming from. Make it a single, definite source, like a lamp or a window. Draw a small sun or lightbulb symbol somewhere on your page to constantly remind you of its direction.
- Map the Shadows:
- Highlight: The part of the form directly facing the light source will be the brightest. This corresponds to Box 1 on your value scale; you might leave it the white of the paper.
- Mid-tone: As the surface of the form curves away from the light, it will receive less light. This area is the object's true color or local value, corresponding to Box 2 and 3.
- Core Shadow: The area on the form that curves furthest away from the light source, just before the edge, will be the darkest part of the object itself. This is the core shadow (Box 4 and 5).
- Cast Shadow: The object will block the light from hitting the surface it's resting on, creating a shadow on that surface. This cast shadow will be darkest right next to the object and will get lighter and softer as it gets further away. Practice shading each of your basic forms. Start with the sphere, as its smooth surface provides a perfect opportunity to practice blending your values into a seamless gradient. This exercise transforms your wireframes into solid, tangible objects.
Section 5: Putting It All Together: Training Your Observation
The previous four exercises have been about building mechanical skill and foundational knowledge. You’ve developed line control, learned to see in shapes, given them form, and applied basic shading. This final section introduces two essential drawing practices—contour and gesture drawing—that tie all these skills together and focus them on the most important artistic muscle of all: your observation. The biggest mistake a beginner can make is to draw what they think an object looks like, relying on preconceived symbols in their brain (like drawing a generic "eye" shape instead of the specific, unique eye they are looking at). To truly learn to draw well, you must learn to draw what you actually see. Contour and gesture drawing are two sides of the same observational coin. Contour drawing trains you to see and record precise edges and details, while gesture drawing trains you to see and capture the energy, movement, and essence of a subject.
Exercise 5a: Blind Contour Drawing for Hand-Eye Coordination
Blind contour drawing is a classic and incredibly powerful exercise for developing a pure connection between your eye and your hand. The goal is not to create a pretty or accurate drawing, but to force your hand to record exactly what your eye is seeing in real-time, without your brain's "symbol library" interfering.
The Concept and Process
The rules are simple: you will draw an object without ever looking down at your paper, and ideally, without lifting your pencil until the drawing is complete.
- Choose a Subject: Your own non-drawing hand is the perfect subject to start with. It's complex, familiar, and always available. Position it in a comfortable pose.
- Fix Your Gaze: Place your pencil on the paper, but fix your eyes on a single point on the edge, or "contour," of your hand.
- Begin Drawing: Imagine your eye is an ant crawling slowly along every tiny bump and curve of your hand's outline. Your pencil must move at the exact same slow, steady speed as your eye. Trace the wrinkles, the shape of the fingernails, and the folds of skin.
- Resist the Urge: Your brain will scream at you to look down at the paper. Resist this temptation completely. The moment you look, the connection is broken. The final drawing will almost certainly look distorted and bizarre. This is not only okay; it's a sign that you did it correctly. The value of this exercise is entirely in the process, not the product. It is a meditation that forges an unbreakable link between observation and action.
Exercise 5b: Gesture Drawing for Capturing Life and Energy
Where contour drawing is slow, methodical, and focused on edges, gesture drawing is the exact opposite. It is fast, energetic, and focused on the essence of your subject—its movement, weight, and general pose. It is the foundation for figure drawing and animation.
The Concept and Process
The goal of gesture drawing is to capture the "gesture" of a subject in a very short amount of time, typically between 30 seconds and 2 minutes.
- Find a Subject: Look for subjects with energy. People walking, animals playing, or even the way a tree's branches twist towards the sky. Online resources with timed photo references for artists are excellent for this.
- Set a Timer: This is crucial. Set a timer for 1 minute.
- Draw with Energy: As soon as the timer starts, use your whole arm to make quick, sweeping lines that capture the main line of action. Is the figure leaning? Twisting? Reaching? Don't draw the outlines; draw the flow of energy through the form. Use loose, continuous scribbles to suggest the mass and volume of the torso and limbs.
- Don't Erase, Don't Detail: You do not have time for details or corrections. The goal is to get the overall impression down on paper before the timer runs out. When it does, stop immediately and start the next pose. Filling pages with these rapid-fire gesture drawings will teach your eye to quickly identify the most important information in a pose and will train your hand to translate that information into dynamic, living lines.
Conclusion
The journey to learn to draw is not about waiting for inspiration to strike, but about building a consistent practice founded on core principles. By engaging with these five basic exercises, you have laid the most important groundwork possible for your artistic development. You have moved beyond the fear of the blank page and have begun to forge a tangible connection between your eyes, your brain, and your hand. You’ve learned that every complex object is built from simple lines and shapes, that form is created through understanding dimension, that shading gives life and weight, and that true artistic skill comes from dedicated observation.
Remember that progress in art is a marathon, not a sprint. The drawings you create today are not a final judgment of your talent, but simply a single step on a long and rewarding path. The key is consistency. Make a commitment to set aside even just 15-20 minutes each day to practice these fundamentals: fill a page with lines, deconstruct an object into shapes, shade a sphere, or do a few quick gesture drawings. By returning to these foundational exercises regularly, you will build the muscle memory, control, and observational confidence necessary to tackle any artistic challenge you set for yourself in the future. You have taken the first and most difficult step. Now, keep your pencil moving.