Creative Skills
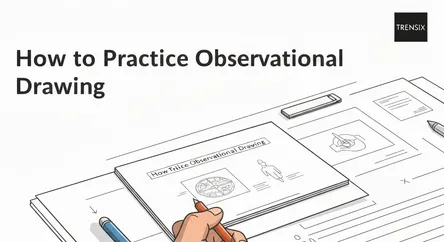
How to Practice Observational Drawing
# How to Practice Observational Drawing: A Complete Guide The desire to draw what we see is one of the most fundamental human instincts. From the ear...
How to Practice Observational Drawing: A Complete Guide
The desire to draw what we see is one of the most fundamental human instincts. From the earliest cave paintings to the masterworks of the Renaissance, artists have strived to capture the world around them with accuracy and feeling. This practice, known as observational drawing, is the bedrock of all realistic art. It is the crucial skill of translating the three-dimensional world onto a two-dimensional surface. Many aspiring artists believe that drawing is an innate talent, a magical ability you either have or you don't. The reality, however, is far more encouraging: drawing is a skill, and like any skill, it can be learned, practiced, and mastered. This guide is designed to demystify the process and provide you with simple, effective exercises to improve your ability to truly see and draw objects, people, and environments.
This comprehensive guide will walk you through the core principles and practical exercises of observational drawing. We will explore the vital difference between looking and seeing, helping you to shift your perception from a passive glance to an active, analytical observation. You will learn about the essential materials that will set you up for success without overwhelming you with choices. We will then dive into a series of foundational exercises, starting with simple shapes and progressing to more complex forms, focusing on techniques like contour drawing, gesture drawing, and understanding negative space. By breaking down the process into manageable steps, you will build a solid foundation, improve your hand-eye coordination, and develop the confidence to tackle any subject. Whether you are a complete beginner picking up a pencil for the first time or an intermediate artist looking to sharpen your foundational skills, this guide will provide you with the tools and techniques to unlock your potential and begin your journey toward drawing with precision and confidence.
Section 1: Understanding the Core Principles of Observational Drawing
At its heart, observational drawing is the practice of drawing from life. It involves directly observing a subject—be it a person, a still life arrangement, or a landscape—and translating that visual information onto paper. This is fundamentally different from drawing from imagination or a photograph. Drawing from life forces you to contend with the complexities of light, shadow, perspective, and form in a real, three-dimensional space. The primary goal is not just to create a pretty picture, but to train your eyes to see with greater accuracy and your hand to record that information with fidelity. It is a discipline of intense focus that bridges the gap between perception and creation, ultimately enhancing your artistic abilities across all mediums.
The Critical Difference: Looking vs. Seeing
One of the first and most significant hurdles for any artist to overcome is learning the difference between "looking" and "seeing." In our daily lives, we are constantly looking at things. Our brain rapidly identifies objects and labels them: "apple," "chair," "tree." This process is efficient for navigating the world, but it is detrimental to drawing. When we simply look, we rely on preconceived symbols and ideas of what an object should look like. For example, when you think of an eye, you might draw an almond shape with a circle inside. This is a symbol, not a true observation.
Seeing, on the other hand, is an active, analytical process. It requires you to deconstruct what is in front of you into its most basic visual components: shapes, lines, angles, values (lights and darks), and textures. An artist who truly sees the eye ignores the label and instead observes the specific curve of the upper eyelid, the way the light creates a highlight on the iris, the subtle shadow cast by the eyelashes, and the unique shape of the tear duct. Practicing observational drawing is the most effective way to cultivate this deeper mode of perception. It trains you to quiet the labeling part of your brain and engage the part that processes spatial relationships and abstract shapes.
The Brain's Role in Drawing
The process of learning to draw is largely a process of learning to see, and this is deeply connected to how our brain functions. The left hemisphere of the brain is typically associated with logical, verbal, and symbolic processing. It's the part that wants to name and categorize everything. The right hemisphere is more attuned to spatial, intuitive, and holistic information. It excels at recognizing patterns, relationships, and the overall "gestalt" of a subject.
When you struggle to draw something accurately, it's often because your left brain is interfering, imposing its pre-packaged symbols onto your perception. The exercises in observational drawing are specifically designed to bypass this left-brain dominance and engage the right brain. Techniques like upside-down drawing or focusing on negative space force you to abandon your symbolic understanding of an object and instead perceive it as a collection of pure shapes and lines. By consistently practicing these exercises, you are forging new neural pathways, effectively rewiring your brain to see the world as an artist does. This mental shift is the true key to unlocking your drawing potential.
Section 2: Essential Materials for Observational Drawing
Getting started with observational drawing doesn't require a hefty investment in expensive art supplies. In fact, keeping your toolkit simple is often the best approach, as it allows you to focus on the fundamental skills without getting distracted by a myriad of options. The core materials you need are a drawing surface, a drawing tool, and an eraser. As you progress, you can certainly expand your collection, but mastering the basics with these simple tools will provide a strong and versatile foundation. The goal is to choose materials that are accessible, easy to use, and encourage experimentation and practice. Don't let the fear of "wasting" good paper or materials hold you back; the act of drawing is far more valuable than the supplies themselves.
Choosing Your Drawing Tools
The humble pencil is the quintessential tool for observational drawing, and for good reason. It offers a wide range of values, is erasable, and allows for both fine lines and broad shading.
Graphite Pencils
Graphite pencils come in a range of hardness levels, from hard (H) to soft (B). A good starting set would include a 2H (for light initial sketches), an HB (a middle-of-the-road pencil, similar to a standard #2), and a 2B or 4B (for darker lines and shadows). The H pencils produce light, crisp lines that are easy to erase, making them ideal for laying down the initial structure of your drawing. The B pencils are softer, containing more graphite, which allows them to create rich, dark marks perfect for adding depth and contrast.
Other Options
While graphite is the standard, don't be afraid to experiment. Charcoal (vine or compressed) is excellent for expressive, large-scale drawings and for quickly establishing dark values. Pen and ink are fantastic for contour drawing, as the permanence of the line forces you to be more decisive and confident in your mark-making.
Selecting Paper and Sketchbooks
The surface you draw on can significantly impact the final result. For general practice, a simple, inexpensive sketchbook is your best friend.
Sketchbooks
Choose a sketchbook with a decent paper weight (around 60-80 lb. or 90-120 gsm) to prevent easy tearing and to handle some light erasing. The key is to have a dedicated place for your practice that you can carry with you. The act of regularly filling a sketchbook, even with "bad" drawings, is a crucial part of the learning process. It documents your progress and frees you from the pressure of creating a masterpiece every time.
Loose Paper
Working on loose sheets of paper, perhaps clipped to a drawing board, can be freeing, especially for larger studies. A simple newsprint pad is incredibly cheap and perfect for quick gesture drawings where you'll be making many sketches in a short amount of time. For more finished pieces, a heavier-weight, acid-free drawing paper will be more durable and less prone to yellowing over time.
The Importance of a Good Eraser
Think of an eraser not as a tool for correcting mistakes, but as a drawing tool in its own right. A good eraser can lift graphite to create highlights, soften edges, and refine shapes.
Kneaded Eraser
This is the most versatile eraser for an artist. It's a soft, pliable putty that can be molded into any shape. You can tap it on the paper to lighten an area without damaging the surface, or form it into a fine point to lift out tiny highlights. It works by absorbing graphite particles rather than abrading the paper.
Vinyl or Plastic Eraser
These are firmer erasers that are very effective at completely removing graphite from an area. They are great for cleaning up edges and creating crisp, hard highlights, but be gentle to avoid damaging the paper's surface.
Section 3: Foundational Observational Drawing Exercises
The key to improving your observational drawing skills lies in consistent, focused practice. The following exercises are designed to train your eye to see more accurately and improve your hand-eye coordination. They are not about creating finished masterpieces but are instead focused on the process of seeing. Approach them with patience and an open mind. Set up a simple still life—a coffee mug, a piece of fruit, a crumpled piece of paper—and work through these foundational techniques. Remember to draw what you see, not what you think you see.
Exercise 1: Blind Contour Drawing
This is a classic exercise that directly challenges your brain's reliance on symbols and forces an intense connection between your eye and hand. The goal is to draw the outline of your subject without looking at your paper.
How to Do It
- Set Up: Place an object in front of you. Choose something with interesting edges and curves, like your own hand, a plant, or a shoe.
- Positioning: Position your sketchbook so you cannot see the paper as you draw. You can achieve this by sitting at an angle or even putting a piece of cardboard up to block your view.
- The Process: Place your pencil on the paper. Fix your eye on a single point on the edge of your subject. Imagine your pencil tip is directly touching that point. Very, very slowly, let your eye creep along the contours of the object. As your eye moves, your hand should move at the exact same speed. Do not lift your pencil from the paper. Trace every little bump, curve, and indentation you see.
- The Rule: The most important rule is: Do not look at your paper. Resist the urge to peek. The drawing itself will look distorted and strange—that's the point. The goal is the process of observation, not the final product. Spend at least five to ten minutes on a single blind contour drawing.
The purpose of this exercise is to slow you down and force you to observe every minute detail of the object's outline. It builds a powerful connection between sight and touch, enhancing your ability to record visual information faithfully.
Exercise 2: Modified Contour Drawing
This is a progression from blind contour drawing. Here, you are allowed to look at your paper, but only sparingly. The vast majority of your time should still be spent intensely observing your subject.
How to Do It
- Observation First: Spend about 90% of your time looking at the object and only 10% of your time looking down at your paper to check your position and relationships.
- Slow and Steady: As with blind contour, move your eye and hand slowly along the edges of the subject. When you need to check your drawing, stop moving both your eye and your hand. Glance down at the paper, reorient yourself, then look back at the exact spot on the object where you left off before continuing.
- Inside and Out: Don't just focus on the outer silhouette. Let your line travel inside the form to describe interior contours, like the wrinkles on a piece of fabric or the veins on a leaf. This will help you begin to understand how to describe form with line.
This exercise continues to prioritize observation while allowing you to build a more coherent and proportionally accurate drawing. It helps you practice making judgments about distance, angle, and scale.
Exercise 3: Gesture Drawing
Where contour drawing focuses on edges, gesture drawing aims to capture the energy, movement, and overall essence of the subject. It's about action and form, not detail. This is an essential practice for drawing figures, but it's also incredibly useful for any object.
How to Do It
- Subject Matter: Human figures (from life or photos) are ideal, but you can also use animals or even inanimate objects with a sense of dynamism, like a flowing plant or a crumpled blanket.
- Time Limit: The key to gesture drawing is speed. Set a timer for very short intervals: 30 seconds, 1 minute, or 2 minutes at most.
- Capture the Action: Your goal is not to draw the outlines. Instead, look for the "line of action"—an imaginary line that runs through the core of the subject, indicating its main energy or thrust. Start with this line. Then, quickly block in the main forms and shapes (head, torso, limbs) using loose, energetic marks.
- Keep Moving: Don't get bogged down in detail. Your pencil should be in constant motion. Think of it as sculpting the form with your lines. Once the timer goes off, stop immediately and move on to the next drawing.
Gesture drawing teaches you to see the subject as a whole and to prioritize the most important information. It develops a sense of rhythm and fluidity in your work and is a fantastic warm-up exercise before any observational drawing session.
Section 4: Seeing Shapes and Negative Space
One of the most profound shifts in an artist's perception is learning to see the world not as a collection of named objects, but as an arrangement of abstract shapes. When you stop thinking "I'm drawing a chair" and start thinking "I'm drawing this rectangle, next to that L-shape, with this trapezoid underneath," you bypass the symbolic left brain and engage the spatial right brain. This allows for much greater accuracy in proportion and placement. A powerful tool in this process is the concept of negative space.
The Power of Negative Space
Negative space is the area around and between the subjects of an image. If you are drawing a chair, the positive space is the chair itself. The negative space is the shape of the wall seen through the legs of the chair, the shape of the floor between the rungs, and the shape of the air surrounding the chair's silhouette. Often, these negative spaces form simpler, more abstract shapes that are easier to draw accurately than the complex object itself.
Why It Works
Our brains don't have preconceived symbols for these "empty" shapes. You don't have a mental icon for the shape of the air between a person's arm and their torso. Because of this, you are forced to observe the shape for what it truly is—a collection of angles and curves. By accurately drawing the negative spaces, you will find that the positive space (your subject) magically and accurately takes form on the page. It's a foundational technique used by artists to solve complex proportional problems and create more compelling compositions.
Exercise 4: Drawing Negative Shapes
This exercise trains you to actively identify and draw the shapes that are not your subject.
How to Do It
- Set Up Your Subject: A chair is the classic subject for this exercise. Place a simple wooden chair against a plain wall. Other good subjects include a plant with open branches or a bicycle.
- Identify the Negative Spaces: Before you draw, consciously identify the negative spaces. Notice the triangle formed between the chair leg and the floor, the trapezoid of wall visible through the back of the chair, etc.
- Draw Only the Negative Spaces: With your pencil, begin to draw the outlines of these negative shapes onto your paper. Do not draw any lines that belong to the chair itself. Focus entirely on the shapes of the "empty" space.
- Fill Them In: As you define a negative shape, you can lightly shade it in. This helps your brain solidify it as a positive, tangible shape in your drawing.
- Reveal the Subject: Continue this process, drawing all the negative spaces you can see around and within the chair. When you have finished, the un-drawn, white part of your paper will form the silhouette of the chair. You will likely find that the proportions are more accurate than if you had tried to draw the chair directly.
This observational drawing exercise is a true "a-ha" moment for many artists. It fundamentally alters your perception and provides a powerful, practical tool for achieving accuracy in all your future drawings.