Creative Skills
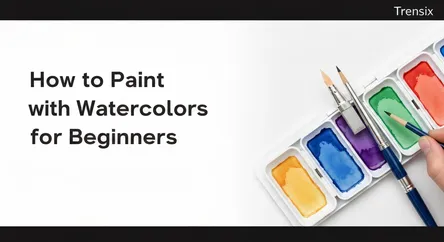
How to Paint with Watercolors for Beginners
# How to Paint with Watercolors for Beginners: A Guide to Essential Supplies and Basic Techniques Welcome to the vibrant and fluid world of watercolo...
How to Paint with Watercolors for Beginners: A Guide to Essential Supplies and Basic Techniques
Welcome to the vibrant and fluid world of watercolor painting! Often celebrated for its luminous, transparent qualities, watercolor can seem intimidating to the uninitiated. Its unforgiving nature—where mistakes can be tricky to cover up—might feel daunting. However, with a foundational understanding of the essential supplies and a grasp of a few core techniques, anyone can begin their journey into this expressive and rewarding medium. This guide is designed to demystify the process, transforming apprehension into creative confidence. Whether you've never picked up a brush before or are looking to solidify your fundamental skills, you've come to the right place.
This comprehensive article will serve as your roadmap to navigating the essentials of starting with watercolors. We will begin by assembling your artist's toolkit, breaking down exactly what you need without overwhelming you with choices. From selecting the right paper that won't buckle under moisture to choosing paints that offer vibrant pigments and brushes that will become an extension of your hand, we’ll cover the watercolor basics you can't do without. Once your supplies are in order, we will transition into the practical magic of painting. You'll learn how to control the delicate dance between water and pigment, and master foundational techniques such as the flat wash, the graduated wash, the dynamic wet-on-wet, and the precise wet-on-dry methods. Prepare to unlock a new skill and unleash your inner artist.
Assembling Your Toolkit: Essential Watercolor Supplies for Beginners
Embarking on your watercolor journey doesn't require a lavish studio filled with every art supply imaginable. In fact, starting with a curated set of quality basics is far more effective. It allows you to become intimately familiar with your tools and how they interact. This section will guide you through the must-have supplies, ensuring you invest in materials that will support your learning process rather than hinder it.
Choosing Your Core Materials: Paper, Paints, and Brushes
The trifecta of watercolor painting consists of paper, paints, and brushes. The quality of these three items will have the most significant impact on your final artwork and your overall painting experience.
Paper: The Foundation of Your Artwork
The most crucial supply for a beginner is arguably the paper. Unlike standard drawing or printer paper, watercolor paper is specifically designed to handle large amounts of water without buckling or disintegrating. Look for paper labeled "cold press" with a weight of at least 140 lb (300 gsm). This type of paper has a slight texture that is very forgiving and perfect for beginners. While 100% cotton paper, like Arches, is considered the highest quality because it dries evenly and holds water well, more budget-friendly student-grade options from brands like Canson or Strathmore are excellent for practice.
Paints: Pans vs. Tubes
Watercolor paints come in two primary forms: pans (small cakes of dried paint) and tubes (thick, paste-like paint). Pan sets are often recommended for beginners because they are portable, easy to use, and a great way to get a wide range of colors affordably. Tube paints are more concentrated and can be used to mix larger quantities of a specific color, which is useful for creating washes. For a first set, a pan with 12-24 colors or a small introductory set of tubes from brands like Winsor & Newton Cotman or Kuretake Gansai Tambi will provide a fantastic starting palette.
Brushes: Your Primary Tool
You don't need a vast collection of brushes to start. In fact, one or two versatile brushes are all you truly need. A round brush in a size 6 or 8 is incredibly versatile, capable of creating both broad strokes and fine details. A larger flat brush is also useful for applying even washes over large areas. While traditional sable brushes are prized, modern synthetic brushes from brands like Princeton or Silver Black Velvet offer excellent performance and durability at a more accessible price point.
Setting Up Your Creative Space
Once you have your core materials, you'll need a few additional items to create an efficient and enjoyable painting environment. A well-organized workspace can make the creative process much smoother.
Water Containers and Palette
You will need at least two jars for water: one for rinsing your brushes and one for clean water to mix with your paints. This prevents your colors from becoming muddy. Mason jars work well for this purpose. If you're using tube paints, you'll need a palette for mixing. A simple ceramic plate can work perfectly, but plastic palettes with wells are also a great option.
Auxiliary Tools
Keep a roll of paper towels or a natural sponge on hand. These are indispensable for blotting excess water from your brush, lifting color from the paper to correct mistakes, and creating texture. Masking tape is useful for securing your paper to a board or surface, which helps prevent buckling as it dries. You might also want a simple graphite pencil for light sketches before you begin painting. Finally, having a board to prop your paper on at a slight angle can help gravity assist in creating smooth, even washes.
Understanding the Heart of Watercolor: Water and Pigment Control
The defining characteristic of watercolor is its transparency, a quality achieved through the delicate balance of water and pigment. Mastering this relationship, often referred to as "water control," is the most fundamental skill a beginner can develop. It dictates the value (lightness or darkness) of your colors, how they blend on the paper, and the texture of your brushstrokes. Every other technique is built upon this core concept.
The Pigment-to-Water Ratio Explained
Think of your paint consistency in terms of beverages: the more water you add, the lighter and more transparent the color becomes, like tea. With less water, the color is more vibrant and opaque, like cream.
Creating Light, Medium, and Dark Values
Practicing the creation of different values with a single color is an excellent exercise. To do this, start by squeezing a bit of paint onto your palette.
- Dark Value (Cream Consistency): Dip a damp (not soaking) brush into the pigment and mix it on your palette with very little water. The paint should feel thick and glide onto the paper with rich, vibrant color.
- Medium Value (Milk Consistency): Add a couple of drops of water to your dark value mix. The paint will become more fluid and slightly more transparent. This is a versatile consistency for many applications.
- Light Value (Tea/Coffee Consistency): Add significantly more water to your mix. The color will become very transparent, allowing the white of the paper to shine through, creating a light, luminous wash.
Understanding these ratios is key because watercolor painting traditionally works from light to dark. You preserve the white of the paper for your highlights and gradually build up layers of color to create depth and shadow.
Your Workspace and Water Management
Your physical setup plays a direct role in how you manage water control. As mentioned, having two separate water containers is crucial. One jar is for rinsing pigment from your brushes, and it will quickly become dirty. The second jar should contain clean water used exclusively for mixing with paints on your palette or for wetting the paper. This simple practice prevents colors from becoming dull and muddy.
Furthermore, the state of your brush is paramount. A brush fully saturated with water will deliver a very different result than a damp brush. Get into the habit of controlling the amount of water in your brush by gently tapping it on the side of your water jar or dabbing it on a paper towel after rinsing. This gives you precise control over how much water you introduce to either your palette or your paper. Experimenting with these variables through simple exercises will build your intuitive understanding of how water and pigment behave together.
Mastering Foundational Techniques: The Four Essential Washes
In watercolor, a "wash" is a layer of paint applied to the paper, typically over a broad area. Your ability to lay down smooth, controlled washes is the bedrock upon which all other skills are built. By mastering a few key wash techniques, you'll be able to create backgrounds, establish initial color fields, and build layers with confidence. We will explore the four most essential types: the Flat Wash, the Graduated Wash, the Wet-on-Wet technique, and the Wet-on-Dry technique.
The Flat Wash: Creating a Smooth, Even Layer of Color
A flat wash is a single, uniform layer of color that covers a specific area of the paper. It's perfect for painting skies, backgrounds, or any area that requires a consistent tone.
Step-by-Step Guide to a Flat Wash
- Prepare Your Color: Mix a generous puddle of your chosen color on your palette. It's better to have too much paint mixed than to run out midway through the wash.
- Tilt Your Surface: Prop up your paper or board at a slight incline (around 15-30 degrees). This allows gravity to help pull the paint downwards evenly.
- Load Your Brush: Use a large brush and fully load it with your paint mixture.
- Apply the First Stroke: Starting at the top of the area you want to cover, make a smooth, horizontal stroke across the paper. You should see a small bead of excess paint form at the bottom of this stroke.
- Continue Downward: Load your brush again and make a second horizontal stroke that slightly overlaps the first, picking up the bead of paint and carrying it downward. Continue this process, moving steadily down the page until the entire area is covered.
- Soak Up the Excess: Once you've reached the bottom, use a clean, damp (not wet) brush to gently soak up the final bead of paint to prevent a dark line from forming as it dries.
The Graduated Wash: Transitioning from Dark to Light
A graduated wash, also known as a gradient wash, is a wash that transitions smoothly from a dark value to a light value of a single color. This technique is invaluable for creating realistic skies that are darker overhead and lighter at the horizon.
How to Create a Graduated Wash
- Begin Like a Flat Wash: Start by mixing your color and tilting your board. Apply the first one or two strokes with the full-strength pigment, just as you would for a flat wash.
- Introduce Water: For the next stroke, dip your brush in your clean water jar to slightly dilute the paint on the brush, then make your next overlapping stroke.
- Continue Diluting: Repeat this process for each subsequent stroke. With each new line, add a little more clean water to your brush, gradually lightening the color.
- Finish Light: Continue until the color fades into a very light tint or even clear water at the bottom. As with the flat wash, soak up any excess bead of moisture at the end.
Wet-on-Wet: Embracing Spontaneity and Soft Edges
The wet-on-wet technique involves applying wet paint onto paper that is already wet. This is where the magic of watercolor truly shines, creating beautiful, soft-edged blends and unpredictable blooms of color. It's ideal for painting loose backgrounds, clouds, or achieving a dreamy, ethereal effect.
Exploring the Wet-on-Wet Technique
- Prepare the Paper: Using a large, clean brush, wet the area of the paper where you want to paint with clear water. The paper should have an even sheen, but not be so wet that there are puddles.
- Apply the Paint: Load your brush with color and simply touch it to the wet paper. Watch as the pigment blossoms and spreads across the wet surface.
- Introduce More Colors: While the area is still wet, you can introduce other colors. Drop a second color next to or into the first and watch them mingle and blend on their own. Tilting the paper can help guide the flow of the colors.
- Let It Be: A key to successful wet-on-wet painting is knowing when to stop. Overworking the area can lead to muddy colors. Let the water and pigments do their work and embrace the "happy accidents" that occur.
Wet-on-Dry: Achieving Crisp Edges and Detail
In contrast to the soft diffusion of wet-on-wet, the wet-on-dry technique involves applying wet paint onto dry paper (or a previously painted layer that has completely dried). This method provides maximum control and creates sharp, clean edges. It is the go-to technique for painting details, defined shapes, and layering colors.
Utilizing the Wet-on-Dry Technique
- Ensure a Dry Surface: Make sure your paper is completely dry before you begin. If you are layering, be patient and allow the underlying wash to dry fully. A hairdryer on a low setting can speed this up.
- Load Your Brush: Mix your desired color and consistency on your palette and load your brush.
- Paint with Precision: Apply the paint directly to the dry paper. The color will stay exactly where you put it, resulting in a crisp, defined line or shape.
- Layering (Glazing): Wet-on-dry is the foundation of a technique called glazing, where you apply thin, transparent layers of color over previous dry layers. This allows you to build up rich, complex colors and create a sense of depth and luminosity. Remember to always work from light to dark.
Avoiding Common Pitfalls: Tips for a Better Painting Experience
Every beginner encounters challenges, but being aware of common mistakes can significantly shorten the learning curve. Watercolor is a medium that rewards patience and planning. By understanding how to avoid a few frequent missteps, you can prevent frustration and create a more enjoyable and successful painting practice.
Mistake 1: Overworking the Painting
One of the most common temptations for beginners is to endlessly fiddle with a painting, adding more strokes and layers in an attempt to "fix" it. This almost always leads to a dull, muddy result, stripping away the fresh, spontaneous quality that makes watercolor so beautiful.
How to Avoid It
- Plan Ahead: Before you start, have a basic idea of your light, mid-tone, and dark areas. This helps you approach the painting with more confidence.
- Trust Your Brushstrokes: Try to apply your strokes deliberately and then leave them alone. Let the water and pigment do their work.
- Use Larger Brushes: Working with a brush that is slightly larger than you think you need can prevent you from fussing over tiny, unnecessary details.
- Step Back: If you feel the urge to overwork an area, walk away for a few minutes. When you return with fresh eyes, you may find the "imperfection" is actually a unique and beautiful part of the piece.
Mistake 2: Not Letting Layers Dry Completely
Impatience is the enemy of clean watercolor layers. Painting a new layer on top of a still-damp one will cause the colors to bleed together uncontrollably, and you will lose the crisp edges you might have been aiming for with the wet-on-dry technique.
How to Avoid It
- Be Patient: The simplest solution is to wait. Depending on the humidity and how much water you used, this could take anywhere from a few minutes to an hour.
- Use a Hairdryer: If you're short on time, a hairdryer on a low, warm setting can significantly speed up the drying process. Hold it at a distance to avoid pushing the wet paint around.
- Work on Multiple Areas: You can work on one section of your painting while another section is drying, making your process more efficient.
Mistake 3: Creating "Muddy" Colors
Muddy colors happen when too many pigments are mixed together on the paper or palette, resulting in a dull, brownish, or grayish tone. This often occurs from overworking, not changing rinse water, or poor color mixing choices.
How to Avoid It
- Keep Your Water Clean: As emphasized before, use two water jars—one for rinsing and one for mixing. Change your rinse water frequently, especially when switching between color families.
- Limit Your Palette: When starting a painting, try to work with a limited number of colors (e.g., three to five). This encourages more harmonious color mixing.
- Understand Layering: When glazing (layering transparent colors), be mindful of how the colors will interact. For example, layering complementary colors (like red and green) can create neutrals, but if overmixed, can lead to mud.
- Let It Be: Sometimes a bleed or blend doesn't go as planned. Instead of trying to scrub it away (which damages the paper and makes things worse), try to incorporate it into the painting or lift the color gently while it's still wet with a clean, damp brush or paper towel.
By keeping these tips in mind, you can navigate the early stages of your watercolor journey with greater ease and focus on the joy of creating.
Conclusion: Embracing the Journey of Watercolor Painting
Embarking on the path to learning watercolor is a journey filled with discovery, happy accidents, and immense creative satisfaction. We have walked through the essential first steps, from selecting the foundational trio of paper, paints, and brushes to organizing an efficient workspace. You are now equipped with the core knowledge of watercolor basics, understanding that the delicate dance between water and pigment is the heart of this medium. By practicing the creation of different values, you have learned to control the very essence of watercolor's luminous character.
The foundational techniques—the smooth consistency of a flat wash, the beautiful transition of a graduated wash, the spontaneous blending of wet-on-wet, and the crisp precision of wet-on-dry—are now part of your artistic vocabulary. These are the building blocks from which all of your future creations will grow. Remember, too, the common pitfalls to avoid: resist the urge to overwork your paintings, exercise patience by allowing layers to dry, and keep your colors vibrant by managing your water and palette. The most important takeaway is to embrace the process. Watercolor is a conversation between you, the paint, and the paper. There will be unexpected moments and learning opportunities in every brushstroke. Pick up your brush, be bold, and start painting.