Food & Cooking
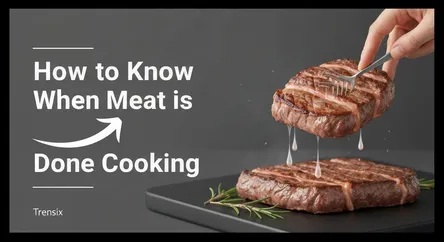
How to Know When Meat is Done Cooking
# How to Know When Meat is Done Cooking: A Guide to Using a Thermometer and Visual Cues for Doneness That pivotal question—"is it done yet?"—is one e...
How to Know When Meat is Done Cooking: A Guide to Using a Thermometer and Visual Cues for Doneness
That pivotal question—"is it done yet?"—is one every home cook faces. Whether you're grilling a thick-cut steak, roasting a whole chicken, or pan-searing a delicate piece of fish, knowing precisely when your meat is perfectly cooked is the key to a delicious and, most importantly, safe meal. Undercook your meat, and you risk foodborne illness; overcook it, and you're left with a dry, tough, and flavorless disappointment. This guide is your comprehensive resource for mastering the art and science of meat doneness. We'll demystify the process, moving beyond guesswork and old wives' tales to give you the confidence to cook any cut of meat to perfection every single time.
You will learn why a digital meat thermometer is the single most important tool in your kitchen for guaranteeing food safety and achieving your desired level of doneness, from rare to well-done. We will explore how to use a thermometer correctly for various cuts, from a hefty pork shoulder to a thin chicken breast. But we won't stop there. While a thermometer provides the ultimate accuracy, a skilled cook also understands the subtle visual and textural cues that meat provides as it cooks. This guide will teach you how to read the signs: the color of the juices, the firmness of the flesh, and the overall appearance. By combining the precision of a thermometer with the nuanced understanding of visual cues, you will elevate your cooking, ensuring that every piece of meat you prepare is not only safe to eat but also incredibly juicy, tender, and flavorful. Say goodbye to uncertainty and hello to consistent, delicious results.
The Unrivaled Importance of a Meat Thermometer
While experienced chefs often develop a "feel" for doneness, the only truly reliable and safe method for determining when meat is done is by using a food thermometer. This simple tool removes all guesswork, ensuring that your meat has reached a high enough internal temperature to destroy harmful bacteria like Salmonella and E. coli. Relying solely on cooking time, color, or the clarity of juices can be dangerously misleading. For example, research from the USDA has shown that one in four hamburgers turns brown before reaching the safe internal temperature of 160°F (71°C). Factors like the meat's pH and fat content can affect its color, making visual cues alone an unreliable indicator of safety. Using a thermometer is the only way to be certain.
Choosing the Right Thermometer
Investing in a quality digital instant-read thermometer is one of the best decisions a home cook can make. These devices provide a fast and accurate temperature reading, taking the stress out of the final moments of cooking.
Types of Meat Thermometers
- Digital Instant-Read Thermometers: These are highly recommended for their speed and accuracy. They aren't meant to be left in the meat during cooking but are used to check the temperature towards the end of the cooking time. Some models have very thin probes, making them ideal for thinner cuts of meat.
- Dial Oven-Safe Thermometers: These can be inserted into the meat before cooking and remain in the oven, allowing you to monitor the temperature without opening the oven door. However, they can be slower to register the temperature and may be less accurate than their digital counterparts.
- Leave-In Probe Thermometers: These offer the best of both worlds. A probe is inserted into the meat and connected by a heat-safe cord to a digital display unit that sits outside the oven or grill. Many come with programmable alarms that alert you when the target temperature is reached, preventing overcooking.
How to Use a Meat Thermometer Correctly
Proper placement of the thermometer probe is crucial for an accurate reading. The goal is to measure the temperature at the very center of the thickest part of the meat, as this will be the last area to cook through.
Step-by-Step Insertion Guide
- Identify the Thickest Part: For roasts, whole poultry, or thick chops, visually identify the thickest section of the meat.
- Avoid Bone and Gristle: Bone and fat heat up at a different rate than the muscle tissue and can give you a false reading. Always insert the probe into the flesh, making sure it doesn't touch any bone.
- Insert to the Center: For thick cuts like roasts or a whole chicken, insert the thermometer into the thickest part until the tip is in the center. For a whole bird, the best place to check is the innermost part of the thigh, near the breast, without touching the bone.
- For Thinner Cuts: For thinner items like steaks, pork chops, or hamburger patties, it's often more effective to insert the thermometer horizontally from the side. This helps ensure the sensor is fully embedded in the center of the meat.
- Wait for the Reading: Allow the thermometer a few seconds to stabilize and provide a final temperature. With an instant-read model, this should only take a moment.
By consistently using a thermometer and following these placement guidelines, you can guarantee that your meat is cooked to a safe temperature every time, providing peace of mind and delicious results.
Mastering Doneness for Different Meats: Temperature is Key
The ideal internal temperature for doneness varies significantly depending on the type of meat and the desired outcome. The USDA provides safe minimum internal temperature guidelines that are essential for preventing foodborne illness. However, for certain cuts, particularly beef and lamb, personal preference for doneness (from rare to well-done) also plays a major role. It's also critical to understand the concept of "rest time."
The Importance of Resting Your Meat
For whole cuts of meat like steaks, roasts, and chops, it's recommended to let the meat rest for at least three minutes after removing it from the heat source. During this rest period, two important things happen. First, the internal temperature continues to rise by a few degrees—a phenomenon known as "carryover cooking." This rise helps to destroy any remaining harmful bacteria. Second, resting allows the juices, which have been driven to the center of the meat by the heat, to redistribute throughout the cut. Slicing into meat immediately after cooking will cause these flavorful juices to spill out, resulting in a drier final product.
Beef, Lamb, and Veal: From Rare to Well-Done
For whole cuts of beef, lamb, and veal (steaks, roasts, and chops), the USDA recommends a minimum internal temperature of 145°F (63°C), followed by a three-minute rest. This will result in a medium-well to well-done steak. However, many people prefer their meat cooked to a lesser degree of doneness for enhanced flavor and tenderness.
Temperature Guide for Steaks and Roasts:
- Rare: 120-125°F (49-52°C) - A deep red center that is cool to warm.
- Medium-Rare: 130-135°F (54-57°C) - A warm, red center with pink edges. This is often considered the ideal for flavor and juiciness.
- Medium: 140-145°F (60-63°C) - A fully warm pink center.
- Medium-Well: 150-155°F (65-68°C) - A slightly pink center.
- Well-Done: 160°F (71°C) and above - Uniformly brown or gray throughout with no pink.
For ground beef, lamb, and veal, the rules are different. The grinding process can introduce surface bacteria into the center of the meat. Therefore, ground meats must be cooked to a higher internal temperature of 160°F (71°C) to ensure safety.
Poultry (Chicken and Turkey): Safety First
When it comes to poultry, there is no room for error. All poultry—including whole birds, breasts, thighs, wings, and ground products—must reach a safe minimum internal temperature of 165°F (74°C).
Tips for Perfectly Cooked Poultry:
- Check Multiple Spots: When cooking a whole bird, check the temperature in the thickest part of the breast and the innermost part of the thigh and wing.
- Dark Meat vs. White Meat: While the safe temperature is 165°F, dark meat (thighs and legs) contains more connective tissue and often has a better texture when cooked to a higher temperature, around 175°F to 180°F. This higher heat helps break down the collagen, resulting in more tender meat.
- Avoid Overcooking Breasts: Chicken breasts are very lean and can dry out quickly. Use your thermometer diligently and pull them from the heat as soon as they reach 165°F (or slightly below, allowing for carryover cooking).
Pork: The New Standard of Safety
Guidelines for cooking pork have evolved. Thanks to improved farming practices, the risks associated with undercooked pork have significantly decreased. The USDA has updated its recommendation for whole cuts of pork (chops, roasts, tenderloin) to a minimum internal temperature of 145°F (63°C), followed by a three-minute rest period. This temperature yields a juicy, tender, and slightly pink center, which is a significant improvement over the dry, overcooked pork of the past.
Pork Temperature Guidelines:
- Chops, Roasts, and Tenderloin: 145°F (63°C) for medium-rare, or up to 160°F (71°C) for medium.
- Ground Pork: Just like other ground meats, ground pork and sausage should always be cooked to 160°F (71°C).
- Ribs and Shoulder: For tougher cuts with a lot of connective tissue, like pork shoulder for pulled pork or ribs, you'll want to cook them to a much higher internal temperature (often 195-205°F or 90-96°C). This extended cooking at a low temperature breaks down collagen into gelatin, making the meat exceptionally tender.
Fish and Seafood: A Delicate Balance
Fish cooks very quickly and can go from perfectly cooked to dry and overdone in a matter of moments. The general rule of thumb is to cook fish to an internal temperature of 145°F (63°C).
How to Tell When Fish is Done:
- Use a Thermometer: For the most accurate result, insert a thermometer into the thickest part of the fillet.
- The Fork Test: A reliable visual cue is the "fork test." Insert a fork at an angle into the thickest point and twist gently. The fish should flake easily and lose its raw, translucent appearance, becoming opaque.
- Color Change: As fish cooks, its appearance will change from translucent and shiny to solid and opaque. Cod will become solid white, while salmon will turn a lighter pink.
Beyond the Thermometer: Using Visual and Tactile Cues
While a thermometer is the gold standard for safety and precision, learning to read the meat's visual and tactile signals can enhance your cooking intuition. These methods are best used as secondary checks in conjunction with a thermometer, especially as you gain experience.
Judging Doneness by Color and Juices
The color of the meat and its juices has long been used as an indicator of doneness. However, as noted earlier, this can be unreliable for safety, but it's a useful guide for preference, particularly with steaks.
Steak Color Guide:
- Rare: A deep red center with red juices.
- Medium-Rare: A warm red center with light pink or reddish juices.
- Medium: A hot pink center with slightly pink to clear juices.
- Medium-Well: Only a hint of pink remains in the center, and the juices should be mostly clear.
- Well-Done: No pink color remains; the meat is brown or gray throughout, and the juices run clear.
For poultry, a common check is to pierce the thickest part of the thigh. If the juices that run out are clear, it's generally considered cooked. If they are reddish or pink, it needs more time. However, this should always be confirmed with a thermometer reading of 165°F.
The Touch Test: Gauging Firmness
Experienced grill masters and chefs often use the "touch test" to gauge the doneness of a steak. This method involves comparing the firmness of the cooked meat to the firmness of the fleshy part of your hand at the base of your thumb. While this technique requires practice to master, it can be a useful, quick assessment.
The Hand/Finger Test for Steak Doneness:
- Relax Your Hand: Open your non-dominant hand and relax it.
- Rare: With your hand relaxed, press the fleshy area below your thumb. This soft, squishy feel is comparable to a rare steak.
- Medium-Rare: Gently touch the tip of your index finger to the tip of your thumb. The fleshy area below the thumb will tense up slightly. This is the feel of a medium-rare steak.
- Medium: Now, touch your middle finger to your thumb. The muscle will be firmer, similar to a medium steak.
- Medium-Well: Press your ring finger to your thumb. The area will feel firmer still, indicating medium-well.
- Well-Done: Finally, touch your pinky finger to your thumb. The muscle will be very firm, which corresponds to a well-done steak.
This method is subjective and varies from person to person, so it should be used as a supplementary guide rather than a primary method. Always confirm with a thermometer for the most accurate and safe results.
Conclusion
Mastering the art of cooking meat to perfection is a journey of both science and sense. The most critical lesson is that a digital meat thermometer is an indispensable tool, offering the only foolproof method to guarantee food safety and achieve your desired level of doneness. By understanding and utilizing the correct internal temperatures for different types of meat—from the crucial 165°F for all poultry to the versatile 145°F for pork chops and the customizable range for a perfect steak—you remove the guesswork and ensure consistently delicious results.
Beyond the numbers, this guide has equipped you with the ability to read the subtle cues the meat provides. You've learned to observe the change in color and juices, to understand the importance of carryover cooking during a proper rest, and even to gauge firmness with the classic touch test. By combining the unwavering accuracy of a thermometer with a developed intuition for these visual and tactile signals, you will gain complete control over your cooking. No longer will you need to wonder, "Is it done yet?" You will know, with confidence, every single time. The result will be perfectly cooked, succulent, and safe meat that will impress your family and friends and bring immense satisfaction to your culinary endeavors.