Home & DIY
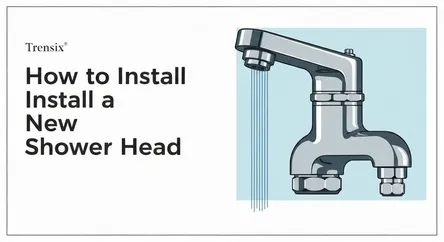
How to Install a New Shower Head
# How to Install a New Shower Head: A 15-Minute Upgrade for a Better Shower Experience Is your morning shower less of a refreshing cascade and more o...
How to Install a New Shower Head: A 15-Minute Upgrade for a Better Shower Experience
Is your morning shower less of a refreshing cascade and more of a disappointing drizzle? Do you find yourself battling with a fixture that sprays water everywhere except where you want it to go? Before you resign yourself to another lackluster shower, consider this: you are likely less than 15 minutes away from a completely revitalized experience. Installing a new shower head is one of the simplest, most affordable, and impactful DIY home improvement projects you can undertake. It requires minimal tools, no special skills, and the payoff is immediate. That weak stream can be transformed into a powerful, massaging spray or a gentle, spa-like rainfall, fundamentally changing how you start and end your day.
This comprehensive guide is designed to empower you to confidently install a shower head on your own. We will walk you through every single step, from selecting the right fixture for your needs to the final polish of your new installation. You will learn the correct way to remove your old, tired shower head without damaging your plumbing, a crucial yet often overlooked preparation step that guarantees a leak-free seal, and the professional technique for applying plumber's tape. We’ll also cover how to handle common troubleshooting issues, such as a stubborn leak or lower-than-expected water pressure. Whether you're a seasoned DIYer or someone who has never picked up a wrench, this guide will provide you with the knowledge and confidence to complete this simple upgrade. Forget calling a plumber and paying for a service call; this is one home improvement task you can absolutely conquer yourself.
Section 1: Why Upgrading Your Shower Head is a Game-Changer
Before we dive into the nuts and bolts of the installation process, it's worth taking a moment to appreciate why this quick task is so beneficial. Swapping out your shower head is more than just a simple repair; it's an upgrade to your home and your daily wellness routine. The right shower head can dramatically improve your shower's performance, conserve resources, and add a touch of luxury to your bathroom.
Boosting Water Pressure and Performance
One of the most common reasons people decide to install a new shower head is to fix low water pressure. Over time, shower heads can become clogged with mineral deposits like calcium and lime, especially in areas with hard water. These deposits obstruct the small nozzles, leading to a weak, uneven spray. While you can sometimes clean these fixtures, a new model often provides a much more significant and immediate improvement. Modern shower heads are engineered with technologies designed to optimize water flow, creating the feeling of higher pressure even while adhering to water conservation standards. By choosing a model designed for performance, you can transform a frustrating trickle into an invigorating, high-pressure stream.
Conserving Water and Saving Money
An old, inefficient shower head can waste a surprising amount of water and energy. Showering accounts for a significant portion of a household's water usage. By upgrading to a modern, water-efficient model, you can substantially reduce your consumption without sacrificing performance. Look for fixtures with the WaterSense label, an EPA certification that ensures the shower head uses at least 20% less water than standard models. This simple switch can save the average family thousands of gallons of water per year, which translates directly into lower utility bills for both water and the energy used to heat it. It's an environmentally responsible upgrade that pays for itself over time.
Enhancing Your Shower Experience
Beyond pure functionality, a new shower head can introduce a level of luxury and customization to your daily routine. The market is filled with a diverse range of options designed to cater to every preference.
Types of Shower Experiences:
- Rainfall Shower Heads: These large, wide-faced heads mimic the feeling of a gentle summer rain, offering a soothing and relaxing experience.
- Handheld Shower Heads: Offering ultimate flexibility, handheld models are perfect for rinsing hair, washing pets, and cleaning the shower enclosure itself.
- Dual-Head Systems: Why choose? These systems combine a fixed shower head with a handheld wand, giving you the best of both worlds.
- Massaging and Multi-Function Heads: Many models come with multiple spray settings, from a powerful, targeted massage jet to a light, aerated mist, allowing you to tailor your shower to your mood or needs.
Section 2: Gathering Your Tools and Materials
One of the best aspects of this project is how few tools you actually need. You likely already have everything required sitting in a toolbox or kitchen drawer. Before you start, take a minute to gather these items to ensure the process is as smooth and efficient as possible. Having everything within arm's reach prevents you from having to stop mid-project.
Essential Tools
You don't need a professional plumber's toolkit to install a shower head. The list is short and simple, but each item plays a key role in getting the job done right and protecting your fixtures.
Adjustable Wrench or Channel-Lock Pliers
This will be your primary tool for loosening the old shower head and giving the new one its final turn. An 8-inch or 10-inch adjustable wrench is ideal. If you don't have one, a pair of channel-lock pliers will also work perfectly. The key is to have a tool that can grip the base of the shower head securely.
Soft Cloth or Rag
This is a simple but crucial item. You will use the cloth for two purposes. First, you'll wrap it around the base of the old shower head and the new one when using your wrench. This protects the finish from being scratched or damaged by the metal teeth of your tool. Chrome, brushed nickel, and matte black finishes are particularly susceptible to scratches, and this simple precaution keeps your new fixture looking pristine. Second, you'll use it for cleaning up any water drips or old residue.
Necessary Materials
Besides the new shower head itself, there is one critical material you must have on hand. Do not attempt the installation without it, as it's the secret to a leak-free connection.
Plumber's Tape (Teflon Tape)
Also known as thread seal tape or Teflon tape, this thin white tape is essential for creating a watertight seal between the shower arm and the new shower head. It works by filling the microscopic gaps in the threads, preventing water from seeping out. A single roll is inexpensive and can be found at any hardware or home improvement store. Ensure you have a fresh roll; old, brittle tape won't create a proper seal.
The New Shower Head
Of course, you'll need your new shower head. Unbox it and quickly inspect the contents. Ensure all parts are present, including any small rubber washers or screens that are meant to be pre-inserted into the connector. Read the manufacturer's specific instructions, as some models may have a unique requirement or feature not covered in a general guide.
Section 3: The Step-by-Step Installation Guide
With your tools and materials ready, it's time to begin. This process is straightforward and should take no more than 15 minutes. We've broken it down into a few simple steps. Follow them in order to ensure a successful, leak-free shower head installation.
Step 1: Prepare Your Workspace
A little preparation makes the entire process smoother and safer. First, lay an old towel or a thick cloth over the floor of your shower or bathtub. This serves two important functions: it protects the surface from accidental scratches if you drop a tool, and it will plug the drain, preventing any small parts, like a rubber washer or chunks of old plumber's tape, from falling in and causing a clog. You generally do not need to turn off the main water supply to your house for this project, as the shower valve itself acts as the shut-off. Just ensure the shower faucet is turned completely off.
Step 2: Remove the Old Shower Head
This is often the most physically demanding part of the job, especially if the old fixture has been in place for years and is sealed with mineral deposits.
The Removal Process
- Try by Hand First: Attempt to unscrew the shower head by hand. Grip the connecting nut at the base of the head and turn it counter-clockwise (remember: righty-tighty, lefty-loosey). Sometimes, you'll get lucky and it will come off without any tools.
- Use Your Wrench: If it's stuck, grab your adjustable wrench or pliers and the soft cloth. Wrap the cloth around the connecting nut to protect the finish. Adjust your wrench to get a snug fit on the nut and turn it counter-clockwise with steady, firm pressure. Avoid yanking or jerking, as this could put stress on the plumbing inside the wall. The initial "break" is the hardest part; once it moves, it should unscrew easily by hand.
- Unscrew and Remove: Continue turning until the old shower head is completely detached from the shower arm (the pipe extending from the wall). Be prepared for a small amount of residual water to drip out of the arm.
Step 3: Clean and Prep the Shower Arm Threads
This is the most critical step for ensuring a perfect, leak-free seal, and it's one that many people skip. The threads on the shower arm must be completely clean before you install the new shower head. Over time, old plumber's tape, pipe dope, and mineral deposits build up in the threads.
Cleaning the Threads
- Peel off Old Tape: Use your fingernail or a small utility knife blade (carefully!) to peel away all remnants of the old plumber's tape. It will likely be brittle and come off in small pieces.
- Scrub the Threads: Use an old toothbrush or a small wire brush to vigorously scrub the threads. This will remove any remaining residue and mineral buildup.
- Wipe it Clean: Once you've scrubbed the threads, use your cloth to wipe them clean and dry. They should look shiny and be free of any debris. A clean, smooth surface is essential for the new tape to adhere properly.
Step 4: Apply New Plumber's Tape (The Right Way)
Applying plumber's tape correctly is an art, but it's an easy one to master. The direction in which you wrap the tape is extremely important.
The Clockwise Wrap
- Hold the Tape: Hold the roll of plumber's tape in one hand and the end of the tape against the threads with your thumb.
- Wrap Clockwise: Begin wrapping the tape over the threads in a clockwise direction. This is crucial. When you screw on the new shower head (which also turns clockwise), this motion will tighten the tape into the threads rather than unraveling it.
- Stretch and Overlap: Apply slight tension to the tape as you wrap, so it conforms tightly into the threads. Overlap the tape by about half its width with each rotation.
- Cover the Threads: Make three to four complete revolutions around the shower arm. You want to cover all the threads but not use an excessive amount of tape, as this can prevent the new head from screwing on properly. Once done, snap the tape from the roll and press the loose end smoothly against the threads.
Step 5: Install the New Shower Head
Now for the satisfying final step. With the shower arm prepped, you're ready to attach your new fixture.
- Check for the Washer: Look inside the connector of your new shower head. There should be a small rubber washer or o-ring inside. This is a primary seal, so make sure it's there and seated properly.
- Hand-Tighten First: Carefully align the new shower head with the threads on the shower arm and begin screwing it on by hand in a clockwise direction. It should turn easily. If you feel resistance, stop, back it off, and try again to avoid cross-threading. Hand-tighten it as much as you can. For many plastic-bodied shower heads, hand-tight is sufficient.
- Final Turn with a Wrench: For metal fixtures, or if the instructions specify, give it a final tightening with your wrench. Place the soft cloth over the connector nut to protect the finish. Grip it with your wrench and give it about a one-quarter to one-half turn more. Do not over-tighten! Over-tightening can crack the plastic connector on the shower head or damage the threads on the shower arm, leading to major leaks and costly repairs. The goal is snug, not strained.
Step 6: Check for Leaks
Turn on the water and observe the connection point between the shower head and the shower arm. Check for any drips or spraying water. Let the water run for a minute to test the seal under full pressure. If you see no leaks, you have successfully completed the installation. If you do see a small drip, don't panic. Turn the water off, use your wrench and cloth to give the connection a slight extra quarter-turn, and test again. If it still leaks, you may need to unscrew the head and re-wrap the threads with plumber's tape.
Section 4: Troubleshooting Common Installation Problems
While installing a shower head is usually a trouble-free process, you might occasionally run into a minor hiccup. Here’s how to solve the most common issues without having to call in a professional.
Issue 1: A Persistent Drip or Leak at the Connection
You've tightened the new shower head, turned on the water, and you see a frustrating little drip coming from where the head meets the shower arm.
Potential Causes and Solutions:
- Insufficient Tightening: The most common cause is simply not getting the connection quite snug enough. Turn off the water, and using your cloth and wrench, give the shower head another gentle quarter-turn. Be careful not to apply excessive force.
- Improper Taping: The leak may be due to the plumber's tape. If a gentle tightening doesn't work, the best solution is to start over with the tape. Unscrew the shower head completely. Remove all of the new tape you just applied and thoroughly clean the threads again. Re-apply fresh plumber's tape, ensuring you are wrapping it clockwise and getting 3-4 tight, overlapping wraps. This solves the problem 90% of the time.
- Missing or Damaged Washer: Double-check that the rubber washer/o-ring is properly seated inside the shower head's connector. If it fell out during installation or was missing from the packaging, it will not seal correctly. If it appears cracked or damaged, you may need to find a replacement at your local hardware store.
Issue 2: Low Water Pressure After Installation
You installed a brand new shower head expecting a powerful spray, but instead, you're getting a weak flow. This is a common and usually easily remedied issue.
Potential Causes and Solutions:
- Flow Restrictor: To comply with water conservation regulations, almost all new shower heads come with a flow restrictor pre-installed. This is a small plastic or rubber disc, often brightly colored, that sits deep inside the connector. While it saves water, it can sometimes result in a less-than-satisfying pressure. You can often remove this with a pair of needle-nose pliers or a small screwdriver. Important: Check your local building codes and regulations before removing it, as it may be required in your area.
- Debris in the Line: The process of removing the old head and installing the new one can sometimes dislodge sediment or bits of old tape inside the shower arm. This debris can then get caught in the filter screen of your new shower head, immediately clogging it. Unscrew the new head, and inspect the screen inside the connector. If you see any debris, rinse it out under a faucet and reinstall the head.
Conclusion
Congratulations! In just a few simple steps and likely less than 15 minutes, you have successfully completed a home improvement project that you will appreciate every single day. By taking the time to install a new shower head, you've not only enhanced the look and feel of your bathroom but have also upgraded your daily routine with better water pressure and a more luxurious experience. You've learned how to properly remove an old fixture, the critical importance of cleaning the shower arm threads, and the professional technique for applying plumber's tape to create a perfect, leak-free seal.
This project proves that you don't need to be a professional plumber to make significant, positive changes in your home. Armed with just a few basic tools and the right knowledge, you have the power to fix common household annoyances and customize your space to better suit your needs. Now, all that's left to do is to turn on the water, step in, and enjoy the immediate reward of your handiwork with a powerful and refreshing shower.