Creative Skills
How to Draw Faces: A Proportions Guide
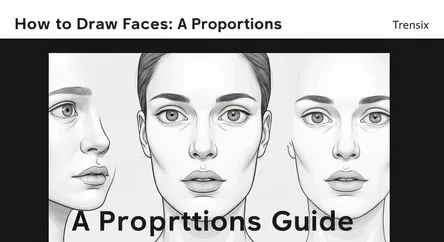
# How to Draw Faces: A Proportions Guide Drawing a human face is one of the most challenging yet rewarding endeavors an artist can undertake. It’s a...
How to Draw Faces: A Proportions Guide
Drawing a human face is one of the most challenging yet rewarding endeavors an artist can undertake. It’s a pursuit that combines technical skill with a deep sense of observation and connection. For many aspiring artists, the initial attempts at portraiture can be frustrating. You might meticulously draw an eye or a mouth that looks perfect in isolation, but when placed within the whole, something feels fundamentally "off." This common struggle almost always comes down to one crucial element: proportion. The human brain is incredibly adept at recognizing faces, and even the slightest inaccuracy in the placement or size of a feature can send a drawing tumbling into the "uncanny valley." This is where a clear understanding of facial proportions becomes not just helpful, but absolutely essential. Mastering these foundational rules is the key to unlocking your ability to create believable, lifelike, and compelling portraits.
This comprehensive guide is designed to demystify the process and provide you with a reliable, step-by-step framework for mapping the human face. We will move beyond vague tips and delve into a structured method, often referred to as the Loomis method in honor of the great artist and teacher Andrew Loomis, who codified these principles. You will learn how to start with a simple sphere and build upon it with logical guidelines that dictate the correct placement for the eyes, nose, mouth, ears, and hairline. This guide will teach you not just where to place these features, but why they belong there, giving you the confidence to draw faces from your imagination or from reference with greater accuracy and artistic freedom. By the end of this article, you will have a solid roadmap for how to draw faces, transforming that initial frustration into a feeling of empowerment and creative control.
Section 1: Understanding the Foundation: Basic Head Proportions
Before we can even think about drawing eyes or lips, we must first construct the stage on which they will sit: the human head. The biggest mistake beginners make is starting with the details. They'll pour all their effort into a single eye, only to realize it's in the wrong place or the wrong size relative to the rest of the head. To avoid this, we must work from the general to the specific. This means starting with the overall shape of the cranium and establishing the core guidelines that will ensure every feature has its proper home. Think of this initial stage as creating the architectural blueprint for your drawing. Without a solid foundation, the entire structure will be unstable. The techniques in this section are universal, forming the basis for drawing faces of any age, gender, or ethnicity. While individual features vary immensely, the underlying proportional relationships remain remarkably consistent.
The Basic Shape: The Cranium and Jaw
The first step in our journey of how to draw faces is to understand that the human head is not a perfect circle or a simple oval. It's a more complex structure composed of the cranium (the spherical part that houses the brain) and the jaw.
The Cranial Sphere
Forget drawing a flat oval for a moment. Start by drawing a simple circle or sphere. This represents the main mass of the cranium. Don't worry about making it perfect; a light, sketchy circle will do just fine. This sphere is the core of our structure. Now, imagine slicing off a small section from both sides of the sphere. This flattening of the sides represents the temporal area of the skull, preventing our head from looking like a cartoonish ball. The result should be a shape that is still mostly circular but has two subtly flattened vertical sides. This seemingly minor adjustment is the first step toward creating a more realistic, three-dimensional form.
Adding the Jaw
With the cranium established, we now need to add the lower half of the face. From the flattened sides of your sphere, draw two lines angling downwards and inwards, meeting at a point to form the chin. The shape of this jawline will dramatically influence the character of the face you are drawing. A wide, squared-off jaw can suggest strength or masculinity, while a softer, more rounded jaw can convey youth or femininity. For a basic, neutral face, aim for a gentle curve. The combination of your flattened sphere and this new jawline should now resemble an egg shape, but one that is slightly wider at the top and tapering towards the bottom. This is our foundational head shape, the canvas upon which we will map all the features.
Section 2: Placing the Core Features: Establishing Critical Guidelines
Now that we have our basic head shape, it's time to create the crucial map that will guide the placement of every feature. This is the most important part of learning how to draw faces correctly. These guidelines are the secret to achieving balance and realism. We will divide the face horizontally and vertically to create a grid that removes all the guesswork from the process.
The Center Lines: Establishing Symmetry and Placement
The first and most important lines you will draw on your head shape are the central axes. These two lines will serve as the primary reference points for everything that follows.
The Vertical Axis of Symmetry
Draw a single vertical line that runs straight down the middle of your egg shape, from the very top to the bottom of the chin. This line is your anchor for symmetry. It ensures that the features on the left side of the face are a mirror image of the features on the right. Unless you are drawing a face in a three-quarter or profile view, this line should perfectly bisect the face. It's the line that the center of the nose and the middle of the lips will rest upon.
The Horizontal Axis (Brow Line)
Next, find the exact halfway point of your entire head shape (from the top of the cranium to the bottom of the chin) and draw a horizontal line across it. This is arguably the most critical guideline in portrait drawing, and it's where many beginners make their first mistake. This central horizontal line is not the eye line. It is the brow line. The eyes themselves will actually sit just below this line. Placing the eyes directly on the center line is the most common reason why beginner drawings have foreheads that appear too short and cramped. By correctly identifying this line as the brow line, you have already taken a massive leap toward proportional accuracy.
Mapping the Rest of the Face
With our two primary axes in place, we can now subdivide the face further to find the locations for the nose and mouth.
Finding the Nose Line
Now, focus on the lower half of the face—the area from your horizontal brow line down to the bottom of the chin. Find the halfway point of this section and draw another horizontal line across the face. This new line marks the bottom of the nose. So, the rule is simple: the bottom of the nose is located halfway between the brow and the chin. You now have the face divided into three distinct zones: the hairline to the brow, the brow to the nose, and the nose to the chin. These three zones are roughly equal in height.
Finding the Mouth Line
Finally, we need to place the mouth. Look at the bottom section you just created, from the bottom of the nose to the chin. Divide this area into thirds. The line where the upper and lower lips meet will sit on the top third line, so it's about one-third of the way down from the nose to the chin. The remaining two-thirds make up the mass of the lower lip and the chin itself. This simple division prevents the mouth from being placed too low or too high, which is another common error.
Section 3: Placing and Sizing the Features
With our foundational grid meticulously mapped out, we can now confidently begin to place and size the individual features. The guidelines we have drawn will act as our infallible guide, ensuring everything fits together harmoniously. This is the stage where the personality of the face begins to emerge, and your understanding of how to draw faces will truly solidify.
Placing the Eyes: The Windows to the Soul
The eyes are often the focal point of a portrait, and their correct placement is paramount. Using our brow line as a guide, we can place them with precision.
The Eye Line and the Five-Eye Rule
As established, the eyes sit just below the brow line. The tops of the eyelids will often touch or be very close to this line. To determine the size and spacing of the eyes, we use a classic artistic rule: the width of the head at the eye level is approximately equal to the width of five eyes. This means the space between the two eyes is equal to the width of one eye. Similarly, the space from the outer corner of each eye to the side of the head is also equal to the width of one eye. Sketch in two almond shapes for the eyes on your eye line, making sure the gap between them is the same width as one of the eyes you've drawn. This rule is a game-changer for achieving a natural, balanced look and is a cornerstone of learning how to draw faces.
Locating the Nose: The Centerpiece
The nose can be a tricky feature, but our guidelines make its placement straightforward.
Using Your Guidelines for Width and Length
We already know the bottom of the nose rests on the horizontal line we drew halfway between the brow line and the chin. To determine its width, draw two faint vertical lines dropping down from the inner corners of each eye (the tear ducts). Where these lines intersect the nose line is where the nostrils will flare out to. This simple trick perfectly connects the eyes and the nose, ensuring they are scaled correctly relative to one another. You can then sketch a simple shape for the nose, indicating the ball at the tip and the wings of the nostrils.
Positioning the Mouth: Expression and Form
The mouth is the center of expression, and its placement completes the core trio of facial features.
Aligning the Mouth with the Eyes
We've already established that the line where the lips meet sits about one-third of the way down from the bottom of thenose to the chin. To find the width of the mouth, draw two faint vertical lines down from the center of each pupil. The corners of the mouth will generally end where they meet these lines. This is a general rule for a mouth in a neutral expression; a smiling mouth will be wider, and a puckered mouth will be narrower. But for a standard portrait, this alignment with the pupils is the perfect starting point.
Section 4: Refining the Structure: Jaw, Ears, and Hairline
With the eyes, nose, and mouth correctly placed, the face is truly taking shape. However, to complete the portrait, we must frame these features by defining the jaw, placing the ears, and establishing the hairline. These elements provide the complete structure of the head and are essential for a finished, believable drawing.
Shaping the Jaw and Chin
Our initial jawline was a simple placeholder. Now is the time to refine it. The jaw runs from just below the ear down to the chin. Observe how it connects. Does it curve gently, or is it more angular? Refining this shape adds immense character. The masseter muscle, used for chewing, creates a plane change on the side of the face as the jaw turns back towards the ear. Indicating this subtle shift from the front plane of the face to the side plane will add a significant amount of three-dimensional realism to your drawing.
Placing the Ears: An Often-Overlooked Feature
Ears are frequently misplaced or ignored by beginners, but they are crucial for anchoring the face. Luckily, their placement is directly related to the guidelines we've already drawn.
Vertical and Horizontal Placement
The ears fit neatly within the middle zone of the face. The top of the ear almost always aligns perfectly with the horizontal brow line. The bottom of the ear, where the lobe is, aligns with the horizontal line that marks the bottom of the nose. This simple rule is incredibly reliable. When viewing a face from the front, the ears will be positioned on the sides of the head, just behind the jawline. Getting the ears right provides a powerful sense of structure and completes the side profile of the head.
Establishing the Hairline
The final structural element to place is the hairline. This feature varies more than any other, but there is still a useful proportional guideline to start with.
Finding the Starting Point
Remember how we divided the face into three equal zones (chin to nose, nose to brow)? The final zone goes from the brow up to the hairline. The hairline typically starts about halfway between the brow line and the very top of the cranium we first drew. This marks the point where the forehead ends and the hair begins. From this central point, the hairline will sweep back in various shapes—a widow's peak, a rounded curve, or a receding line. This is just a starting point, and you should always adjust based on your reference, but it prevents the common mistake of making the forehead too short or too tall.
Conclusion
You have now journeyed through a complete, step-by-step process for constructing a proportionately accurate human face. We started with the fundamental structure of the cranium and jaw, established a reliable grid of guidelines, and used that grid to place every feature with confidence and precision. The core takeaways are simple yet powerful: the brow line is halfway down the head, the nose is halfway between the brow and chin, and the mouth is one-third of the way down from the nose. The head is five eyes wide, and the ears fit neatly between the brow line and the nose line.
Learning how to draw faces is not about magic or innate talent; it's about understanding these foundational principles. This proportional method is your key—a reliable tool you can use every single time you draw. Practice this method repeatedly. Draw the head shape and the guidelines over and over until you no longer need to think about them. Use it to draw from photos, from life, or from your imagination. While every face is unique, with endless variations in its features, this underlying structure of proportion is the universal truth that connects them all. By mastering it, you are no longer just copying what you see; you are building a face with an architect's understanding, giving you the power to create portraits that are not only accurate but truly full of life.