Food & Cooking
How to Cook Rice on the Stovetop
# How to Cook Rice on the Stovetop: A Foolproof Method for Perfect, Fluffy Rice For such a simple, foundational food, cooking rice on the stovetop ca...
How to Cook Rice on the Stovetop: A Foolproof Method for Perfect, Fluffy Rice
For such a simple, foundational food, cooking rice on the stovetop can be a surprisingly intimidating task. Many home cooks, from novices to seasoned veterans, have faced the disappointment of lifting a lid to find a pot of mushy, gummy mush or, conversely, a scorched layer of crunchy, undercooked grains. It’s a culinary challenge that has led many to rely on dedicated electric rice cookers, believing that perfect rice is a feat of technology rather than technique. However, mastering the art of stovetop rice is not only possible but also incredibly rewarding, freeing up counter space and connecting you to a fundamental cooking skill practiced for millennia. This guide is here to demystify the process entirely. We will provide you with a single, foolproof method that will empower you to cook perfect, fluffy, and delicious rice on your stovetop, every single time.
This comprehensive guide will walk you through every critical detail, transforming you from a hesitant rice-maker into a confident cook. We will delve into the science behind the grain, exploring why the rice-to-water ratio is so crucial and settling the age-old debate on whether or not to rinse. You will learn about the essential, yet simple, equipment that sets you up for success. The core of this article is a detailed, step-by-step walkthrough of our foolproof absorption method—from the initial boil to the all-important resting phase that makes the magic happen. We’ll also go beyond the basics, offering specific adjustments for popular varieties like aromatic basmati and wholesome brown rice. Finally, we’ll equip you with a complete troubleshooting guide to diagnose and fix any rice calamity you might encounter. By the end of this article, you will not only know how to cook rice; you will understand the principles behind it, ensuring a perfect pot is always within your reach.
Section 1: The Foundation of Perfect Rice: Key Principles
Before we even turn on the stove, understanding a few key principles is essential. The type of rice you use, how you prepare it, and the precise ratio of water are the foundational pillars upon which perfectly cooked rice is built. Getting these elements right from the start is the most important step towards achieving that coveted fluffy texture.
Why Your Choice of Rice Matters
Not all rice is created equal. The length of the grain is the primary determinant of its texture and starch content, which directly impacts how it cooks.
Long-Grain Rice (e.g., Basmati, Jasmine, American Long-Grain)
These grains are slender, typically four to five times longer than they are wide. They have a lower starch content, which means when cooked, the grains remain separate, light, and fluffy. This makes long-grain rice the ideal choice for side dishes, pilafs, and any dish where you want distinct, non-sticky grains. Our foolproof method is primarily designed for this category.
Medium-Grain Rice (e.g., Arborio, Valencia)
Plumper and shorter than long-grain rice, these varieties contain more starch. This higher starch content results in a final texture that is more moist, tender, and slightly sticky. The grains tend to cling together, which is why they are perfect for dishes like risotto and paella, where a creamy consistency is desired.
Short-Grain Rice (e.g., Sushi Rice, Bomba)
Short, stout, and almost round, short-grain rice has the highest starch content. When cooked, it becomes soft, sticky, and clumps together significantly. This texture is essential for making sushi, rice pudding, and other dishes where the rice needs to hold its shape. You should not use the primary method in this guide for short-grain rice without significant modifications.
The Great Debate: To Rinse or Not to Rinse?
One of the most debated topics in rice cooking is whether or not to rinse the grains before cooking. The short answer: for fluffy, distinct grains, you absolutely should. Rice grains are processed and packaged, and during this journey, they accumulate a fine coating of starch powder. If you don't wash this excess starch off, it will dissolve in the cooking water, creating a sticky, glue-like consistency that causes the grains to clump together.
Rinsing is a simple but crucial step. Place your measured rice in a fine-mesh sieve and hold it under cold running water, or put the rice in a bowl, cover it with cold water, and swirl it with your hand. You'll immediately see the water turn milky and cloudy—that's the excess starch. Pour out the starchy water and repeat the process two to three more times, until the water runs mostly clear. This ensures each grain cooks individually, leading to a much fluffier final product. The only time you shouldn't rinse is when that excess starch is desirable, such as in risotto, where it contributes to the dish's signature creaminess.
The Golden Rule: Mastering the Rice-to-Water Ratio
The most common mistake in cooking rice is using the wrong amount of water. Too much water leads to a soggy, mushy pot, while too little results in undercooked, hard grains with a scorched bottom. While many packages suggest a 1:2 ratio (one part rice to two parts water), this often results in rice that is overly soft. For truly perfect, fluffy long-grain white rice on the stovetop, the foolproof ratio is 1 cup of rice to 1.5 cups of water.
This 1:1.5 ratio provides just enough liquid for the rice to absorb and steam itself to tender perfection without becoming waterlogged. It’s a reliable starting point that works consistently for most long-grain white rice varieties. For other types, like brown rice, this ratio needs adjustment, which we will cover in a later section. Remember to measure accurately; use a proper liquid measuring cup for your water and a dry measuring cup for your rice. Precision here is key.
Section 2: Gearing Up: Tools for Success
You don’t need a kitchen full of high-tech gadgets to cook perfect rice. In fact, the beauty of the stovetop method is its simplicity. However, using the right tools will make the process more reliable and prevent common cooking issues.
Choosing the Right Pot
The single most important piece of equipment for cooking rice is your pot. The ideal choice is a heavy-bottomed saucepan with a tight-fitting lid.
Why a Heavy Bottom is Crucial
A pot with a thick, heavy base distributes heat more evenly than a thin-bottomed one. This is critical for rice because it prevents "hot spots"—areas where the heat is more intense, which can cause the rice at the bottom of the pot to burn before the rice at the top has finished cooking. A Dutch oven or a sturdy saucepan will work perfectly. Thin, flimsy pots are a direct path to scorched rice.
The Importance of a Tight-Fitting Lid
The stovetop absorption method relies on trapping steam inside the pot to cook the rice gently. If your lid doesn't fit snugly, steam will escape. This loss of moisture and heat can disrupt the cooking process, leading to unevenly cooked rice that may be dry on top and wet on the bottom. If you find your lid is a bit loose, you can place a clean kitchen towel between the pot and the lid to create a better seal, but be extremely careful to keep the towel away from the flame or heat source. A pot with a glass lid can also be helpful, as it allows you to check on the rice without lifting the lid and letting steam escape.
Essential Utensils
Beyond the pot, you only need a few basic kitchen tools.
- Measuring Cups: As established, accuracy is vital. Have a set of dry measuring cups for the rice and a liquid measuring cup for the water or broth.
- Fine-Mesh Sieve: This is the best tool for rinsing your rice. It allows you to wash the grains thoroughly under running water without losing any down the drain. If you don't have one, you can use a bowl, as described earlier.
- Fork or Rice Paddle: Once the rice is cooked and has rested, you'll need something to fluff it. A fork works well to gently separate the grains without mashing them. Alternatively, a traditional rice paddle (shamoji) is designed specifically for this task, with a flat surface that allows you to "cut" and fold the rice to fluff it perfectly.
Section 3: The Foolproof Stovetop Method: A Step-by-Step Guide
This is the core of our guide—a simple, repeatable process for perfect long-grain white rice. Follow these steps precisely, and you'll be rewarded with a flawless pot of fluffy grains. This recipe is for 1 cup of uncooked rice, which yields about 3 cups of cooked rice, enough for 3-4 servings. You can easily scale it up, just ensure your pot is large enough to accommodate the expansion.
Step 1: Measure and Rinse Your Rice
Measure exactly 1 cup of long-grain white rice (like jasmine or basmati) into a fine-mesh sieve. Hold the sieve under cold, running water and rinse the rice, using your fingers to gently agitate the grains. Continue rinsing for about a minute, or until the water running through is no longer cloudy. Shake the sieve to remove as much excess water as possible.
Step 2: Combine Ingredients in the Pot
Transfer the rinsed rice to your heavy-bottomed saucepan. Add 1.5 cups of cold water. At this stage, you can also add a pinch of salt (about ¼ to ½ teaspoon) for flavor. Some people also like to add a teaspoon of butter or oil, which can help keep the grains separate and add a little richness, though this is optional.
Step 3: The Initial Boil and Gentle Simmer
Place the pot on the stove over medium-high heat and bring the water to a gentle boil or a strong simmer. You should see bubbles breaking across the entire surface. Don’t let it come to a rapid, rolling boil, as this can cause the water to bubble over once you cover the pot. Give the rice one final, gentle stir to ensure no grains are stuck to the bottom.
Step 4: The Hands-Off Cooking Phase
As soon as the water is simmering nicely, turn the heat down to the absolute lowest setting your stove can manage. Cover the pot with its tight-fitting lid. Now, set a timer for 15 minutes. This next part is the most critical rule of all: Do not lift the lid. No peeking! Lifting the lid releases the precious steam that is essential for cooking the rice evenly. Stirring during this phase is also forbidden, as it activates starches and will make your rice gummy. Trust the process and let the heat and steam do their work.
Step 5: The Crucial Resting Period
When the 15-minute timer goes off, turn off the heat completely. Do not lift the lid yet. Slide the pot off the hot burner to a cooler part of your stovetop. Let the rice sit, covered and undisturbed, for another 10 minutes. This resting period is not an optional step; it's where the magic happens. The residual heat and steam inside the pot will finish cooking the rice, allowing the moisture to redistribute evenly throughout the grains. Skipping this step can result in rice that is slightly wet on the surface.
Step 6: Fluff and Serve
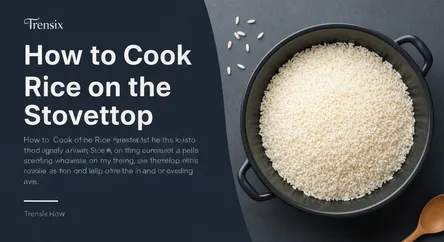
After the 10-minute rest, you can finally remove the lid. You should see a bed of perfectly cooked rice, with all the water absorbed. Take a fork or a rice paddle and gently fluff the rice, scraping from the bottom and lifting to separate the grains. Serve immediately and enjoy your perfectly cooked, fluffy stovetop rice.
Section 4: Beyond the Basics: Adapting for Different Rice Types
While the 1:1.5 ratio and 15-minute simmer time is perfect for standard long-grain white rice, other popular varieties require slight adjustments to achieve the best results.
How to Cook Basmati or Jasmine Rice
These aromatic long-grain rice varieties are slightly more delicate than standard white rice. While the 1:1.5 ratio still works well, they cook a bit faster.
Method Adjustments:
- Ratio: 1 cup rice to 1.5 cups water.
- Simmer Time: Reduce the simmer time to 13 minutes.
- Resting Time: Keep the 10-minute resting period.
- Optional Soak: For extra-long and fluffy basmati grains, you can soak the rinsed rice in cold water for 30 minutes before cooking. If you do this, reduce the cooking water to 1.25 cups.
How to Cook Brown Rice
Brown rice is a whole grain, meaning it retains its nutrient-rich bran and germ. This outer layer takes longer to soften and requires more water to cook through properly. Patience is key for perfect brown rice.
Method Adjustments:
- Ratio: Use a ratio of 1 cup brown rice to 2 cups of water or broth. Some suggest up to 2.5 cups of liquid.
- Simmer Time: Brown rice needs a much longer cooking time. After bringing it to a boil, reduce the heat to low, cover, and simmer for 40-45 minutes.
- Resting Time: The resting period is just as important. Let it stand, covered and off the heat, for at least 10 minutes before fluffing.
Section 5: Troubleshooting Common Rice-Cooking Calamities
Even with a foolproof method, things can sometimes go awry. Here’s how to diagnose and fix the most common rice-cooking problems.
Problem: My Rice is Mushy or Gummy
This is almost always the result of too much water or stirring during the cooking process.
The Cause and Solution:
- Too Much Water: You likely used a ratio greater than 1:1.5. Next time, measure more precisely and reduce the liquid. If you catch it right after cooking, you can try to save it by uncovering the pot and cooking over very low heat for a few minutes to evaporate some excess moisture.
- Stirring: Remember, stirring activates starch, creating a gluey texture. Once you put the lid on, leave it alone.
- Not Rinsing: Excess surface starch can also lead to gumminess. Don't skip the rinsing step.
Problem: The Bottom is Burnt or Scorched
This happens when the heat is too high or your pot is too thin.
The Cause and Solution:
- Heat is Too High: Your "low" setting might still be too powerful. The rice should be at a barely-there simmer, not actively bubbling. After the initial boil, use the smallest burner on its lowest setting.
- Thin Pot: A thin-bottomed pot creates hot spots that burn the rice. Invest in a heavy-bottomed saucepan for even heat distribution.
Problem: My Rice is Undercooked or Crunchy
This is the opposite of mushy rice and is caused by too little water or not enough cooking time.
The Cause and Solution:
- Too Little Water: Ensure you are using the correct 1:1.5 ratio.
- Escaping Steam: A loose-fitting lid lets too much steam escape, preventing the rice from cooking properly. Check your lid's fit.
- Peeking: Every time you lift the lid, you let out heat and steam, extending the cooking time. If your rice is still crunchy after the allotted time, add a splash (a few tablespoons) of hot water, replace the lid, and continue to cook on low for another 5-10 minutes.
Problem: My Rice is Clumpy and Sticky
While not as disastrous as mushy rice, clumpy rice lacks that desirable fluffy texture.
The Cause and Solution:
- Skipping the Rinse: This is the number one cause of clumpy rice. The surface starch is acting like glue. Always rinse your long-grain rice.
- Fluffing Too Vigorously: Be gentle when you fluff. Use a fork to lift and separate the grains, don't stir or mash them.
Conclusion
The ability to cook a perfect pot of rice on the stovetop is a foundational kitchen skill that brings with it a sense of accomplishment and culinary freedom. By abandoning guesswork and embracing a reliable, foolproof method, you can say goodbye to inconsistent results forever. The path to fluffy, delicious rice is paved with a few simple but non-negotiable rules: choose the right rice for the job, rinse away the excess starch, use the precise 1-to-1.5 ratio of rice to water, and respect the process. Bring your rice to a simmer, clamp on a tight-fitting lid, reduce the heat to a mere whisper, and walk away. Resist the urge to peek or stir, and most importantly, honor the crucial 10-minute resting period that allows the grains to achieve textural perfection. Master these steps, and you will unlock the secret to consistently flawless rice, a versatile and satisfying staple for countless meals to come.