Home & DIY
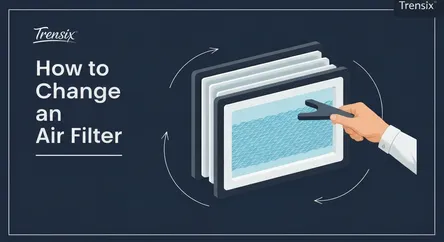
How to Change an Air Filter
# How to Change an Air Filter: A Comprehensive DIY Guide Welcome to one of the simplest yet most impactful home maintenance tasks you can perform: ch...
How to Change an Air Filter: A Comprehensive DIY Guide
Welcome to one of the simplest yet most impactful home maintenance tasks you can perform: changing your HVAC air filter. It might not sound as exciting as a major renovation, but the humble air filter is a critical component of your home's heating, ventilation, and air conditioning (HVAC) system. A clean filter is the gatekeeper to both the air you breathe and the health of your expensive HVAC equipment. Neglecting this quick task can lead to a cascade of problems, including reduced system efficiency, higher energy bills, poor indoor air quality, and even costly repairs down the line. Many homeowners feel intimidated by any task involving their HVAC unit, picturing complex machinery and the risk of breaking something. However, learning how to change hvac filter components is a foundational DIY skill that requires no special tools and only a few minutes of your time.
This comprehensive guide is designed to demystify the process entirely. We will walk you through every single step, from understanding why this task is so crucial to identifying the correct filter for your specific needs. You will learn how to determine the perfect replacement schedule based on your home's unique environment—whether you have pets, suffer from allergies, or live in a dusty area. We'll show you exactly where to locate the filter housing in your system, how to read the filter size printed on the frame, and the simple mechanics of swapping the old, dirty filter for a fresh, new one. By the end of this article, you will not only feel confident in your ability to change hvac filter units but will also have a deeper appreciation for how this small action contributes to a healthier, more comfortable, and more cost-efficient home. Let's get started and empower you to take control of your home's air quality and maintenance.
Why Changing Your HVAC Filter is a Critical Home Maintenance Task
The air filter in your HVAC system serves as the first line of defense for both your respiratory health and your heating and cooling equipment. Its primary job is to trap airborne particles before they can circulate throughout your home or, just as importantly, clog the sensitive inner workings of your HVAC unit. When you consistently change hvac filter cartridges, you are performing preventative maintenance that pays significant dividends in three key areas: indoor air quality, system efficiency and longevity, and cost savings.
Enhancing Indoor Air Quality
The air inside your home can be significantly more polluted than the air outside. It contains a mixture of dust, pollen, pet dander, mold spores, bacteria, and other microscopic debris. Your HVAC system continuously circulates this air. A clean, effective filter captures a large percentage of these contaminants, preventing them from being redistributed into the rooms where you live, eat, and sleep.
The Impact on Health
For individuals with allergies, asthma, or other respiratory conditions, a clean air filter is not just a matter of comfort but of health. A clogged filter loses its ability to trap allergens, allowing them to cycle through the air and trigger symptoms. By regularly installing a new filter, you ensure that your system is actively removing these irritants, leading to a healthier living environment for everyone in the household, especially children and the elderly who are more susceptible to airborne pollutants.
Protecting Your HVAC System and Maximizing Efficiency
Beyond air quality, the filter's most crucial role is protecting the HVAC unit itself. When a filter becomes clogged with dirt and debris, it severely restricts airflow. This obstruction forces your system's fan motor to work much harder to pull air through, leading to a number of negative consequences.
Preventing Costly Damage
The increased strain on the fan motor can cause it to overheat and potentially burn out, resulting in an expensive repair call. Furthermore, restricted airflow can lead to a condition where your system's evaporator coils ice over in the summer or the heat exchanger overheats in the winter. Both of these scenarios can cause significant damage to the core components of your HVAC unit, potentially shortening its operational lifespan by years. A simple, inexpensive filter change is one of the best insurance policies you can have against premature system failure. When you change hvac filter components on schedule, you are ensuring the equipment can "breathe" properly, allowing it to function as designed without unnecessary stress.
Achieving Significant Cost Savings
The financial benefits of regular filter changes are twofold. Firstly, you save on energy bills. A system that can move air freely operates far more efficiently. The Department of Energy estimates that consistently changing your air filter can reduce your home's energy consumption by as much as 15%. When your system doesn't have to fight against a clogged filter, it uses less electricity or gas to heat and cool your home, which is directly reflected in lower utility bills each month. Secondly, as mentioned above, you save on repair and replacement costs. The cost of a few air filters over the course of a year is minuscule compared to the price of repairing a burnt-out motor or replacing an entire HVAC unit that has failed due to neglect.
How Often Should You Change Your HVAC Filter?
One of the most common questions homeowners have is about the proper frequency for changing an air filter. The generic "every 90 days" advice is a decent starting point, but it's far from a one-size-fits-all rule. The optimal schedule for when you should change hvac filter cartridges depends heavily on the type of filter you use, the specifics of your living environment, and how you use your system. Following a personalized schedule is key to balancing cost, convenience, and performance.
Factors Influencing Replacement Frequency
Several variables can require you to change your filter more or less often than the standard recommendation. Understanding these will help you create the right schedule for your home.
Filter Type and MERV Rating
The primary determinant is the filter itself. Basic, flat-panel fiberglass filters are the least efficient and may need to be changed as often as every 30 days. Higher-quality pleated filters, which have a larger surface area for trapping particles, can typically last up to 90 days. The filter's MERV (Minimum Efficiency Reporting Value) rating also plays a role. Filters with higher MERV ratings (e.g., MERV 11 or 13) capture smaller particles more effectively but can also clog faster, sometimes requiring more frequent changes to maintain proper airflow.
Household Occupants and Pets
The more people and pets you have, the more dust, hair, and dander will be circulating in the air. A household with multiple pets, especially those that shed heavily, should plan to change hvac filter units every 30 to 45 days. Pet dander is a major allergen and can clog a filter very quickly.
Health Considerations
If anyone in your home suffers from allergies or asthma, it's wise to change the filter more frequently, perhaps every 30-60 days, regardless of the filter type. This ensures the indoor air quality is kept as high as possible, minimizing airborne irritants that can trigger respiratory issues.
Local Environment and Air Quality
Your home's location matters. If you live in a dusty, dry climate, near a construction zone, or in an area with high pollen counts or wildfire smoke, your filter will have to work much harder. In these conditions, a monthly check-up and potential change are recommended. Conversely, a home in a pristine, low-pollen environment might be able to extend the filter's life slightly.
System Usage
The more you run your HVAC system, the faster the filter will get dirty. During peak heating season in the winter and peak cooling season in the summer, your system is running almost constantly. During these months, you should check your filter monthly. In the milder spring and fall months when you may not be using the system at all, the filter isn't actively collecting new debris.
A General Guideline for Filter Changes
- Basic 1-inch Fiberglass Filters: Change every 30 days.
- Basic 1-inch Pleated Filters: Change every 60-90 days.
- High-Efficiency Pleated Filters (thicker, 4-5 inches): Can last 6-12 months.
- Homes with Pets or Smokers: Change every 30-60 days.
- Homes with Allergy/Asthma Sufferers: Change every 30-45 days.
- Vacation Homes or Single Occupant Homes (no pets): Can often go 6-12 months.
The best practice is to perform a visual inspection. Hold the filter up to a light source. If you cannot see light passing through it, it's clogged and ready to be changed, regardless of how long it has been in place.
Step-by-Step Guide to Changing Your HVAC Filter
Now that you understand the "why" and "when," it's time for the "how." The process to change hvac filter components is straightforward and should take no more than five to ten minutes. Follow these detailed steps to ensure you do it correctly and safely.
Step 1: Turn Off Your HVAC System
Before you do anything else, you must turn off your HVAC system. This is a critical safety step. Go to your thermostat and switch the system to the "Off" position. This prevents the unit from kicking on while you have the filter compartment open, which could pull dust and debris directly into the sensitive internal components of the fan and coils. It also ensures the fan motor is not running, eliminating any risk of injury from moving parts. For an extra layer of safety, you can also switch off the power to the furnace or air handler at your home's breaker box.
Step 2: Locate the Air Filter Compartment
The air filter is always located somewhere along the path of the return air ductwork, just before the air enters the main air handler or furnace unit. This is where the air is filtered before it gets heated or cooled. There are two common locations:
Location A: In the Furnace or Air Handler
In many systems, especially in basement or closet installations, the filter slot is built directly into the side, bottom, or top of the HVAC unit itself. Look for a removable cover or a metal slot, typically between 4 to 6 inches wide and 15 to 30 inches long. This cover might be secured with a simple latch, thumb screws, or just slide out of place.
Location B: In a Return Air Grille
In other setups, particularly in homes where the HVAC unit is in the attic or a crawlspace, the filter is housed in a large return air vent inside the home. These are typically large grilles found in a central hallway ceiling, a high wall, or sometimes a low wall. You'll recognize them by hinged frames with tabs or latches that allow the grille to swing open for access to the filter behind it.
Step 3: Determine the Correct Filter Size
Once you've located and opened the compartment, carefully slide the old filter out. The single most important piece of information you need is the filter's size.
Reading the Filter Dimensions
Look at the cardboard frame of the old filter. The dimensions are almost always printed along the edge. You will see three numbers, such as "16x25x1". These numbers represent the Length x Width x Depth (or thickness). It's crucial to buy a replacement filter with the exact same dimensions. An incorrectly sized filter will either not fit at all or, if it's too small, will allow air to bypass the filter media, defeating its purpose and letting dirty air into your system.
What to Do If the Size Isn't Printed
If the size isn't printed on the old filter or is illegible, use a tape measure to measure the old filter's length, width, and depth yourself. Round up to the nearest whole inch to get the "nominal" size, which is the standard size used for purchasing. For example, if your filter measures 15 ¾" x 24 ¾" x ¾", you will need a 16x25x1 filter.
Step 4: Purchase the Right Replacement Filter
With the correct size in hand, you can purchase a new filter at any home improvement store, hardware store, or online. When buying, you'll also need to decide on the type of filter (pleated is generally recommended over fiberglass for better performance) and the MERV rating. For most residential homes, a filter with a MERV rating between 8 and 13 offers an excellent balance of high-efficiency air filtration without overly restricting airflow.
Step 5: Install the New Filter
This is the final and easiest step. Before sliding the new filter in, take a moment to look for an arrow printed on its cardboard frame.
Check the Airflow Arrow
This arrow is critically important. It indicates the correct orientation for the filter and shows the direction that air should flow through it. The arrow must always point towards the furnace or air handler and away from the return duct that is pulling air from your rooms. Installing the filter backward can reduce its effectiveness and may even cause it to collapse under pressure.
Insert and Secure
Simply slide the new, correctly oriented filter into the slot. It should fit snugly without being forced. Once it's fully inserted, replace the cover for the filter compartment, making sure it's secure. If your filter was in a return air grille, place the new filter in the frame and swing the grille shut, ensuring the latches click into place.
Step 6: Turn Your System Back On
Finally, go back to your thermostat and turn your HVAC system back on. You can also switch the breaker back on if you turned it off. Your system will now run more efficiently with clean, fresh air. It's a good practice to write the date of the change on the new filter's frame with a marker so you'll know exactly when it was last replaced.
Conclusion
Mastering the skill to change hvac filter components is a small investment of time that yields substantial returns for any homeowner. As we've explored, this simple five-minute task is one of the most effective forms of preventative maintenance you can perform. It directly improves the quality of the air you breathe by trapping dust, allergens, and other pollutants, creating a healthier indoor environment for you and your family. Furthermore, it safeguards the heart of your home's comfort system—the HVAC unit itself. By ensuring unrestricted airflow, a clean filter prevents undue strain on the motor, reduces the risk of overheating or freezing, and significantly extends the operational lifespan of your expensive equipment.
The financial benefits are equally compelling. An efficient system consumes less energy, which translates into lower monthly utility bills, and by preventing costly repairs, you save a significant amount of money in the long run. By following this guide, you now have all the knowledge you need: how to identify the right filter for your needs, how to establish a replacement schedule tailored to your home's unique conditions, and how to perform the change-out process safely and correctly. Armed with this information, you can confidently take control of this essential DIY task, ensuring your home remains a comfortable, healthy, and cost-effective sanctuary for years to come.