Home & DIY
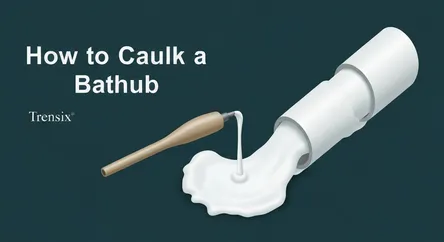
How to Caulk a Bathtub
'How to Caulk a Bathtub | Home & DIY | Perform basic maintenance | caulk a bathtub | Tips for removing old caulk and applying a smooth, clean bead.'...
'How to Caulk a Bathtub | Home & DIY | Perform basic maintenance | caulk a bathtub | Tips for removing old caulk and applying a smooth, clean bead.'
How to Caulk a Bathtub Like a Pro: A Step-by-Step Guide
A cracked, peeling, or moldy line of caulk around your bathtub is more than just a cosmetic issue; it's a critical failure in your bathroom's defense against water damage. That seemingly small gap is an open invitation for water to seep into your walls, leading to rotted wood, damaged drywall, and a potential haven for mold and mildew. These issues can be costly and time-consuming to repair, turning a minor maintenance task into a major renovation project. Fortunately, learning how to caulk a bathtub is one of the most accessible and cost-effective DIY skills a homeowner can master. It's a project that requires patience and attention to detail rather than expensive, specialized tools. A fresh, professionally applied bead of caulk not only restores the clean, crisp look of your bathroom but also ensures a watertight seal that protects your home's integrity for years to come.
This comprehensive guide is designed to walk you through the entire process, from start to finish, empowering you with the knowledge and confidence to achieve a flawless result. We will delve into the nitty-gritty details, starting with how to completely remove the old, failing caulk without damaging your tub or tiles. We'll then cover the most critical and often overlooked step: properly cleaning and preparing the surface to ensure maximum adhesion for the new sealant. Finally, we will provide a detailed, step-by-step tutorial on applying a smooth, consistent, and perfectly tooled bead of new caulk. Whether you're a first-time DIYer or someone looking to refine their technique, this guide will equip you with expert tips and tricks to avoid common pitfalls and make the task of caulking a bathtub a simple and satisfying home maintenance project.
Section 1: Understanding the Essentials of Bathtub Caulk
Before you begin to caulk a bathtub, it’s crucial to understand the purpose of caulk and how to choose the right product for the job. This foundational knowledge will not only make the process smoother but will also ensure your work is durable and long-lasting.
The Critical Role of Caulk in a Bathroom
Caulk is a flexible sealing compound used to fill gaps and cracks between building materials. In a bathroom, its primary function is to create a waterproof and airtight seal in the joint where the bathtub deck meets the tiled wall or surround. This area is subject to constant movement due to temperature fluctuations and the weight of people getting in and out of the tub. Standard grout is rigid and would crack under such stress, but caulk is designed to remain flexible, accommodating this movement while maintaining a watertight barrier. Without a proper seal, water from splashes and showers will inevitably find its way into the wall cavity. This moisture intrusion can lead to severe structural damage, including wood rot and the deterioration of drywall, and it creates the perfect dark, damp environment for harmful mold and mildew to thrive, which can impact your home's air quality and your family's health.
Choosing the Right Caulk for Your Bathtub
Selecting the correct type of caulk is arguably the most important decision you'll make in this project. Using the wrong product will lead to premature failure, cracking, and mold growth.
Silicone vs. Latex Caulk
For a high-moisture environment like a bathtub surround, the choice primarily comes down to 100% silicone caulk or a siliconized latex/acrylic blend.
-
100% Silicone Caulk: This is the gold standard for caulking a bathtub. It is highly flexible, extremely durable, and offers superior adhesion and long-lasting waterproof protection. Silicone is also inorganic, which makes it naturally resistant to mold and mildew. The primary downside is that it cannot be painted and can be slightly more challenging to clean up, requiring mineral spirits.
-
Siliconized Latex/Acrylic Caulk: This type of caulk, often labeled as "Kitchen & Bath" or "Tub & Tile," is a latex-based product infused with silicone for improved flexibility and water resistance. It is easier to apply and tools more smoothly than pure silicone. A significant advantage is that it is paintable and cleans up easily with just soap and water. However, it is generally less durable and less resistant to mildew over the long term compared to 100% silicone.
For the best possible performance and longevity in a bathtub application, 100% silicone caulk with added mildewcides is the recommended choice.
Section 2: Gathering Your Tools and Materials
Having all your necessary tools and materials organized and ready before you start will make the process of caulking your bathtub much more efficient and less messy. A clean workspace and the right equipment are key to achieving a professional-looking finish.
Essential Toolkit for Caulk Removal and Application
You don’t need a workshop full of expensive tools for this job. Most of the required items are readily available at any hardware store.
For Old Caulk Removal
- Utility Knife or Razor Scraper: A sharp blade is essential for cleanly cutting through the old bead of caulk.
- Caulk Removal Tool: This is a specialized plastic or metal tool with different angled heads designed to scrape out caulk without scratching surfaces like acrylic or fiberglass tubs.
- Pliers or Tweezers: Useful for grabbing and pulling out stubborn, stringy pieces of old silicone caulk.
- Caulk Softener/Remover (Optional): For particularly stubborn or old caulk, a chemical remover can help break it down, making it easier to scrape away.
For Surface Preparation
- Shop-Vac or Vacuum with Hose Attachment: To quickly clean up all the old caulk debris.
- Stiff-Bristled Brush (like an old toothbrush): For scrubbing the joint clean.
- Cleaning Agents: Denatured alcohol or isopropyl alcohol is ideal for the final wipe-down as it evaporates quickly and leaves no residue. For mold and mildew, a solution of one-part bleach to two-parts water is effective.
- Clean, Lint-Free Rags or Paper Towels: For cleaning and thoroughly drying the area.
For New Caulk Application
- Caulk Gun: A dripless caulk gun is highly recommended. It releases pressure on the tube when you release the trigger, preventing excess caulk from oozing out.
- Tube of 100% Silicone Kitchen & Bath Caulk: Choose a color that matches your tub and tile (white and clear are the most common).
- Painter's Tape: The secret weapon for achieving perfectly straight, clean caulk lines.
- Caulk Tooling Tool (Optional but Recommended): A small plastic or rubber tool with various corner profiles to create a consistent, concave bead. Your finger can also be used.
- Paper Towels: To have on hand for wiping away excess caulk from tools and surfaces.
Section 3: The Step-by-Step Guide to Removing Old Caulk
Proper removal of the old, failing caulk is a non-negotiable first step. Applying new caulk over old is a recipe for disaster; the new sealant will not adhere properly, and you’ll trap moisture and mildew underneath, leading to a seal that fails in a matter of weeks.
Step 1: Softening and Cutting the Old Caulk
The goal here is to break the seal of the old caulk from both the tub deck and the wall tile.
Making the Initial Cuts
Take your utility knife and hold it at a low angle. Carefully run the blade along the top edge of the caulk line where it meets the tile. Then, repeat this process for the bottom edge where the caulk meets the bathtub. Be patient and apply steady pressure. The objective is to sever the connection on both sides, isolating the bead of caulk in the middle. Be especially careful not to press too hard if you have an acrylic or fiberglass tub, as these surfaces can be scratched easily.
Step 2: Scraping and Pulling
Once the edges are cut, you can begin the removal process.
The Removal Process
Using your caulk removal tool or a plastic putty knife, start at one corner and begin to gouge out the loosened caulk. Often, you can get a long piece started and then use pliers or your fingers to gently pull it away from the joint. It may come off in long, satisfying strips or frustratingly small chunks. Work your way around the entire bathtub, removing as much of the material as possible. For any remaining stubborn bits, use a razor scraper held at a very low angle to carefully slice them off the surface. If you encounter extremely hardened caulk, applying a chemical caulk remover according to the manufacturer's instructions can make this step significantly easier.
Section 4: Preparing the Surface for a Perfect Bond
This preparation stage is the most critical part of the entire project. An immaculately clean and completely dry surface is the only way to guarantee that your new caulk will form a strong, lasting, waterproof bond. Any leftover soap scum, residue, or moisture will compromise the seal.
Step 1: Deep Cleaning the Joint
After removing all the large pieces of old caulk, it’s time to deep clean the gap.
Removing Debris and Mildew
First, use a shop-vac or a vacuum cleaner with a hose attachment to thoroughly remove all the loose dust and dried caulk particles from the joint and the surrounding area. Next, inspect the joint for any signs of black spots, which indicate mildew. If mildew is present, treat the area with a bleach and water solution. Apply the solution with a spray bottle or a rag and use a stiff-bristled brush or an old toothbrush to scrub the joint vigorously. Let the solution sit for 10-15 minutes to kill any remaining spores, then rinse the area thoroughly with clean water.
Step 2: Final Cleaning and Drying
The final cleaning step ensures there is absolutely no residue left that could interfere with adhesion.
The Final Wipe-Down
Wipe down the entire joint and the surrounding tile and tub surfaces with denatured or isopropyl alcohol on a clean, lint-free rag. The alcohol will cut through any remaining soap scum or oils and has the added benefit of evaporating very quickly without leaving a film.
Ensuring the Surface is Bone Dry
This is absolutely crucial. The area must be 100% dry before you apply new caulk. Any trapped moisture will turn to vapor and create bubbles in your caulk, preventing it from curing properly. After the alcohol wipe, allow the area to air dry for at least one to two hours. To be extra safe, you can use a hairdryer on a low-heat setting to gently dry the entire joint, ensuring all moisture has evaporated.
Section 5: Applying the New Caulk Bead
With the old caulk gone and the surface perfectly prepped, you are now ready for the main event: applying the new bead of silicone. This step requires a steady hand and a bit of practice, but our techniques will help you achieve a smooth, professional line.
Step 1: Preparing the Caulk Tube and Gun
Proper setup is key to controlling the flow of caulk.
Cutting the Nozzle
Most caulk tubes have a sealed tip that needs to be cut. Use your utility knife to cut the tip at a 45-degree angle. The size of the opening you cut will determine the size of your caulk bead. Start small; you can always cut more off if needed. A hole about 1/8th of an inch in diameter is a good starting point for most bathtub joints. After cutting the tip, puncture the inner foil seal of the tube using a long nail or the built-in poker on your caulk gun.
Step 2: Taping for Clean Lines
This trick is the best way for a beginner to get perfectly straight caulk lines.
Creating a Guide with Painter's Tape
Apply two parallel strips of painter's tape—one on the wall just above the joint and one on the tub deck just below it. Leave an even gap between the two strips of tape, about 1/4 inch wide. This channel will act as your guide, ensuring the caulk only goes where you want it and creating crisp, clean edges.
Step 3: Filling the Bathtub
This is a pro tip that prevents the caulk from cracking later.
Why You Should Fill the Tub with Water
Fill the bathtub completely with water before you apply the caulk. The weight of the water will slightly lower the tub, opening the gap between the tub and the wall to its widest point. By applying the caulk while the gap is at its maximum width, you ensure that the sealant will be in a neutral or compressed state when the tub is empty. This prevents the caulk from being stretched and torn when you later fill the tub for a bath.
Step 4: Applying the Caulk
It’s time to lay the bead.
The Application Technique
Hold the caulk gun at a 45-degree angle to the joint. Start in a corner and apply steady, consistent pressure to the trigger while moving the gun smoothly along the joint. You want to push the caulk into the gap rather than simply laying it on top. Move at a speed that allows you to lay a continuous bead that slightly overfills the gap you taped off. Work in long, continuous strokes for the most consistent results.
Step 5: Tooling for a Smooth Finish
Tooling, or smoothing, the bead is what gives it a clean, concave, professional appearance.
How to Tool the Bead
Immediately after applying the caulk along one section, it's time to tool it. You can use a dedicated caulk tooling tool, or simply your finger dipped in a little bit of water or denatured alcohol to prevent the silicone from sticking. Starting at the corner, press the tool or your finger lightly into the bead and drag it smoothly along the entire length in one continuous motion. This will force the caulk firmly into the joint and remove the excess, leaving a perfectly smooth, concave profile. Wipe the excess caulk that collects on your tool or finger onto a paper towel.
Step 6: Removing the Tape and Curing
The final step is to reveal your perfect lines.
The Big Reveal
Remove the painter's tape immediately after tooling the caulk. Pull the tape away from the caulk line at a 45-degree angle. This will shear the edge of the caulk bead cleanly, leaving you with perfectly straight, sharp lines. Do not wait for the caulk to start drying before you remove the tape. Finally, drain the water from the tub and allow the caulk to cure undisturbed for the time specified by the manufacturer, which is typically at least 24 hours. Do not allow the new caulk to get wet during this curing period.
Conclusion: Protecting Your Home with a Perfect Seal
Mastering how to caulk a bathtub is a fundamental DIY skill that pays dividends in protecting your home from the persistent threat of water damage. While it may seem like a simple cosmetic fix, a pristine, watertight caulk seal is your first line of defense against moisture intrusion, mold, and costly structural repairs down the road. By following the detailed steps outlined in this guide—from the diligent removal of old caulk and the meticulous preparation of the surface to the careful application and tooling of the new bead—you have all the knowledge required to achieve a result that is not only beautiful but also durable and highly functional. Remember that patience is key; taking the time to perform each step correctly, especially the cleaning and preparation, is what separates an amateur job from a professional, long-lasting seal. With your new skills, you can now confidently maintain this critical barrier, ensuring your bathroom remains a clean, healthy, and damage-free space for years to come.