Food & Cooking
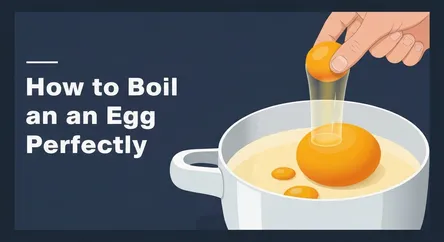
How to Boil an Egg Perfectly
# How to Boil an Egg Perfectly Mastering the art of boiling an egg is a foundational kitchen skill that can elevate a simple meal, provide a quick an...
How to Boil an Egg Perfectly
Mastering the art of boiling an egg is a foundational kitchen skill that can elevate a simple meal, provide a quick and nutritious snack, or form the basis of countless beloved recipes. Yet, achieving that perfect yolk consistency—whether you crave a liquid gold center for your toast soldiers, a jammy yolk for a vibrant salad, or a firm, creamy yolk for deviled eggs—can often feel like a frustrating game of chance. The process seems simple, but variables like egg size, starting temperature, and precise timing can mean the difference between a perfect outcome and a disappointing, overcooked result with a dreaded chalky, grey-green ring around the yolk. This comprehensive guide is designed to demystify the process and empower you to boil an egg perfectly, every single time.
This article will walk you through everything you need to know, from the basic science of how an egg cooks to the foolproof step-by-step methods for achieving your desired doneness. We will explore the great debate of starting with cold water versus hot water, provide a detailed timing chart for soft-boiled, medium-boiled, and hard-boiled eggs, and offer essential tips for preventing cracked shells and ensuring an easy peel. By the end of this guide, you will have the knowledge and confidence to control the outcome of your boiled eggs, transforming this simple culinary task from a source of anxiety into an act of precision. Whether you are a novice cook looking to learn a new skill or an experienced home chef aiming for consistent perfection, this guide will become your go-to resource for flawless boiled eggs.
Understanding the Fundamentals of Egg Boiling
Before diving into the step-by-step instructions, it's helpful to understand the science at play and the key variables that influence the outcome. Knowing the 'why' behind the 'how' will give you a more intuitive grasp of the process, allowing for better troubleshooting and more consistent results.
The Science of a Perfectly Boiled Egg
Boiling an egg is a fascinating exercise in protein chemistry. An egg is composed primarily of the white (albumen) and the yolk. The egg white is about 90% water and 10% protein, while the yolk contains fats, vitamins, minerals, and proteins. When you introduce heat, these proteins, which are long chains of amino acids curled into tight balls, begin to unfold and bond with each other. This process, known as coagulation, is what transforms the liquid egg into a solid state.
Interestingly, the proteins in the egg white and yolk coagulate at different temperatures. The whites begin to set around 144-149°F (62-65°C), while the yolk starts to firm up at a slightly higher temperature, around 149-158°F (65-70°C). This temperature difference is why it's possible to have a fully cooked, firm white while the yolk remains soft and runny. Overcooking, especially at a high, rolling boil for too long, causes the proteins to form tighter and tighter bonds, squeezing out water and leading to a rubbery white and a dry, crumbly yolk. It can also cause a chemical reaction between sulfur in the white and iron in the yolk, creating that unappetizing greenish-gray layer. The key to a perfect boiled egg is managing heat and time to cook both the white and the yolk to their ideal, respective textures.
Key Variables You Need to Control
Several factors can influence how your egg cooks. Being aware of them is the first step toward achieving consistent results.
Egg Temperature (Fridge-Cold vs. Room Temperature)
The starting temperature of your egg is a critical variable. Many recipes recommend using eggs straight from the refrigerator to establish a consistent baseline for cooking times. An egg at room temperature will cook faster than one that is cold. Some sources suggest letting eggs sit on the counter for 10-15 minutes to reduce the temperature shock when placing them in hot water, which may help prevent cracking. If you use room temperature eggs, you may need to reduce your cooking time by about a minute. For the sake of consistency, this guide's timings are based on large eggs taken directly from the fridge.
Egg Size and Age
Eggs come in various sizes (medium, large, extra-large, jumbo), and this will affect the cooking time. A larger egg will naturally take longer to cook through than a smaller one. The timings provided in this guide are for large eggs; you should adjust by about 30 seconds to a minute for different sizes. The age of the egg also plays a role, particularly when it comes to peeling. Older eggs (a week or two old) are generally easier to peel. This is because as an egg ages, it loses moisture and the air cell at the large end increases in size, causing the inner membrane to pull away slightly from the shell.
Altitude's Impact
Water boils at a lower temperature at higher altitudes due to lower atmospheric pressure. At sea level, water boils at 212°F (100°C), but in a city like Denver (at 5,280 feet), it boils around 202°F. This lower boiling temperature means you need to increase your cooking time to achieve the same level of doneness. A general rule is to add approximately one extra minute of cooking time for every 1,000 feet (about 300 meters) above 3,000 feet in elevation.
The Great Debate: Cold Water vs. Hot Water Start
One of the most debated topics in egg boiling is whether to start with the eggs in cold water and bring it all to a boil together, or to lower the eggs directly into already boiling water. Both methods have their proponents and can yield good results, but they offer different advantages.
The Cold Water Start Method
This traditional method involves placing your eggs in a saucepan, covering them with cold water, and then heating the water.
How It Works
You place the eggs in a single layer at the bottom of a pot and cover them with at least an inch of cold water. You then bring the water to a full rolling boil over high heat. Once it's boiling, you immediately turn off the heat, cover the pot, and let the eggs sit in the hot water for a predetermined amount of time to finish cooking.
Pros and Cons
The primary advantage of the cold water start is that the gradual increase in temperature is gentler on the eggs, making them less likely to crack. This method also tends to produce slightly more tender egg whites because of the slower cooking process. However, the main drawback is a lack of precision. The time it takes for water to boil can vary significantly depending on your stove, the type of pot, and the amount of water used, making it harder to nail specific timings for soft or medium yolks.
The Hot Water Start Method
This method, favored by many chefs and culinary experts for its precision, involves carefully adding eggs to water that is already boiling.
How It Works
You bring a pot of water to a rolling boil first. Then, using a slotted spoon, you gently lower the fridge-cold eggs into the water. You immediately reduce the heat to maintain a gentle boil or rapid simmer and start your timer. Keeping the water at a gentle boil ensures the eggs cook consistently without being jostled around so violently that they crack.
Pros and Cons
The biggest advantage here is control and consistency. Because the eggs go into water that's already at a specific temperature (boiling), you can time the cooking process with much greater accuracy. This makes it the superior method for achieving a specific yolk texture, from runny to jammy. Eggs started in hot water are also consistently easier to peel. The high initial heat helps the egg white set quickly, causing it to pull away from the shell's inner membrane more effectively. The primary con is a slightly higher risk of the shells cracking due to the abrupt temperature change. However, this can be mitigated by lowering the eggs in gently and not overcrowding the pot.
For the most reliable and repeatable results, especially when aiming for soft or medium-boiled eggs, the hot water start method is highly recommended.
Step-by-Step Guide to Perfectly Boiled Eggs
This section provides a foolproof, step-by-step process using the recommended hot water start method. Following these instructions will give you consistent, easy-to-peel eggs cooked exactly to your liking.
Step 1: Preparation is Key
Gather your equipment and prepare your eggs and water.
- A saucepan or pot: Choose one that is large enough to hold the eggs in a single layer without crowding them.
- Eggs: Use large, fridge-cold eggs for the timings below.
- Slotted spoon or skimmer: For safely lowering and removing eggs from the hot water.
- A large bowl for an ice bath: This is crucial for stopping the cooking process.
- Timer: Use a timer for precision; don't just estimate.
Fill your saucepan with enough water to cover the eggs by at least an inch and bring it to a rolling boil over high heat. While the water is heating, prepare your ice bath by filling a large bowl with cold water and plenty of ice cubes.
Step 2: The Boiling Process
Once the water has reached a strong, rolling boil, it's time to cook.
Lowering the Eggs
Reduce the heat slightly from a vigorous boil to a more gentle, rapid simmer. This will prevent the eggs from bouncing around and cracking. Using your slotted spoon, carefully lower each egg into the water one at a time. Don't drop them in.
Timing is Everything
As soon as the last egg is in the water, start your timer immediately. Keep the water at a gentle but consistent boil throughout the cooking process. Refer to the detailed timing guide in the next section to determine the exact duration for your desired yolk consistency.
Step 3: The Crucial Ice Bath
This step is just as important as the boiling itself. It stops the cooking process instantly and makes the eggs easier to peel.
Shocking the Eggs
When your timer goes off, use the slotted spoon to promptly remove the eggs from the boiling water. Immediately transfer them into the prepared ice water bath. This rapid cooling, often called "shocking," prevents the residual heat from continuing to cook the eggs, which is what leads to overcooked yolks and the dreaded green ring.
Cooling Down
Let the eggs sit in the ice bath for at least 5 to 10 minutes, or until they are cool enough to handle. The cold water helps the egg contract and pull away from the shell, which significantly aids in the peeling process.
Step 4: The Art of the Easy Peel
Peeling boiled eggs can be a frustrating experience, but with the right technique, the shell should slip off easily.
Techniques for Flawless Peeling
There are several effective methods. A popular one is to gently tap the larger, bottom end of the egg on a hard surface to crack it, as this is where the air pocket is located. Then, gently roll the egg on the counter with the palm of your hand to create many small cracks all over the shell. The easiest way to peel is under a thin stream of cool running water or by submerging the egg in a bowl of water. The water helps to get under the thin membrane between the shell and the white, allowing the shell to slide off cleanly.
The Ultimate Egg Boiling Timing Guide
Use this chart as your guide to perfection. These timings are based on large, fridge-cold eggs cooked using the hot water start method. Adjust times slightly for smaller or larger eggs.
For Soft-Boiled Eggs
Characterized by a fully set white and a liquid yolk, perfect for dipping.
- 5 Minutes: The white will be just set, and the yolk will be completely runny. Ideal for serving in an egg cup with toast soldiers.
- 6 Minutes: A classic soft-boiled egg with a liquid yolk and a firm white. A popular choice for a delicious, runny center.
For Medium-Boiled Eggs
The best of both worlds, with a firm white and a soft, jammy, or custardy yolk.
- 6 ½ Minutes: A personal favorite for many, this timing yields a gloriously jammy yolk that's perfect for spreading on toast or topping a salad.
- 7 Minutes: The yolk will be almost set but still deliciously sticky and soft in the very center.
- 8 Minutes: A firmer medium-boiled egg. The yolk is mostly set but still soft and tender. This is often the ideal texture for making flavorful Scotch eggs.
For Hard-Boiled Eggs
Both the white and the yolk are fully cooked and firm, but the yolk remains creamy and vibrant.
- 10 Minutes: This is the beginning of a true hard-boiled egg. The yolk is fully cooked with just a hint of softness in the middle.
- 12 Minutes: Considered by many to be the perfect classic hard-boiled egg. The yolk is fully set, firm, and cooked through, but still creamy and bright yellow. Ideal for egg salad, deviled eggs, or slicing onto a Cobb salad.
- 14-15 Minutes: This will result in a very firm, pale, and chalkier yolk. Venture into this territory if you prefer a very well-done egg, but be mindful that cooking much longer can lead to rubbery whites and that gray-green yolk ring.
Troubleshooting Common Egg Boiling Problems
Even with a great method, issues can sometimes arise. Here’s how to solve the most common problems.
Problem: Cracked Shells During Boiling
It's frustrating when an egg cracks and the white begins to leak out into the water.
- Cause: This usually happens from the sudden temperature change when a cold egg hits boiling water or from eggs knocking against each other in a vigorous boil.
- Solution: When using the hot water start method, be sure to lower the eggs into the water very gently with a spoon. Reduce the heat to a gentle boil rather than a turbulent one. Don't overcrowd the pot, which gives the eggs less room to move and collide. Adding a teaspoon of vinegar or a pinch of salt to the water can also help; it won't prevent cracking, but it will help the egg white coagulate faster if a crack does occur, effectively sealing the leak.
Problem: Difficult-to-Peel Eggs
Losing chunks of the egg white along with the shell is a common kitchen tragedy.
- Cause: This problem is most common with very fresh eggs, where the inner membrane clings tightly to the shell. It can also be a result of starting eggs in cold water, which can cause the white to bond more strongly to the membrane.
- Solution: Use eggs that are at least a week old. Employ the hot water start method and, most importantly, do not skip the ice bath. The rapid cooling is the most critical step for easy peeling. Peeling the eggs under running water also makes a significant difference.
Problem: The Greenish-Gray Yolk Ring
This discolored ring is harmless but visually unappealing.
- Cause: The green ring is ferrous sulfide, formed when hydrogen sulfide in the egg white reacts with iron in the yolk. This reaction is triggered by overcooking, especially at high temperatures.
- Solution: The solution is simple: do not overcook your eggs. Follow the timing guide precisely and immediately transfer the eggs to an ice bath as soon as the timer goes off to halt the cooking process.
Conclusion
Boiling an egg is a testament to the idea that the simplest culinary tasks often require the most precision. By understanding the science behind the process and controlling key variables like time and temperature, you can reliably achieve your ideal egg every time. The hot water start method, combined with a precise timer and an immediate ice bath, offers a foolproof path to consistent, easy-to-peel results. Whether you're preparing a quick breakfast of soft-boiled eggs with toast, a nutrient-packed lunch with a jammy-yolked egg on a bed of greens, or a batch of classic hard-boiled eggs for salads and snacks, you now possess the knowledge to execute it flawlessly. Gone are the days of guesswork and disappointing outcomes. With this guide, you have learned a fundamental skill that will serve you well in all your future kitchen endeavors.