Food & Cooking
Easy No-Knead Bread for Beginners
# Easy No-Knead Bread for Beginners There is something deeply satisfying about the aroma of freshly baked bread wafting through your home. The crackl...
Easy No-Knead Bread for Beginners
There is something deeply satisfying about the aroma of freshly baked bread wafting through your home. The crackle of a golden-brown crust, the soft, airy crumb, and the warm, comforting taste can turn any meal into a special occasion. For many, however, the idea of baking bread from scratch is intimidating, conjuring images of complex kneading techniques, precise timings, and a great deal of mess. But what if you could achieve artisan-quality bread with minimal effort, using a method so simple it feels like magic? Welcome to the world of no-knead bread, a revolutionary technique that has empowered countless beginners to bake spectacular loaves in their own kitchens. This guide is designed to demystify the bread-making process, offering a simple Dutch oven recipe that requires almost no work at all.
This article will walk you through every step of creating a perfect loaf of no-knead bread. We will explore the science behind how this method works without the strenuous effort of kneading, allowing time and yeast to do the heavy lifting. You will learn about the four basic ingredients and the essential equipment needed—primarily a Dutch oven, which creates the perfect steamy environment for a bakery-worthy crust. We will provide a detailed, step-by-step walkthrough, from mixing the shaggy dough to the final, triumphant moment you pull your beautiful, rustic loaf from the oven. We'll also cover tips for success, troubleshooting common issues, and offer ideas for variations, so you can start experimenting once you've mastered the basic technique. Whether you're a complete novice in the kitchen or an experienced cook looking for a simpler way to bake, this guide will give you the confidence and knowledge to bake delicious homemade bread whenever the craving strikes.
Understanding the Magic of No-Knead Bread
The concept of no-knead bread might seem counterintuitive to everything you've heard about bread making. Traditionally, kneading is the crucial step where you develop the gluten network in the dough. This network of proteins is what gives bread its structure, allowing it to trap the gases produced by the yeast and rise into a light, chewy loaf. The no-knead bread method, popularized by baker Jim Lahey, brilliantly sidesteps this labor-intensive process by leveraging two simple, natural elements: time and hydration. By understanding the science behind this technique, you can appreciate just how elegantly simple it is and why it produces such consistently fantastic results, making it the perfect starting point for any beginner baker.
The Science of Slow Fermentation
The secret to developing a strong gluten network without kneading lies in a long, slow fermentation process. When you mix flour with water, two proteins, glutenin and gliadin, begin to link up to form gluten. In traditional recipes, kneading physically stretches and aligns these proteins, speeding up the formation of a strong, elastic web. In a no-knead bread recipe, the dough is made with a higher hydration level (more water) and a very small amount of yeast. This wet, sticky dough is then left to rest for an extended period, typically 12 to 24 hours. During this long, slow ferment, enzymes in the flour and the yeast work their magic. The enzymes break down proteins and starches, while the yeast slowly produces carbon dioxide. The water molecules in the dough allow the gluten strands to move around freely, and over many hours, they naturally align and form the same strong, elastic network that kneading would create, but with a far more complex flavor profile as a bonus.
Why a Dutch Oven is Your Secret Weapon
The second key to achieving a professional-quality artisan loaf at home is creating the right baking environment. Professional bakeries use steam-injected ovens to produce loaves with a crisp, crackly crust and a moist, open crumb. The initial blast of steam keeps the outer surface of the dough moist and pliable, allowing it to expand fully during the initial phase of baking, a phenomenon known as "oven spring." Once the bread has fully risen, the steam subsides, and the dry heat of the oven creates that deeply caramelized, crunchy crust.
This is where the Dutch oven comes in. By preheating the heavy, lidded pot in a very hot oven, you create a personal steam-injected oven on your countertop. When you place the cool dough into the searingly hot pot and cover it with the lid, the moisture from the dough itself is trapped, turning to steam. This steam envelops the loaf, mimicking the conditions of a professional oven and ensuring a magnificent oven spring. After about 30 minutes, you remove the lid, releasing the steam and allowing the crust to brown and crisp up to perfection. This simple piece of equipment is the key to transforming a simple no-knead bread dough into a stunning, rustic masterpiece.
Gathering Your Ingredients and Equipment
One of the most appealing aspects of this no-knead bread recipe is its simplicity, which extends to the ingredients and tools required. You don't need a fancy stand mixer, a bread machine, or exotic, hard-to-find flours. The recipe relies on four basic pantry staples and one key piece of cookware. Before you begin, gathering and preparing your components will ensure the process is smooth, enjoyable, and successful. This section will detail everything you need to get started on your bread-making journey, emphasizing quality and function over complexity. The beauty of this method is in its minimalism, proving that great results can come from humble beginnings.
The Four Essential Ingredients
The foundation of this bread is built on just four simple ingredients. While the list is short, the quality of each component can make a subtle difference in the final product.
Flour, Water, Yeast, and Salt
- Flour: All-purpose flour is perfectly suitable for this recipe and will produce a wonderful loaf with a soft crumb. If you have bread flour, it will also work beautifully, yielding a slightly chewier texture due to its higher protein content. There's no need to sift the flour; simply measure it correctly.
- Water: The recipe calls for cool or lukewarm water. The temperature isn't critical, as the long fermentation time gives the yeast plenty of opportunity to activate. Filtered water is a good choice if your tap water is heavily chlorinated, as chlorine can sometimes inhibit yeast activity.
- Yeast: Instant yeast (also called rapid-rise or bread machine yeast) is the easiest to use as it can be mixed directly with the dry ingredients. Active dry yeast also works, but it's best to dissolve it in the lukewarm water for a few minutes before adding it to the flour to ensure it's alive and active. The amount used is tiny, typically just a quarter of a teaspoon, which is essential for the slow fermentation process.
- Salt: Salt is crucial for more than just flavor; it also plays a vital role in regulating yeast activity and strengthening the gluten structure. Fine sea salt or kosher salt are excellent choices. Avoid coarse salt unless you dissolve it in the water first to ensure it disperses evenly.
Essential Equipment for Success
While you don't need a lot of specialized gear, a few key items will make the process much easier and guarantee the best results for your no-knead bread.
The Indispensable Dutch Oven
The single most important piece of equipment for this recipe is a heavy, lidded pot that can withstand high oven temperatures. A 4 to 6-quart cast-iron Dutch oven is the ideal tool for the job. Its heavy construction ensures excellent heat retention and even distribution, while the tight-fitting lid is crucial for trapping steam. Enameled cast-iron works just as well as traditional seasoned cast iron. If you don't own a Dutch oven, other options can work, such as a heavy stainless steel or ceramic pot with an oven-safe lid. The key is that it must be able to be preheated to a very high temperature safely.
Other Helpful Tools
- Large Mixing Bowl: You'll need a bowl large enough to hold the dough as it doubles or even triples in size during its long rise. Glass, ceramic, or plastic bowls are all fine.
- Spatula or Wooden Spoon: A simple tool for mixing the initial shaggy dough.
- Plastic Wrap or a Clean Kitchen Towel: To cover the bowl during the first fermentation.
- Parchment Paper: This is highly recommended to make transferring the dough into the hot Dutch oven easy and safe. It prevents the dough from sticking and helps you lower it into the pot without risking a burn.
- Scoring Tool or Sharp Knife: While not strictly necessary, scoring the top of the loaf just before baking allows you to control where the bread will expand, creating an attractive "ear" on the finished product.
The Step-by-Step Guide to Baking No-Knead Bread
Now that you understand the principles and have your ingredients and tools ready, it's time to bake. This section will guide you through the entire process, from the initial two-minute mix to the final bake. The beauty of the no-knead bread method lies in its forgiving nature. There are no complex shaping techniques or strict schedules to follow. The process is broken down into four main stages: mixing the dough, the long first rise, a brief second rise and shaping, and finally, baking to perfection in your Dutch oven. Follow these simple steps, and you'll be rewarded with a loaf of bread so delicious and beautiful, you'll be amazed you made it yourself.
Step 1: Mixing the Dough (The 2-Minute Task)
This is where the "minimal effort" promise truly shines. The initial mixing process is incredibly fast and straightforward.
Combining the Ingredients
In your large mixing bowl, whisk together the dry ingredients: 3 cups of all-purpose or bread flour, 1 ½ teaspoons of salt, and ¼ teaspoon of instant yeast. By mixing them first, you ensure everything is evenly distributed. Now, add 1 ½ cups of cool or lukewarm water. Using a spatula or wooden spoon, mix everything together until just combined. The dough will be shaggy, sticky, and look quite messy—this is exactly what you want. There is no need to overmix. Just ensure there are no dry patches of flour remaining. Scrape down the sides of the bowl, gathering the dough into a rough ball at the bottom. That's it. The active work for this stage is complete.
Step 2: The First Rise (The Long Wait)
This is the most crucial phase, where time does all the work for you. The long, slow fermentation develops the gluten and the flavor of your no-knead bread.
Letting Fermentation Work its Magic
Cover the bowl with plastic wrap or a damp kitchen towel. Place it in a draft-free spot at room temperature and simply leave it alone for 12 to 24 hours. The ideal duration will depend on the temperature of your kitchen. In a warmer room (around 75°F/24°C), 12-18 hours may be sufficient. In a cooler room, it might take closer to 24 hours. You'll know the dough is ready when it has more than doubled in size, the surface is dotted with bubbles, and the whole mass jiggles like gelatin when you shake the bowl. You may also see stringy, web-like strands of gluten when you pull the plastic wrap away. Don't stress about the exact timing; this recipe is very flexible.
Step 3: Shaping and the Second Rise (The 30-Minute Rest)
After the long fermentation, the dough will be bubbly and sticky. This next step involves a gentle shaping and a short second rise to prepare it for the oven.
Preparing the Dough for Baking
Lightly flour a work surface and use your spatula to scrape the dough out of the bowl. It will be sticky and will deflate as you handle it. Gently fold the dough over on itself once or twice to form a rough ball. This step is less about traditional shaping and more about gently deflating the dough and creating a bit of surface tension. Place the dough onto a sheet of parchment paper. If you wish, you can lightly dust the top with flour. Cover it loosely with plastic wrap or a clean towel and let it rest for about 30 minutes. While the dough is having its second, shorter rise, place your Dutch oven with the lid on into your oven and preheat it to 450°F (232°C). It is critical that the Dutch oven is screaming hot when the dough goes in.
Step 4: Baking in the Dutch Oven
This is the final, exciting stage where your dough transforms into a magnificent loaf of bread.
The Baking Process
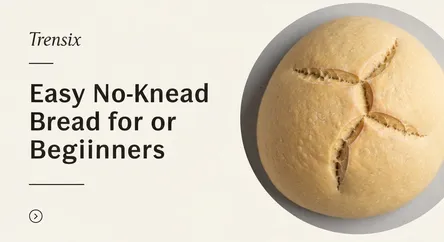
Once the oven and Dutch oven are fully preheated, carefully remove the hot pot from the oven. Be extremely cautious as it will be incredibly hot. Using the parchment paper as a sling, carefully lift your dough and lower it into the Dutch oven. If you want to score your loaf, now is the time to do it. Use a very sharp knife or a razor blade to make one decisive slash about ½-inch deep across the top of the dough. This will give it a rustic, professional look. Immediately place the hot lid back on the pot and return it to the oven.
Bake Times and Cooling
Bake the bread, covered, for 30 minutes. This is the steam-injection phase. After 30 minutes, remove the lid. The bread will be pale but will have risen significantly. Continue to bake, uncovered, for another 15 to 25 minutes, or until the crust is a deep golden brown. You can check for doneness by tapping the bottom of the loaf—it should sound hollow. Carefully remove the bread from the Dutch oven and place it on a wire rack to cool completely. This is a vital step, as the bread is still cooking internally as it cools. Resist the urge to slice into it for at least an hour to allow the crumb to set.
Troubleshooting and Tips for Perfect No-Knead Bread
While the no-knead bread recipe is famously foolproof, occasionally, things don't go exactly as planned. Don't be discouraged! Every baker, regardless of experience, has faced a dense loaf or a sticky mess at some point. The key is to understand what might have gone wrong and how to fix it for your next attempt. This section is dedicated to addressing common issues and providing valuable tips to ensure your bread-baking experience is a success every time. From managing a dough that's too sticky to achieving that perfect, crackly crust, these insights will help you refine your technique and build your baking confidence.
Common Problems and Simple Solutions
Even with a simple recipe, variables like kitchen temperature, humidity, and ingredient measurements can affect the outcome. Here’s how to troubleshoot some common challenges.
My Dough is Too Wet and Sticky
A high-hydration dough is the hallmark of no-knead bread, so a sticky texture is normal and expected. However, if it seems unmanageably soupy after the first rise, it could be due to a couple of factors. You might have slightly mis-measured your flour (scooping flour can compact it, leading to less flour than intended) or your kitchen might be very humid.
- The Fix: When you turn the dough out for shaping, be generous with the flour on your work surface and on your hands. Use a bench scraper if you have one to help you fold and shape the wet dough. Don't be tempted to add a lot more flour into the dough itself, as this will change the texture of the finished bread. A little extra on the outside is all you need to make it handleable.
My Bread Didn't Rise Much (Dense Crumb)
A dense, tight crumb can be disappointing. This usually points to an issue with the yeast or the fermentation time.
- The Fix: First, check your yeast's expiration date. Old yeast may not be active enough to leaven the bread properly. If your yeast is fresh, the issue might be your fermentation environment. If your room is very cold, the yeast will work much more slowly. Try extending the first rise to a full 24 hours or even a little longer. You should see plenty of bubbles on the surface as a sign of active fermentation. Conversely, if your room is extremely warm, the dough might over-proof. In very warm climates, you may need to reduce the initial rise time to 12 hours.
Pro-Tips for Bakery-Level Results
Once you've mastered the basic recipe, a few extra tips can elevate your no-knead bread from great to absolutely spectacular.
Achieving the Perfect Crust
The key to a deeply browned, crispy crust is heat and the removal of moisture.
- Tip 1: Ensure a Thorough Preheat. Don't rush the preheating process. Allow your oven and Dutch oven at least 30-45 minutes to get fully saturated with heat. A properly heated Dutch oven gives you the best initial oven spring.
- Tip 2: Bake Uncovered for Longer. After the initial 30 minutes of covered baking, don't be afraid to leave the loaf uncovered for a full 20-25 minutes. The color is your guide. Aim for a deep, dark brown, not just golden. This develops a more complex flavor and a sturdier crust.
- Tip 3: A Touch of Steam. For an extra crackly crust, you can spritz the loaf with a little water just before you put the lid on the Dutch oven.
Adding Flavors and Variations
The basic no-knead bread recipe is a fantastic blank canvas for experimentation.
- Herbs and Spices: Add 1-2 tablespoons of chopped fresh herbs like rosemary or thyme, or a teaspoon of dried herbs, to the dry ingredients.
- Cheese and Garlic: Fold in a cup of shredded sharp cheddar or Parmesan and a few cloves of roasted, minced garlic during the shaping stage.
- Seeds and Grains: Mix in a handful of sunflower seeds, pumpkin seeds, or rolled oats with the dry ingredients for added texture and flavor. For a decorative finish, brush the top of the loaf with water and sprinkle seeds on top just before baking.
- Whole Wheat Flour: For a heartier loaf, you can substitute up to half of the all-purpose flour with whole wheat flour. You may need to add an extra tablespoon or two of water, as whole wheat flour is more absorbent.
Conclusion
Baking a loaf of crusty, artisan-style bread from scratch is one of the most rewarding kitchen accomplishments, and with the no-knead bread method, it is an accessible joy for everyone. By embracing the simple chemistry of slow fermentation and the ingenious use of a Dutch oven to create a steam-filled baking environment, you can produce bread that rivals what you’d find at a professional bakery. This guide has walked you through every stage of the process, from understanding the science that makes it all possible to gathering your four basic ingredients and mastering the simple, step-by-step technique. We've explored the importance of time, the function of high hydration, and the critical role your Dutch oven plays in achieving that coveted oven spring and perfectly crisp crust.
The true beauty of this recipe lies not just in its incredible results but in its flexibility and forgiveness. It doesn't demand precision, a rigid schedule, or intensive labor. It asks only for a little patience, allowing time to develop complex flavors and a beautiful texture. By following the steps outlined and using our tips for troubleshooting and variation, you now have the tools and the confidence to make no-knead bread a regular ritual in your home. So, mix up a batch of dough tonight, and tomorrow you can fill your home with the unparalleled aroma of baking bread and the deep satisfaction of having created something truly wonderful with your own hands.