Creative Skills
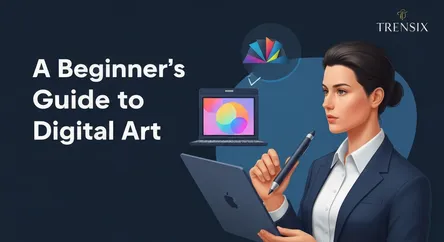
A Beginner's Guide to Digital Art
A Beginner's Guide to Digital Art ## Diving Into the World of Digital Art: A Comprehensive Introduction Embarking on the journey of digital art can...
A Beginner's Guide to Digital Art
Diving Into the World of Digital Art: A Comprehensive Introduction
Embarking on the journey of digital art can feel like stepping into a vast, new universe brimming with endless creative possibilities. If you've ever been captivated by the vibrant illustrations on your screen, the breathtaking concepts for video games and movies, or the sleek graphics that define modern design, you've witnessed the power of digital art. This guide is your friendly and comprehensive roadmap, designed to demystify the process and equip you with the foundational knowledge to start creating your own masterpieces. The transition from traditional to digital media, or even starting as a complete novice, can seem daunting with the array of tools and software available. What tablet is right for you? Which software won't overwhelm a beginner? How do digital brushes even work? These are common and valid questions that can create a barrier to entry, but this guide is here to break down those walls.
We will navigate the essential digital art basics, starting from the ground up. This article is crafted for the absolute beginner, someone who is ready to learn a new skill and unleash their creative potential but isn't sure where to begin. We will explore the very first, and often most crucial, decisions you'll make: choosing a tablet and software. This guide will provide a clear breakdown of the different types of drawing tablets available, from affordable entry-level options to more professional-grade displays, helping you find the perfect fit for your budget and artistic goals. We will also delve into the world of digital art software, comparing popular choices and highlighting beginner-friendly platforms. The goal is to help you select tools that empower, not intimidate. Beyond the hardware and software, we will journey into the core mechanics of digital creation, with a special focus on understanding digital brushes, layers, and the fundamental techniques that will form the bedrock of your artistic practice. By the end of this guide, you will not only have a clear understanding of the necessary tools but also the confidence to install your software, plug in your tablet, and take those exciting first steps into creating digital art.
Gearing Up: Choosing Your Essential Digital Art Tools
The first step in any creative endeavor is gathering your tools, and in digital art, this primarily means selecting your drawing tablet and software. This decision is foundational as these tools will be your direct interface with the digital canvas. The right combination can make the creative process feel intuitive and seamless, while the wrong one can lead to frustration. The market is filled with options catering to every skill level and budget, so it's essential to understand the landscape before making a choice. This section will guide you through the various types of hardware and software, helping you make an informed decision that aligns with your personal artistic aspirations and financial constraints. We'll cover everything from the different categories of drawing tablets to the key features to look for in beginner-friendly software, ensuring you start your digital art journey on the right foot with the best tools for the job.
Finding Your Perfect Canvas: How to Choose a Drawing Tablet
The drawing tablet is arguably the most crucial piece of hardware for a digital artist. It translates the natural movement of your hand into digital strokes on the screen. There are three main categories of tablets to consider, each with its own set of advantages and price points.
Non-Screen Graphics Tablets
These are the most common and affordable entry point into the world of digital art. A non-screen tablet consists of a solid, opaque surface that you draw on with a special stylus, or pen. Your strokes then appear on your connected computer monitor. This creates a slight disconnect between hand and eye, as you are not looking at your hand while you draw. This can take some getting used to, but with practice, it becomes second nature for many artists.
- Pros: Highly affordable, durable, and available in a wide range of sizes. They are an excellent way to learn the fundamentals without a significant financial investment.
- Cons: The hand-eye coordination learning curve can be challenging for some beginners.
- Popular Brands: Wacom's Intuos line is a long-standing industry favorite for beginners. Huion and XP-Pen also offer incredibly competitive and high-quality options at even more accessible price points.
Display Tablets (Pen Displays)
Display tablets feature a screen that you draw directly onto, which offers a more natural and intuitive experience that closely mimics traditional drawing. This direct feedback eliminates the hand-eye coordination challenge of non-screen tablets, making the transition to digital feel more seamless for many artists.
- Pros: Intuitive drawing experience, immediate visual feedback, and a more engaging creative process.
- Cons: Significantly more expensive than non-screen tablets. They also require more desk space and can involve more cable management.
- Popular Brands: Wacom's Cintiq line is the professional standard, but brands like Huion (with their Kamvas series) and XP-Pen (with their Artist series) provide fantastic, more affordable alternatives for beginners and intermediates.
All-in-One Tablet Computers
These are standalone devices that function as both a powerful computer and a drawing tablet. They offer the ultimate in portability and convenience, as you don't need to connect them to a separate computer to work.
- Pros: Maximum portability, self-contained workflow, and often feature high-quality displays with touch functionality.
- Cons: The most expensive option. You are paying for a full computer, not just a drawing peripheral.
- Popular Devices: The Apple iPad (with Apple Pencil) has become a dominant force in this category, especially with powerful apps like Procreate. The Microsoft Surface Pro is another excellent option, offering the full Windows operating system.
When making your choice, consider your budget first. A non-screen tablet is a perfectly valid and professional tool, and it's better to start with a good quality non-screen tablet than a low-quality display tablet. Also, think about ergonomics and size. A larger drawing surface can be more comfortable for broad arm movements, but a smaller one is more portable and can be easier to manage on a small desk.
The Digital Studio: Selecting Your First Art Software
Your digital art software, or drawing program, is your virtual studio. It's where all the magic happens. While some programs are complex industry standards packed with features, many others are designed to be intuitive and welcoming for newcomers. For a beginner, the focus should be on accessibility, ease of use, and a core set of powerful tools.
Raster vs. Vector
First, it's helpful to understand the two main types of digital art programs:
- Raster-based: These programs create images using a grid of pixels (like a digital photograph). This is the most common type for digital painting and illustration, as it allows for nuanced blending, shading, and texture, much like traditional painting. Photoshop, Procreate, and Krita are raster-based.
- Vector-based: These programs use mathematical equations to create lines and shapes. The key advantage is that vector art can be scaled to any size without losing quality. This makes it ideal for logo design, icons, and clean, scalable illustrations. Adobe Illustrator and Affinity Designer are vector-based.
As a beginner focused on drawing and painting, a raster-based program is the best place to start.
Top Software Choices for Beginners
- Krita: This is arguably the best free option available. Krita is a professional-grade, open-source painting program that is packed with features, including an excellent brush engine, stabilizers for smooth lines, and a user-friendly interface. It's an incredible resource for anyone starting on a budget.
- Procreate (iPad only): If you opt for an iPad, Procreate is a must-have. It's known for its incredibly intuitive interface and powerful brush engine. While it's not free, it's a one-time purchase that is remarkably affordable for the professional-level quality it provides.
- Clip Studio Paint: A favorite among comic and manga artists, Clip Studio Paint is also a fantastic all-around painting program. It has one of the best brush engines on the market and offers powerful features like 3D model integration for posing. It's available for a one-time purchase on PC/Mac or via subscription on tablets.
- Adobe Photoshop: The long-reigning industry standard. Photoshop is an immensely powerful program, but its vast array of tools (many of which are for photo editing) can be overwhelming for a beginner. It operates on a subscription model, which can be a deterrent for hobbyists. However, learning it can be a valuable long-term investment if you plan to pursue a creative career.
For your first software, prioritize one with a simple layout and a strong community. Krita is an excellent starting point because it costs nothing to try, and its capabilities will not limit you as your skills grow.
Understanding Your Digital Canvas: Layers and Brushes
Once you have your hardware and software, the next step is to familiarize yourself with the core concepts that make digital art so flexible and powerful. At the heart of this are two elements: layers and brushes. Mastering these fundamentals is a crucial part of the digital art basics. Layers provide control and editability, acting as a safety net that encourages experimentation. Brushes are the tools you use to make your marks, and understanding how to use and customize them is key to developing your personal style. Think of this as learning how to organize your workspace and how to hold and use your pencils and paintbrushes in this new digital medium.
The Power of Non-Destructive Editing: Getting to Know Layers
Layers are the single most significant advantage digital art has over traditional art. Imagine being able to draw your character on one sheet of transparent paper, the background on another sheet behind it, and the special effects on a third sheet in front. This is precisely what layers allow you to do. Each layer is an independent plane that you can draw on, edit, or move without affecting the content on other layers.
Why Layers Are Essential
- Separation of Elements: You can keep your sketch, line art, colors, and shading all on separate layers. If you make a mistake on your coloring layer, you can erase it without accidentally wiping out your precious line art underneath.
- Experimentation: Want to try a different color scheme for a character's outfit? Just create a new layer on top of your base colors and experiment freely. If you don't like it, you can simply delete the new layer without having to repaint everything.
- Flexibility in Composition: By placing different elements of your artwork on separate layers, you can easily move them around, resize them, or rotate them to perfect your composition long after you've drawn them.
- Blending Modes: Layers can interact with the layers below them in unique ways using "blending modes." For example, a "Multiply" mode can be used for creating shadows, while an "Overlay" or "Screen" mode can be used for creating glowing light effects. Exploring blending modes is a key step in advancing your digital art skills.
A Basic Layer Workflow for Beginners
A simple and effective workflow to start with is:
- Layer 1 (Sketch): Create your initial rough drawing. Lower the opacity of this layer.
- Layer 2 (Line Art): Create a new layer on top of your sketch. Use a clean, dark brush to create your final line art, tracing over the faint sketch below.
- Layer 3 (Base Colors): Place a new layer underneath your line art layer. On this layer, fill in the flat, base colors of your drawing.
- Layer 4+ (Shading and Highlights): Create new layers on top of your color layer (but still under the line art) to add shadows and highlights. Using separate layers for these allows for easy adjustments.
This organized approach is a core practice of digital artists and is a habit worth building from day one.
Unlocking Your Style: A Deep Dive into Digital Brushes
If layers are your canvas, brushes are your entire collection of artistic tools rolled into one. A digital brush is much more than a simple line-maker; it's a complex engine that simulates the properties of real-world tools like pencils, charcoal, ink pens, and paintbrushes, and can even create effects impossible to achieve traditionally. Understanding the basic properties of a digital brush is fundamental to controlling your art.
Core Brush Properties to Understand
- Size: This is the most straightforward setting, controlling the diameter of your brush tip. Most artists will map brush size to a shortcut key or a button on their stylus to change it quickly while painting.
- Opacity: This controls the transparency of the paint you lay down. At 100% opacity, your stroke will completely cover whatever is underneath it. At a lower opacity, the underlying colors will show through, which is perfect for creating glazes or soft shading.
- Flow: Similar to opacity, flow controls how much "paint" comes out of your brush with each stroke. A low flow setting can mimic a dry brush or watercolor effect, allowing you to build up color gradually in a single stroke.
- Hardness/Softness: This determines the sharpness of your brush's edge. A 100% hard brush will have a crisp, clean edge, like a technical pen. A 0% hard brush will have a very soft, blurry edge, like an airbrush. Most painting is done with brushes somewhere in between these two extremes.
- Pen Pressure Sensitivity: This is where the magic happens. A good drawing tablet can detect how hard you are pressing down with the stylus. This pressure data can be linked to various brush properties. The most common links are:
- Pressure for Size: Pressing harder makes the brush stroke thicker. This is key for creating dynamic, tapered lines, similar to an ink brush pen.
- Pressure for Opacity/Flow: Pressing harder makes the stroke more opaque. This is essential for soft, controllable shading and blending, mimicking the layering of graphite or paint.
Exploring Brush Libraries
Every art program comes with a library of default brushes. Spend time experimenting with them! You'll find pencils for sketching, pens for inking, and various paintbrushes (oils, watercolors, acrylics). Don't be afraid to just open a blank document and scribble. See how each brush behaves. Try changing its settings. This play is not a waste of time; it's how you build an intuitive understanding of your tools. As you advance, you can even download or create your own custom brushes to perfectly suit your unique artistic style.
Taking Your First Steps: Fundamental Techniques and Practice
With your tools selected and a basic understanding of your software's core features, it's time to put pen to digital paper. The initial phase of learning digital art is about building confidence and developing fundamental skills that will serve as the bedrock for all your future creations. This isn't about creating a masterpiece on your first day. It's about getting comfortable with your new medium, practicing basic strokes, and learning how to see and interpret shapes and forms digitally. This section will guide you through simple yet crucial exercises to develop your hand-eye coordination and control, and then walk you through the process of completing your very first simple drawing, from initial sketch to final color.
Building Control: Essential Warm-up Exercises
Just as an athlete stretches before a game, artists can benefit from warm-up exercises. These drills are not about creating beautiful art but about training your hand and brain to work together with the tablet and software. Dedicate 5-10 minutes to these exercises at the beginning of each drawing session.
Basic Line and Shape Drills
- Straight Lines: Open a new document and fill the canvas with parallel lines. Draw them horizontally, vertically, and diagonally. Try to keep them as straight and evenly spaced as possible without using a line-straightening tool. This builds muscle memory and control.
- Circles and Ellipses: Fill another canvas with circles and ellipses of various sizes. Try to make them smooth and close the shapes perfectly. Draw them in both clockwise and counter-clockwise directions. This is a fantastic exercise for developing fine motor control.
- Waves and S-Curves: Practice drawing long, flowing S-curves and wavy lines. Focus on creating smooth transitions and consistent curves. This helps with gestural drawing and creating organic, flowing line art.
- Hatching and Cross-Hatching: Draw a simple square and practice filling it with even, parallel lines (hatching). Then, draw another set of lines over them in a different direction (cross-hatching). This exercise helps you control the spacing and consistency of your lines, which is vital for shading.
Pressure Sensitivity Practice
This exercise is specifically for getting a feel for your tablet's pen pressure. Select a basic round brush with pressure sensitivity enabled for both size and opacity.
- Tapered Lines: Practice drawing lines that go from thin to thick to thin again, all in one smooth stroke, simply by varying the pressure you apply. This is the single most important skill for creating dynamic and expressive line art.
- Gradient Swatches: Draw a square and try to create a smooth gradient from light to dark inside it, without lifting your pen. Start with light pressure and gradually increase it as you move across the square. This will teach you the nuanced control needed for digital painting and blending.
From Sketch to Color: Completing Your First Simple Artwork
Now it's time to combine everything you've learned into a small, manageable project. The key here is to choose a very simple subject. A piece of fruit, a coffee mug, a simple cartoon character—anything without too much complexity.
Step 1: The Rough Sketch
Create a new layer and label it "Sketch." Using a pencil-like brush, loosely draw your subject. Don't worry about perfect lines; focus on getting the basic shapes and proportions right. Feel free to be messy and draw over your lines. Once you're happy with the overall shape, lower the opacity of this layer to about 20-30%.
Step 2: The Clean Line Art
Create a new layer above your sketch layer and name it "Line Art." Select a clean, dark inking brush. Now, carefully trace over your rough sketch to create your final, clean outlines. Use the pressure sensitivity skills you practiced to create varied and interesting line weights. For example, make the lines thicker on the underside of objects to suggest weight and shadow. Once you're done, you can hide or delete the "Sketch" layer.
Step 3: Laying Down Flat Colors
Create a new layer and drag it underneath your "Line Art" layer. Name this one "Colors." On this layer, use a hard-edged brush to fill in the base colors of your subject. For instance, if you're drawing an apple, fill the entire apple shape with red. This method of keeping your colors under your line art is a standard professional workflow.
Step 4: Adding Simple Shading and Highlights
To give your object form and dimension, you need to add shadows and highlights.
- Create a Shading Layer: Create a new layer on top of your "Colors" layer (but still under "Line Art"). Name it "Shading." A great trick for beginners is to set this layer's blending mode to "Multiply."
- Choose a Shadow Color: Select a slightly desaturated, darker version of your base color.
- Paint the Shadows: Using a soft-edged brush with low opacity, gently paint in the areas of your subject that would be in shadow. Because the layer is set to "Multiply," the color will darken the base colors beneath it in a natural-looking way.
- Create a Highlight Layer: Add one more layer on top called "Highlights." You might set this layer's blending mode to "Overlay" or "Screen."
- Paint the Highlights: Choose a lighter version of your base color and, with your soft brush, paint where the light would hit your object directly.
Congratulations! You have just completed the entire workflow for a basic piece of digital art. This process of sketching, inking, coloring, and shading is the fundamental building block for nearly all types of digital illustration. Practice it with different simple subjects to build your confidence and speed.
Conclusion: Your Creative Journey Begins Now
You have successfully navigated the essential first steps into the vibrant world of digital art. This guide has equipped you with the foundational knowledge needed to begin your creative journey with confidence. We've demystified the process of choosing the right tools, breaking down the differences between drawing tablets and helping you select a software package that fits your needs and budget. You've learned about the revolutionary power of layers, the non-destructive workflow they enable, and how they provide the freedom to experiment without fear. We've also delved into the heart of digital creation—the brush engine—and explored how properties like size, opacity, and pen pressure are the keys to unlocking expressive and controlled mark-making.
The exercises and the step-by-step walkthrough of creating your first simple piece are more than just instructions; they are the fundamental building blocks of a solid artistic practice. Remember that every expert was once a beginner. The key to growth is consistent practice and a healthy dose of curiosity. Don't be afraid to experiment with different brushes, explore all the functions your software has to offer, and, most importantly, have fun with the process. The path to mastering digital art is a marathon, not a sprint. Be patient with yourself, celebrate your small victories, and keep creating. The blank digital canvas is waiting for you to fill it with your unique vision.