Creative Skills
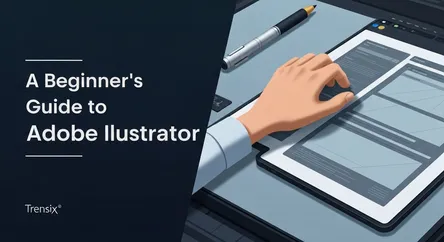
A Beginner's Guide to Adobe Illustrator
## A Beginner's Guide to Adobe Illustrator Adobe Illustrator is the industry-standard software for creating vector graphics, an essential tool for gr...
A Beginner's Guide to Adobe Illustrator
Adobe Illustrator is the industry-standard software for creating vector graphics, an essential tool for graphic designers, illustrators, and artists worldwide. Whether you dream of designing logos, crafting intricate illustrations, or developing icons for websites and apps, your journey begins with mastering this powerful application. For a beginner, opening Illustrator for the first time can feel intimidating. The sheer number of panels, tools, and menus can seem overwhelming, creating a steep learning curve that discourages many aspiring creatives. However, beneath this complex interface lies a logical and incredibly capable system for creating stunning, scalable artwork from scratch. This guide is designed to break down that initial barrier, providing you with a foundational understanding of the core concepts that make Illustrator tick.
This comprehensive walkthrough is crafted specifically for those who want to learn Illustrator but don't know where to start. We will demystify the jargon and guide you step-by-step through the most critical skills. You will begin by understanding the fundamental difference between vector and raster graphics, the very principle upon which Illustrator is built. This knowledge is crucial as it dictates how your artwork is created, saved, and used. From there, we will dive into the practical application of creating and manipulating simple shapes, the building blocks of almost any design. You will learn to use the essential shape and selection tools to build confidence and familiarity with the workspace. The guide will then tackle the most powerful and often feared tool in the Illustrator arsenal: the Pen Tool. We will break down its functions into simple, digestible steps, showing you how to create precise lines and elegant curves with ease. By the end of this guide, you will not only have created your first simple designs but will also possess the core knowledge to explore more advanced features with confidence.
Getting Started: Navigating the Adobe Illustrator Interface
Before you can begin creating, it's essential to familiarize yourself with the Illustrator workspace. A solid understanding of where key tools and panels are located will significantly speed up your workflow and make the learning process much smoother. When you first launch the application, you are greeted with a starting point from which all your creative projects will begin.
The Welcome Screen and Creating a New Document
The first thing you'll see is the Welcome Screen, which is your central hub for starting new projects or opening existing ones. It displays a list of your recent files, making it easy to jump back into your work. More importantly, it features prominent buttons to create a new document or open a file from your computer.
To start a fresh project, click the "Create New" button. This will open the New Document window, which is a critical first step. Here, you can choose from a variety of presets tailored for different outputs, such as Mobile, Web, Print, or Art & Illustration. These presets automatically configure settings like color mode (RGB for screens, CMYK for print), resolution, and artboard size. For your first time, selecting a preset like "Web" and choosing a common size like 1920x1080 pixels is a great way to start. You can also manually enter your desired width and height, choose your units of measurement (pixels, points, inches), and set the orientation (portrait or landscape). Once you've configured your document, click "Create" to open the main workspace.
A Tour of the Workspace
The Adobe Illustrator workspace is highly customizable, but it generally consists of a few key areas that you will interact with constantly. Understanding the role of each component is fundamental to anyone wanting to learn Illustrator efficiently.
The Artboard
At the center of your screen is the Artboard. Think of this as your digital canvas; it represents the printable or exportable area of your document. Anything you create on the artboard will be included in your final design when you save or export it. You can have multiple artboards in a single document, which is incredibly useful for projects like designing a series of social media posts, website mockups, or different pages of a brochure. The grey area surrounding the artboard is called the scratch area, a space where you can place elements you're working on but aren't yet ready to include in the final composition.
The Toolbar
Typically located on the left side of the screen, the Toolbar contains all the tools you need to create and edit your artwork. You'll find everything from selection tools and drawing tools to transformation and navigation tools. Some tools have a small triangle in the bottom-right corner, which indicates that more related tools are nested within. You can access them by clicking and holding the tool icon. Key tools for a beginner, which we will cover in this guide, include the Selection Tool (V), the Direct Selection Tool (A), the Shape Tools (like the Rectangle Tool, M), and the powerful Pen Tool (P).
Panels and the Properties Panel
On the right side of the screen, you'll find a collection of panels. These panels give you access to a wide range of controls and options for your artwork. Common panels include Color, Swatches, Stroke, Gradient, and Layers. The Layers panel is especially important for organizing complex illustrations, as it allows you to stack, lock, and hide different elements of your design.
One of the most useful panels for beginners is the Properties panel. This context-sensitive panel automatically updates to show you the most relevant options for whatever object you have selected. For example, if you select a shape, the Properties panel will display options for its size, position, fill color, stroke weight, and opacity. This dynamic panel consolidates many essential controls into one convenient location, making it easier to make quick adjustments without having to hunt through various menus.
The Foundation: Understanding Vector Graphics
Before you draw your first line or shape, it's crucial to grasp the core technology that powers Adobe Illustrator: vector graphics. This concept is what sets Illustrator apart from pixel-based editors like Adobe Photoshop and is the primary reason it is the preferred tool for creating logos, icons, and other designs that need to be used in various sizes. To truly learn Illustrator, you must first understand the "what" and "why" of vectors.
What Are Vectors?
Vector graphics are images created from mathematical equations. Instead of being made up of a grid of tiny colored squares (pixels), a vector image is composed of points, lines, and curves. Each of these elements, often called a "path" or an "object," is defined by a mathematical formula that tells the computer how to draw it. For example, a simple circle in a vector graphic isn't stored as a collection of pixels; it's stored as a mathematical equation defining its radius, center point coordinates, and properties like its stroke (outline) and fill (interior color).
This mathematical foundation is the key to the power of vectors. Because the image is defined by formulas rather than a fixed grid of pixels, it is infinitely scalable. You can take a vector logo and resize it to be as small as a favicon on a website or as large as a billboard, and it will never lose its quality. The lines will remain perfectly sharp, and the curves will stay smooth because the computer simply recalculates the equations for the new size.
Vectors vs. Rasters (Pixels)
To better understand vectors, it's helpful to compare them to their counterpart: raster graphics. Raster images, also known as bitmap images, are what you typically encounter in photographs. They are made up of a finite grid of pixels. Common raster file formats include JPG, PNG, and GIF.
Resolution Dependence
The defining characteristic of a raster image is its resolution dependence. The quality of the image is tied directly to the number of pixels it contains. If you try to enlarge a raster image beyond its original dimensions, the software has to guess what new pixels to add, a process called interpolation. This results in the image becoming blurry, blocky, and "pixelated." The sharp edges become jagged, and fine details are lost.
Scalability and File Size
In contrast, vector graphics are resolution-independent. As mentioned, their quality is unaffected by scaling. This makes them ideal for logos, icons, and typography, which need to be reproduced cleanly across a wide range of media, from a small business card to a large vehicle wrap. Furthermore, the file size of a vector image is determined by the complexity of the objects within it (the number of paths and points), not its physical dimensions. A simple vector logo will have a small file size whether it's displayed at 50 pixels wide or 5000 pixels wide. A raster image's file size, however, increases dramatically with its dimensions and resolution.
Building Blocks: Creating and Manipulating Simple Shapes
With a grasp of vector theory and the Illustrator interface, it's time to start creating. The most fundamental skill in Illustrator is the ability to create and control basic shapes. These geometric forms—rectangles, circles, polygons—are the foundational elements of countless designs. Mastering these tools will give you the confidence to build more complex artwork.
Using the Basic Shape Tools
The Shape Tools are conveniently grouped in the Toolbar. By default, you'll see the Rectangle Tool (shortcut: M). If you click and hold on this tool, a fly-out menu will appear, revealing other shapes like the Ellipse Tool (L), Polygon Tool, and Star Tool.
Creating Rectangles and Ellipses
To draw a shape, simply select the desired tool and then click and drag on your artboard. As you drag, you'll see an outline of the shape you're creating. Release the mouse button to finalize the shape.
There are a few handy keyboard shortcuts to control shape creation:
- Hold
Shift: This constrains the proportions of the shape. For the Rectangle Tool, it creates a perfect square. For the Ellipse Tool, it creates a perfect circle. - Hold
Alt(orOptionon Mac): This draws the shape from its center point outward, rather than from a corner. - You can combine these keys. Holding
Shift + Altwill draw a perfect square or circle from its center.
If you need precise dimensions, instead of clicking and dragging, you can simply click once on the artboard with a shape tool selected. A dialog box will appear, allowing you to enter the exact width and height for your shape.
Selecting and Transforming Shapes
Once you have a shape on your artboard, you'll need to know how to select, move, and modify it. Illustrator provides two primary selection tools for this purpose, each with a distinct function.
The Selection Tool (V)
The black arrow in the toolbar is the Selection Tool (V). This is your go-to tool for manipulating entire objects. When you select an object with this tool, a "bounding box" appears around it. You can then:
- Move: Click and drag the object to a new position on the artboard.
- Scale: Drag any of the eight handles on the bounding box to resize the object. Hold
Shiftwhile dragging a corner handle to scale it proportionally. - Rotate: Move your cursor just outside one of the corner handles until it turns into a curved, double-sided arrow. Then, click and drag to rotate the object.
The Direct Selection Tool (A)
The white arrow is the Direct Selection Tool (A). This powerful tool allows you to modify the individual components of a shape—specifically, its anchor points and path segments. When you select a shape with this tool, you can see the small squares at its corners or on its path. These are the anchor points. By clicking and dragging an individual anchor point, you can change the fundamental structure of the shape, turning a rectangle into a trapezoid or a more complex polygon. This tool is essential for fine-tuning shapes and is a stepping stone to understanding the Pen Tool.
Combining Shapes: Pathfinder and Shape Builder
The true power of Illustrator emerges when you start combining simple shapes to create more complex ones. The Pathfinder panel and the Shape Builder Tool are two incredible features for this purpose.
To use them, you first need to select two or more overlapping shapes.
- Pathfinder Panel: You can find this panel by going to
Window > Pathfinder. It offers a set of buttons that perform different operations. The most common ones are "Unite" (which merges the selected shapes into one), "Minus Front" (which uses the top shape to cut away from the bottom one), and "Intersect" (which leaves only the overlapping area). - Shape Builder Tool (Shift + M): This is a more intuitive and interactive tool. After selecting your overlapping shapes, choose the Shape Builder Tool. As you hover over the different segments of your shapes, they will be highlighted. You can click and drag across the segments you want to merge into a single shape. To subtract a segment, hold down the
Alt(orOption) key; you'll see a minus sign appear next to your cursor, and you can then click on the segment you wish to remove.
Mastering the Mighty Pen Tool
No guide on how to learn Illustrator would be complete without a deep dive into the Pen Tool (P). It is arguably the most powerful and versatile drawing tool in the application, but it also has the steepest learning curve for beginners. While the shape tools are great for geometric forms, the Pen Tool gives you the freedom to create any custom shape or path with absolute precision, from sharp, straight lines to graceful, organic curves.
The Purpose of the Pen Tool
The Pen Tool works by placing anchor points on the artboard and connecting them with paths. The beauty of it lies in your ability to control the curvature of the paths between these points. This control is what allows you to trace drawings, create complex logos, and draw intricate illustrations with smooth, clean lines. Patience is key when learning the Pen Tool; it requires practice to develop the muscle memory and intuition to use it effectively.
Creating Straight Lines and Polygons
The simplest way to use the Pen Tool is to create straight-line paths.
- Select the Pen Tool (P) from the Toolbar.
- Click once on your artboard to place your first anchor point. Do not drag.
- Move your cursor to a new location and click again. Illustrator will create a straight path connecting the two anchor points.
- Continue clicking to add more anchor points and build a polygonal shape.
- To close the path and create a complete shape, move your cursor over the very first anchor point you created. You'll see a small circle appear next to the Pen Tool cursor. Clicking at this point will close the path.
- Alternatively, to leave the path open, you can simply press
Ctrl(orCmdon Mac) and click anywhere on the artboard to deselect the path, or select a different tool.
Creating and Editing Bézier Curves
The true mastery of the Pen Tool comes from creating curves. These are known as Bézier curves, and they are controlled by direction handles that extend from the anchor points.
Drawing a Simple Curve
- Select the Pen Tool.
- Click on the artboard to place your first anchor point, but this time, click and drag instead of just clicking. As you drag, you will see two direction handles emerge from the anchor point. The length and angle of these handles will determine the shape of the curve.
- Release the mouse button. Move your cursor to where you want the curve to end.
- Click and drag again at this new location. As you drag, you will see the curve form between the two anchor points. You can adjust the shape of this curve in real-time by changing the angle and length of the second point's direction handles.
- The direction handle of your second point will influence the next curve segment you create.
Converting Points and Adjusting Curves
Often, you'll need to create a shape that combines sharp corners and smooth curves.
- Creating a Corner from a Curve: To change direction sharply after creating a curve, you can remove the "forward" direction handle. After creating a curved anchor point, hold down the
Alt(orOption) key and click back on that same anchor point. This will delete the second handle, allowing your next path segment to go in any direction without being influenced by the previous curve. - Editing Existing Curves: You don't have to get your curves perfect on the first try. After you've created a path, you can use the Direct Selection Tool (A) to fine-tune it. Select the path to reveal its anchor points and handles. You can then click and drag an anchor point to move it, or click and drag the end of a direction handle to adjust the shape of the curve. This non-destructive editing is a core strength of vector drawing.
Conclusion
Embarking on the journey to learn Illustrator is a rewarding investment for any aspiring creative. While the software's depth can initially seem daunting, understanding its foundational principles transforms it from an intimidating application into an intuitive and powerful creative partner. By now, you have navigated the essential interface, grasped the critical distinction between vector and raster graphics, and understood why Illustrator's scalability is a game-changer for professional design work. You have taken your first practical steps by creating and manipulating basic geometric shapes, the building blocks that form the basis of more complex designs. Most importantly, you have been introduced to the Pen Tool, unlocking the ability to create precise, custom paths and curves that are limited only by your imagination.
The skills covered in this guide—understanding the workspace, creating shapes, and mastering the basics of the Pen Tool—are the most important ones you will learn. They form the bedrock upon which all other Illustrator techniques are built. The key to true mastery is consistent practice. Challenge yourself to recreate simple logos, trace basic illustrations, and combine shapes to build new forms. The more you use these fundamental tools, the more they will become an extension of your creative thought process. You are now equipped with the core knowledge to explore further, experiment with confidence, and begin creating professional-quality vector art.